How to Change IP Address on Mac: Choose the Best Method for You
Changing your IP address on Mac can come in handy in various situations. For example, you may want to access a certain website that is unavailable in your location. Or you just strive to make your Internet connection more private and protect yourself from third-party monitoring. Whatever your reason, there are a couple of easy ways to change your IP on Mac without any technical skills and manual efforts. Read along to discover the most effective methods and pick the one that suits you best.
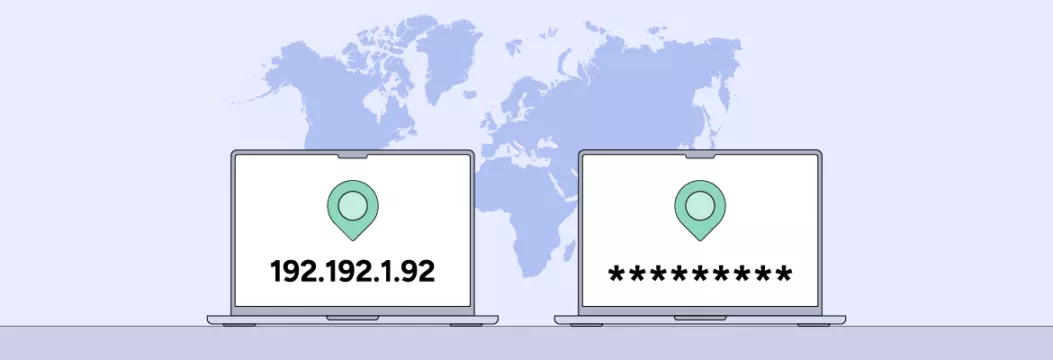
How to change IP address on Mac with a VPN in 6 easy steps
Don’t have time to go through the entire article? We got you covered! Here’s your quick guide on how to change IP on Mac in minutes.
- Choose a credible VPN service like VeePN.
- Select a VeePN pricing plan and sign up.
- Download and install the VeePN app for Mac from App Store.
- Run the app and log in to your account.
- Choose the most suitable location from 89 locations available and connect to it.
- All set – from now on, you have an anonymous IP address! Tap the Connect button and browse with peace of mind.
Now, let’s learn more about the key methods to change your IP address on a macOS device.
3 simple methods to change IP on Mac
There are several ways to change your IP address on Mac. Their effectiveness depends on your individual needs and several other factors. Let’s dive in!
1. Using a VPN to change IP on Mac
Without a doubt, a VPN is the most popular and efficient way to change your IP on Mac. That is due to several reasons:
- Simplicity. A VPN is extremely easy to use – all you have to do is connect to a remote server of your choice. Once done, your traffic will move through it, while your real IP address will remain hidden from prying eyes.
- Encryption. A VPN covers your connection with reliable encryption, meaning that your private data can’t be exposed or stolen. That’s critically important if you often use unprotected public Wi-Fi networks or deal with sensitive information.
- Security. Apart from changing your IP, a VPN also comes with a bunch of goodies to enhance your online security. Some of the most notable features include Kill Switch, IP and DNS leak protection, and anti-monitoring functionality (which is also effective against intrusive pop-ups and ads).
- Access to content. If you often travel to other countries, a VPN is your best bet to access the desired content that is often unavailable in certain regions. With a new IP address and your traffic moving through a remote server, you can unblock any website of your choice in seconds, be it your beloved streaming platform, gaming site, or online casino.
But note that not every VPN offers all those benefits. The effectiveness and reliability of services vary, so you need to choose a VPN for Mac carefully. In particular, “free” VPNs often appear to be scams or fake apps designed to sell your data and compromise your privacy. Further we will cover how to pick and use a good VPN for your needs, so keep reading.
2. Change IP on Mac with a proxy server
Another possible solution allowing you to change your IP on Mac is a proxy server. Just like with a VPN, it alters your IP and runs your Internet traffic through a remote location. But that’s where their similarities end. Unlike VPNs, proxies don’t encrypt your connection, which results in weaker privacy and security. While a proxy might work if you just need to overcome a simple IP block and access a certain website, it won’t protect your data from hackers, snoopers, and other nosy third parties.
Also, a proxy doesn’t come as a full-fledged application that automatically alters your Mac IP address. Instead, you should set it up manually on your device. If you opt for this method, here’s how to change IP on a Macbook or desktop computer:
- Click the Apple icon at the top-left corner of your screen and select System Preferences.
- Head to the Network section.

- Click Advanced…

- Choose the Proxies tab and select the preferred type of proxy.

- Enter the proxy server address and port number in the corresponding fields. You may also need to enter your username and password to run the proxy.
- Click OK to confirm. Once the proxy is up and running, your IP address will change.
3. Restart your Wi-Fi router
One more way to reset IP address on Mac is to restart your Wi-Fi router or modem. But while this option may seem the easiest, it’s also the least effective on our list. The thing is that there’s no guarantee it will work – it all depends on the specifics of your IP address.
Simply put, if your Internet service provider (ISP) provides a dynamic IP, it will change once you unplug your router and plug it in again. But if your IP address is static, this trick won’t work and it will stay unchanged.
OK, now you’re familiar with the most straightforward methods to change IP address on Mac. But where is your IP address, and is it possible to change it manually in your computer’s settings? Let’s figure out.
How to find an IP address on Mac
It’s important to note that your device has two different IP addresses: public IP and private IP (also known as the default gateway). The public one (assigned by your ISP) is visible online and can be changed with the help of a VPN or proxy. In contrast, the private one (assigned by your local network) can be found on your device. Here’s how your easy IP address on Mac manual:
- Click on the Apple menu icon at the top-left corner of the screen.
- Select System Preferences.

- Open Network to access Mac IP settings.

- Click the Advanced… button at the bottom-right corner of your screen.

- Select the TCP/IP tab.

- Your IP address will be displayed next to the IPv4 Address section.

How to switch IP address on Mac manually
You can change your private IP address manually whenever necessary. Here’s how to do that in several simple steps:
- Open System Preferences and select Network.
- Click the Advanced… button
- Choose the TCP/IP tab.
- Select Renew DHCP Lease.

- Enter the subnet mask of your network and the router’s address. If you don’t know these details, they can be found in your router’s settings (feel free to read our related post on how to access your router’s admin panel).
- Click OK to confirm the action.
Now you know how to change both public and private IP addresses on your Mac. But why should you do that, in the first place? Here are the most significant reasons to get a new IP with a VPN.
Benefits of Changing IP Address on Mac with a VPN
Here’s why you may want to get an alternative IP address for your macOS device:
- To address problems with your network. Changing your IP might resolve some issues with your home network (for instance, the “Another device on the network is using your computer’s IP address” error). Also, this trick may help you access another network unavailable with your current IP.
- To protect your privacy and security. As mentioned, changing your IP and encrypting your traffic with a VPN can be a lifesaver in terms of your digital privacy. Your personal information will be hidden from malicious actors and other third parties, including your ISP and the government. Besides, it’s an essential security measure against common public Wi-Fi threats like man-in-the-middle (MITM) and hijacking attacks.
- To access content. Your favorite website has become unavailable for you? Most likely, you’re dealing with an IP block imposed by your ISP. The best way to solve this problem is to change your IP by connecting to a VPN server – as a result, neither your ISP nor the website itself will know where your traffic actually comes from.
- To overcome Internet censorship. If you travel to a country with a low level of Internet freedom, having a credible VPN app on your device is a must. Premium services come with the Double VPN feature, running your traffic through two different locations, which leaves zero chance for anybody who wants to trace your digital footprint.
- To avoid Internet throttling. Did you know that your ISP can intentionally slow down your Internet speed? The technique known as Internet throttling is usually applied to balance the Internet traffic – but ISPs often impose unfair throttling just to make a profit. Luckily, when you change your Mac IP with a VPN, your Internet provider won’t know what you’re up to, so they won’t have a reason to limit your traffic.
But again, not all VPNs will cover all those purposes. Consider the following factors to select a perfect VPN solution for your Mac.
How to choose a VPN to change Mac IP address
- The number of server locations. Make sure the VPN service you opt for offers an extensive network of remote servers. The more servers available, the less overloaded they will be.
- AES-256 encryption. Top-rated VPNs support AES-256 – the most advanced encryption standard that is nearly impossible to crack.
- No data or speed caps. Any VPN slightly affects your Internet speed because of the intensive data encryption process. But thanks to modern VPN protocols like WireGuard®, this slowdown goes unnoticed.
- Intuitive application. A good VPN app is simple to use and navigate, requiring no annoying pop-ups, intrusive ads, and confusing manual setups.
- Cybersecurity features. As said, a VPN doesn’t only hide your IP and encrypt your traffic – it also provides additional features to enhance your security. For example, VeePN NetGuard keeps you away from third-party monitoring, malware, phishing attacks, and other threats.
- 24/7 customer support. Look for a VPN that offers helpful customer support with several options to choose from, such as 24/7 live chat, email, and FAQ pages on the website.
- Affordable pricing. Remember that free VPNs are usually bad for your privacy. Instead, prioritize premium VPNs that offer good value for money.
VeePN checks all the boxes above, which makes it one of the best VPNs for Mac out there. It provides access to servers across 89 locations in 60 countries and ensures top-notch data encryption. You can change your IP and protect your online identity in a few easy steps – all within a convenient and easy-to-use application for your macOS device. Try it out now risk-free with a 30-day money-back guarantee!
How to change IP address on Mac with VeePN: A detailed guide
Now, let’s dive into a comprehensive step-by-step guide on how to change your Mac IP address with VeePN.
1. Download the app and sign up
Head to the App Store and find the official version of the VeePN app. Next, download it on your device and install the file.
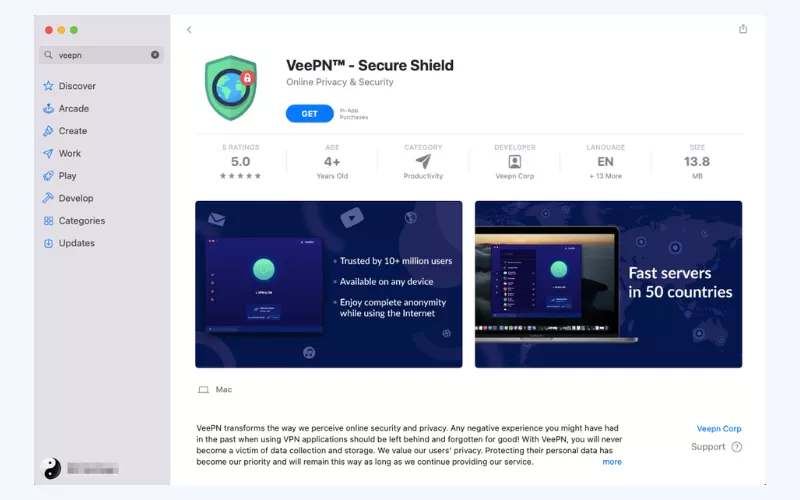
Once done, you can create your VeePN account. Open the VeePN website and pick a pricing plan suitable for your needs. No worries – you will be offered a free trial once you choose your payment method and sign up.
2. Pick the desired location
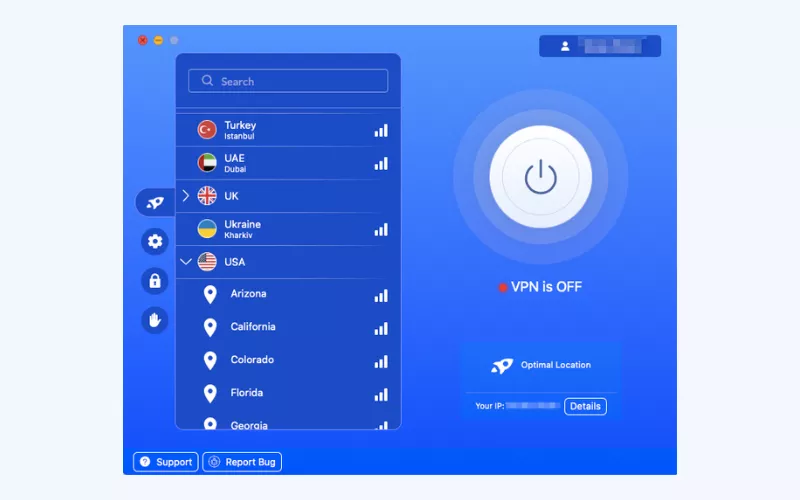
Open VeePN on your Mac computer and log into your account. In the app’s location settings, you can select any location you want and switch between servers whenever necessary. Your IP address will also change once you connect to a new location. This way, you can access unique content that is unavailable elsewhere (unless it violates the Terms of Service of particular platforms).
Disclaimer: VeePN does not promote, condone, or encourage using a VPN in ways that would potentially violate Terms of Service of other companies. For more details, please read the VeePN Terms of Service.
To be more specific, here are your options when changing your virtual location with VeePN:
- Activate the Optimal Location feature when you don’t need to stick to a specific country. This way, you will be automatically connected to the nearest location for better speeds (but your IP address will still change, so you don’t have to worry about your privacy).
- Choose a VPN server in a specific country, such as the US, the UK, Canada, Australia, or India, if you want your new IP to be associated with this location.
- Go for Double VPN for enhanced data protection and confidentiality (but for everyday browsing, it’s not necessary).
3. Turn VeePN on
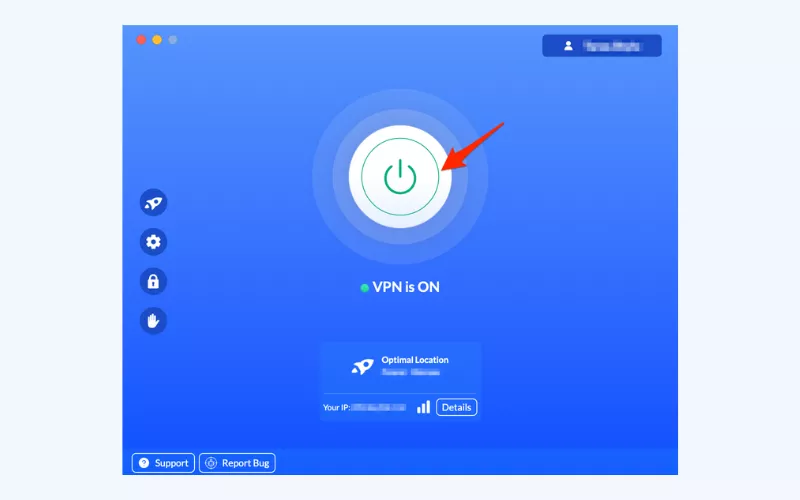
You’re all set! Turn VeePN on and enjoy your secure Internet connection with a new IP address assigned to your Mac. Stream media, watch live TV, play games – do anything you like online without compromising your privacy.
You may also want to change your IP address on an iPhone – find a simple step-by-step on how to do that in our recent article.
4. Make sure your VPN works
Want to check if your VPN works? Then check your IP address before and after you turn it on. When the app is off, Google “What is my IP?” – search results will show it along with your real location. Next, turn VeePN on and repeat your request. Now, your IP and location should be different.
💡 Pro tip: If your IP hasn’t changed after you turned on your VPN, check out our detailed guidelines on how to troubleshoot your VPN connection.
FAQ: How to change IP address on Mac
You can renew IP address on Mac with the help of a VPN or proxy server. While both solutions will change your IP, a VPN is a safer option since it also encrypts your traffic and comes with some extra security features. Take the following steps to get a new IP on Mac with VeePN:
- Download VeePN from the App Store and install it on your Mac.
- Pick the most suitable pricing plan and subscribe to VeePN.
- Open the app and connect to a server location of your choice.
- Click the Connect button to get a new IP address.
Changing your MAC address provided by DHCP service doesn’t necessarily give you a new public IP address. Your public IP is assigned by your ISP, so changing it requires a specifically designed tool like a VPN or proxy. Find out more in this article.
Yes, changing your IP address is fairly easy, and the simplest way to do that is a premium VPN app. It instantly provides you with an anonymous IP associated with another location, while your real address remains hidden from third parties. It enhances your Internet privacy and lets you overcome geographical limitations hassle-free.
To change your self-assigned (private) IP address on Macbook, follow these steps:
- Open System Preferences > Network.
- Select the Advanced… button.
- Open the TCP/IP tab.
- Click Renew DHCP Lease.
Click OK to save changes.
Yes, changing your IP address on Mac is perfectly legal and secure. In fact, it’s an important digital privacy practice that will keep your data away from hackers, snoopers, and other prying eyes. However, the methods of changing your Mac IP address vary in terms of their efficiency and reliability. Some free IP spoofing tools may appear to be fishy programs designed to compromise your safety. We recommend using VeePN – a solid cybersecurity solution that will not only alter your Mac IP address, but also encrypt your traffic and hide your virtual footprint from unwanted monitoring.
VeePN is freedom



Using a VPN to change the IP on my Mac was surprisingly simple.
Changing the IP address on a Mac with a VPN is definitely the most reliable method. I’ve tried proxies before, but the encryption and extra security that come with a VPN make it the better choice.
Actually, this article is very informative!
Anybody has any prior experience in using a VPN on this? How reliable is it, and are there any risks?
Thank you! I will for sure give a try to what you advised on I must admit.