How to Change Location on a MacBook: Step-by-Step Guide
You moved abroad, and lost access to content and programs you loved so much on your MacBook? Or maybe you wanted to explore new online content, but strict geo-restrictions don’t allow it? Keep reading this article to know exactly how to change location to MacBook and access region-specific apps, services, and websites. We’ll also show how you can do it manually, and with an easy option – using a virtual private network (VPN).


Why you might need to change your MacBook location
There can be endless cases when you want to change the location of your MacBook, be it moving to another continent, wanting to access your favorite TV shows that got geo-restricted, or even signing into a local banking app, which is available in a specific country only. Let’s consider some key reasons below:
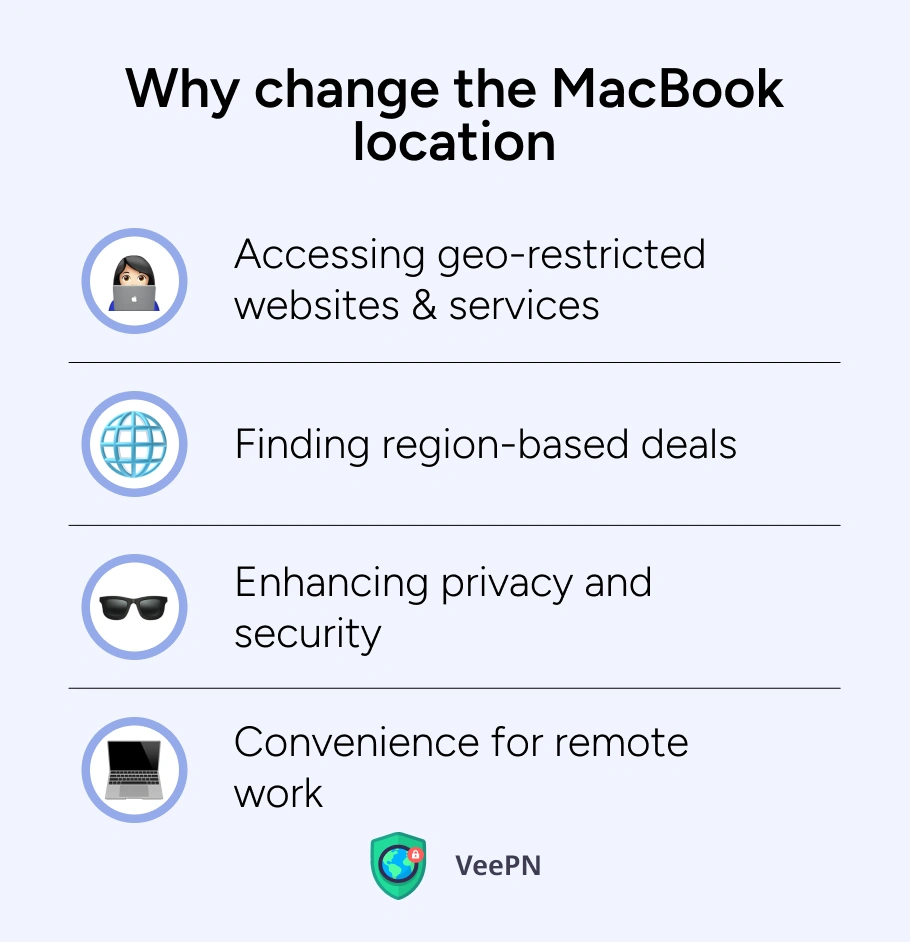
Accessing geo-restricted websites and services
News outlets like BBC or streaming giants like Hulu or Netflix, often limit content based on your IP address. So, you move to another country, your IP automatically changes, and your favorite content gets locked.
Finding region-based deals
Some popular travel booking sites and airlines provide different prices depending on your location. So, to save on your ticket purchasing, you’d want to change location on Mac.
Enhancing privacy and security
A shift in your MacBook’s location settings helps hide your real whereabouts, thereby reducing the potential risk of being tracked by data-hungry apps or cybercriminals.
Convenience for remote work
For digital nomads or people who need to travel frequently, having the correct MacBook location settings is very important. For instance, if you change the time zone on your MacBook, there will be no situation when you’ll have to show up for a Zoom call at 3 a.m.
With all the benefits of changing your MacBook’s location, you might be now wondering how to do it effectively. We’re just about to discuss it!
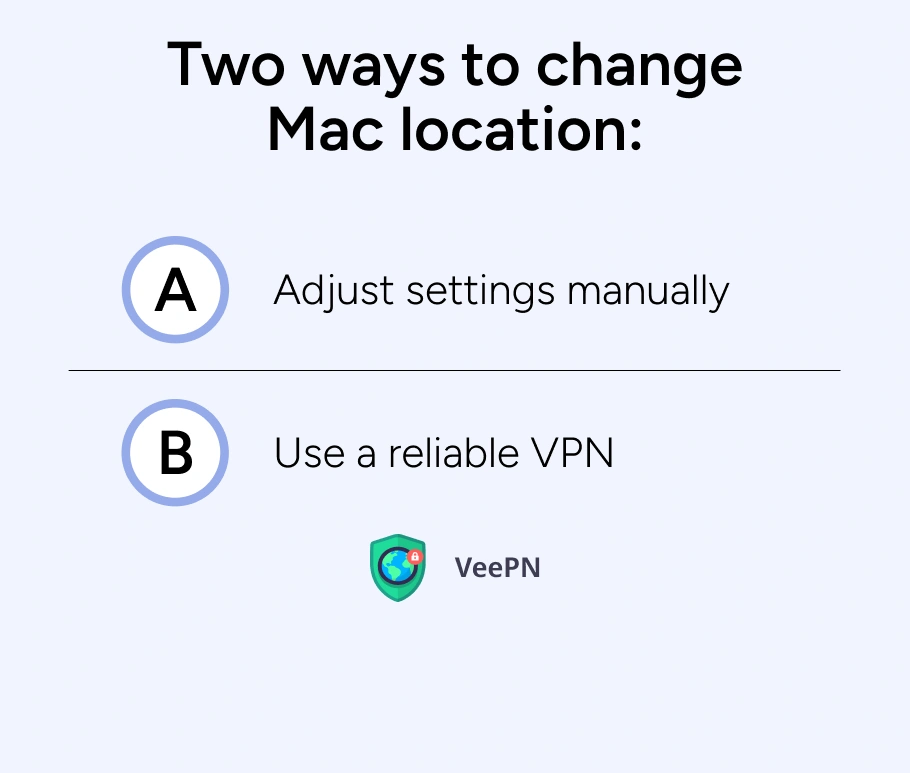
Ways to change location on your Mac
As we said earlier, there are two approaches to switching location on your MacBook – do it manually or using a VPN.
Manual adjustments
In general, Apple does offer handy built-in options that let you change Mac location settings to reflect the region you’re in. But note that these options may not surely bypass region-locked websites or services.
If you opt for the manual approach, you’ll need to tweak system settings to change time zones on your MacBook, adjust your network configurations, or use browser-based tools like proxies and extensions.
Adjust your Mac’s time zone
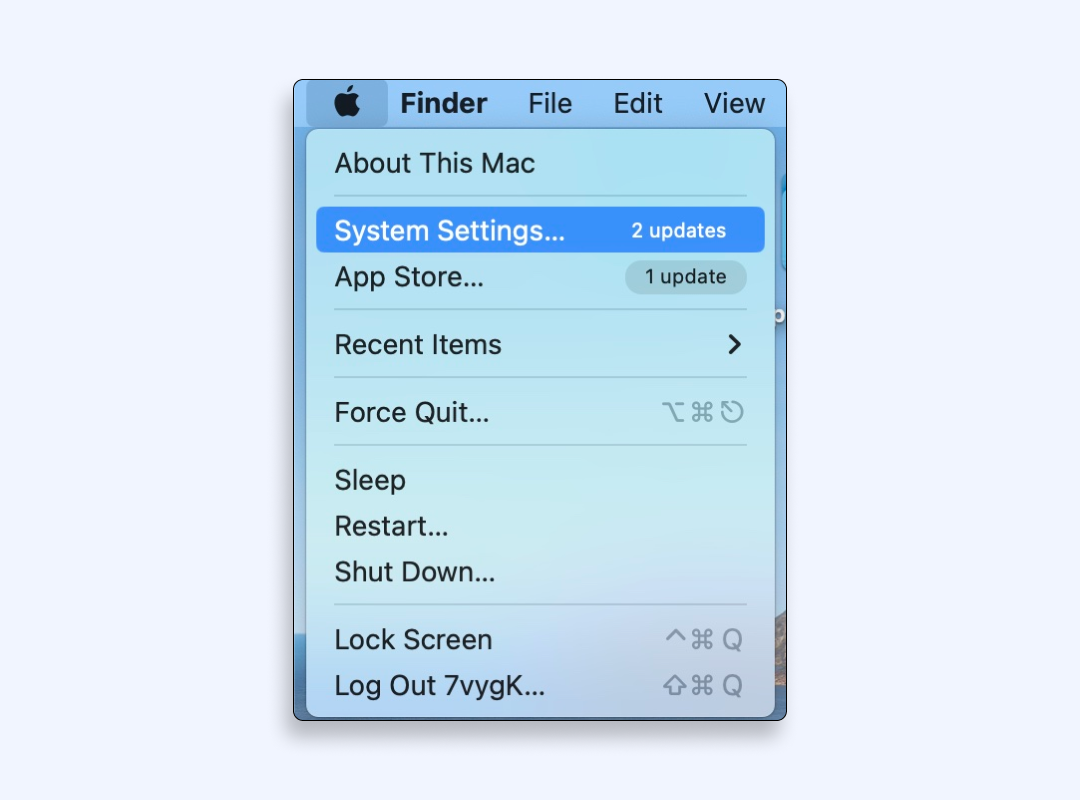
- Click the Apple icon in the top-left corner and select System Settings (or System Preferences on older versions).
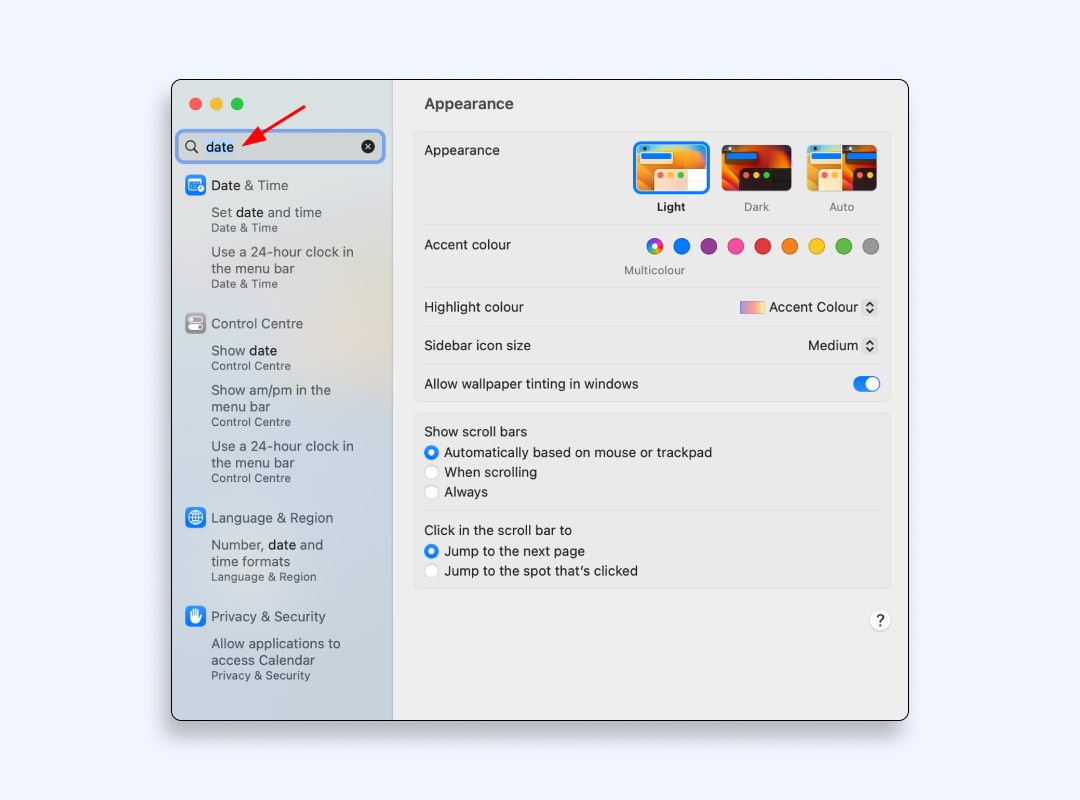
- Go to Date & Time.
- Toggle the automatic time zone feature off if needed and pick a new time zone.
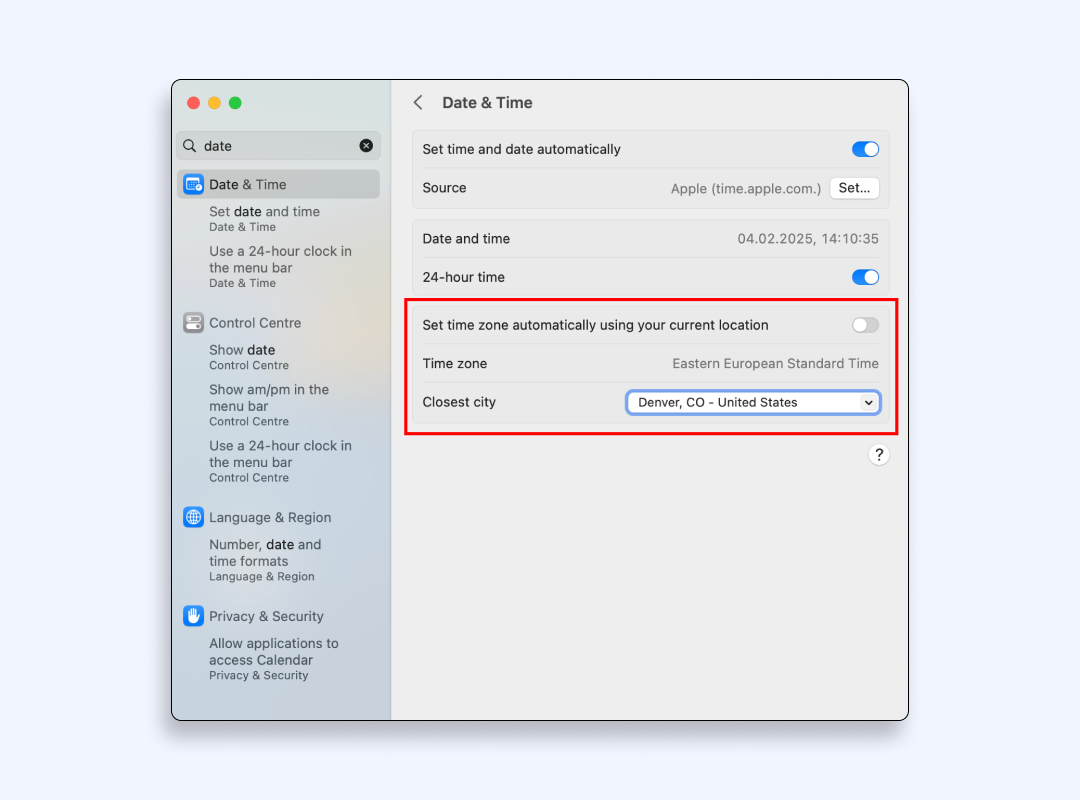
This way, you can change the time zone on the MacBook based on your preferences. But changing the time zone alone won’t hide your IP address or let you access geo-restricted sites.
Create a new network location
- Go to the Apple menu > System Settings (or System Preferences).
- Select Network.
- In the Location drop-down, click Edit Locations
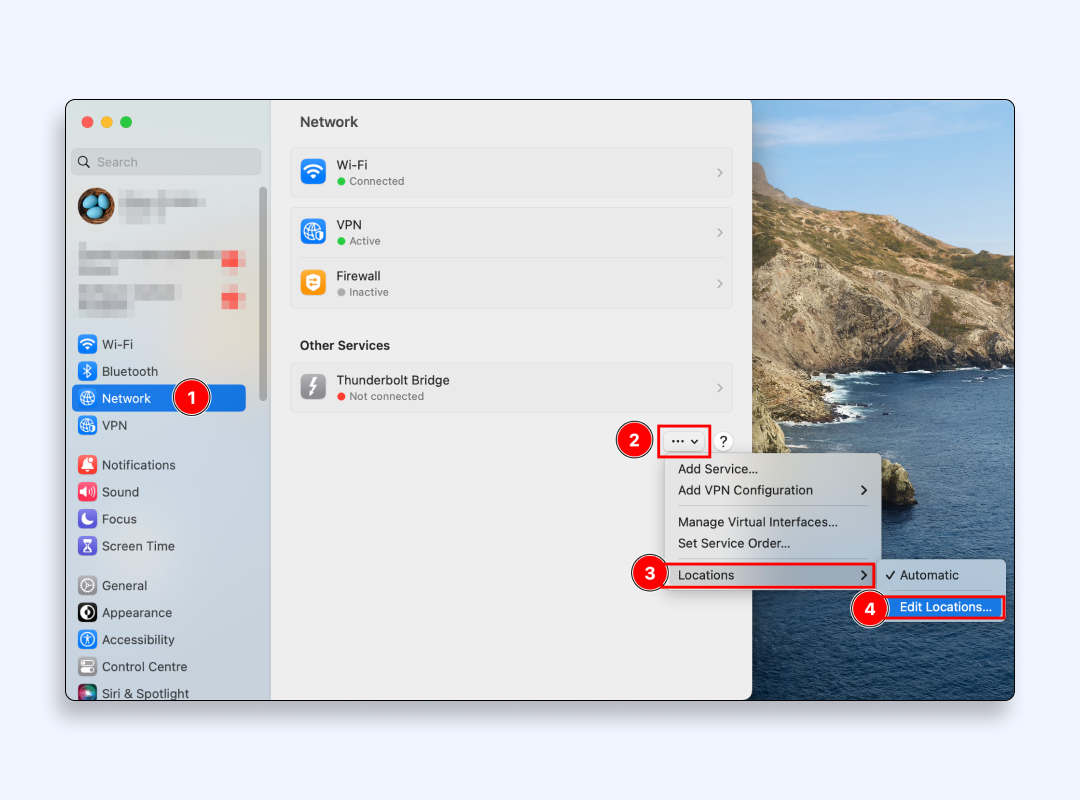
- Click “+” (Add) and name your new location (for example, “WorkTripUSA”) and tap Done.
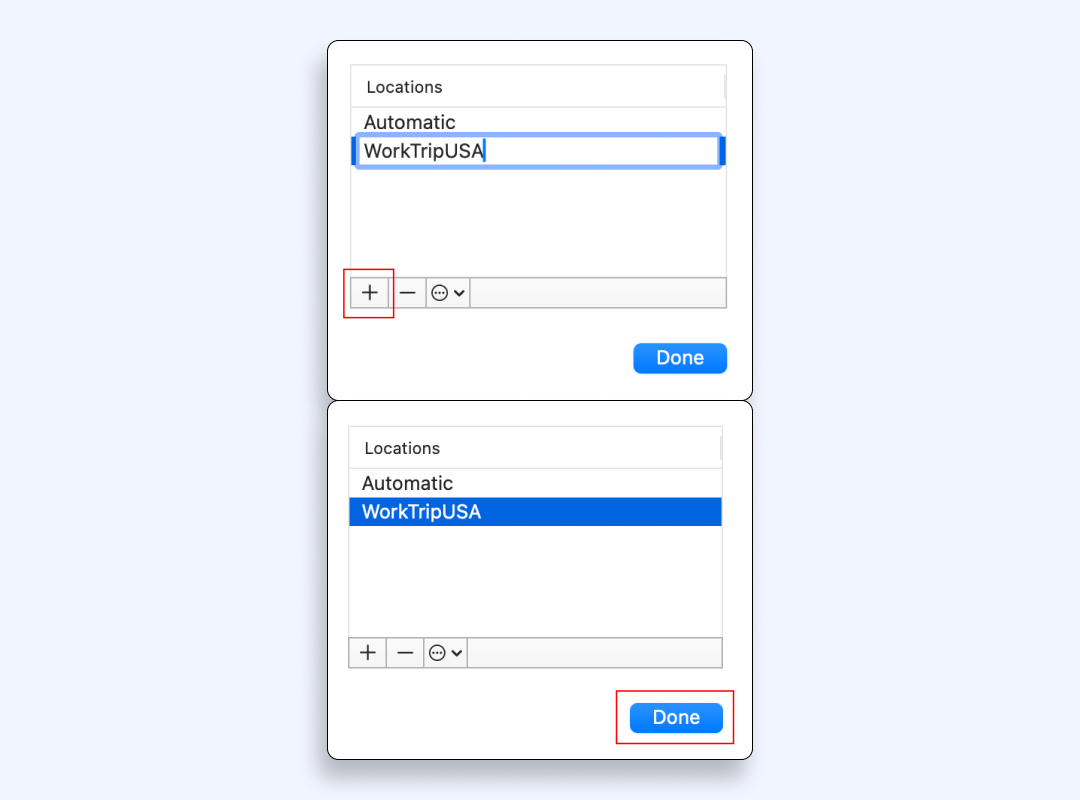
- Select your newly created location.

These actions will be helpful in case you need to frequently switch Wi-Fi spots across different regions. But this method doesn’t fully “spoof” your Mac’s location as well.
Use Tor browser or proxies
You could have heard of using Tor for hiding your online location. It’s a browser that bounces your connection through multiple servers worldwide, making it harder for scammers to track your real identity. Another way to change your Mac location is using a proxy server. It masks your original IP address by acting as an intermediary between you and the website you’re visiting.
However, these methods are not that pleasant to use. Even simple Internet browsing on Tor is often frustratingly sluggish, not to mention streaming and gaming. It happens because your data is routed through several volunteer-run nodes, and connection speed falls down. On the other hand, proxies don’t encrypt your traffic, which means your data remains vulnerable to snooping.
If you feel that manually changing your MacBook’s location or using Tor and proxies isn’t your cup of tea, let’s look at the second method.
Use a VPN for Mac to change location
This way is a simpler and more secure one. Virtual Private Network or VPN reroutes all your traffic through a server in another region. It makes your MacBook appear as though you’re physically present in another place.
VPN stands out as it fully secures your Internet traffic so that not a single hacker can snoop on your data and pinpoint your whereabouts. Let’s look at other reasons to use a VPN.
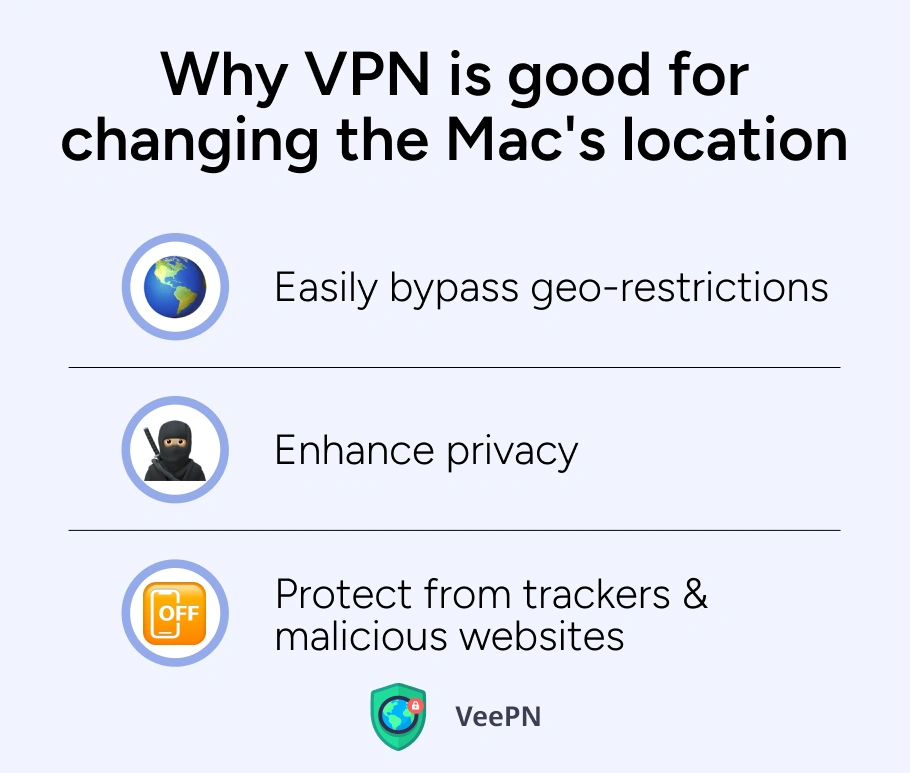
Easily bypass geo-restrictions
Whether you’re abroad or testing foreign services from home, a VPN helps you dodge annoying “unavailable in your region” messages.
Enhance privacy
We hear about data breaches taking place quite often these days. Recently, there was a massive leak of sensitive data from a multinational media conglomerate Thomson Reuters. VPN encryption will protect your info from such instances and assign an anonymous IP to mitigate such risks.
Protect from trackers and malicious websites
Premium VPN providers offer features like NetGuard that protect your browsing on Mac by automatically blocking harmful websites, trackers that detect your online activities and annoying ads.
In short, a VPN is your best bet when you want to change location to MacBook — with the perks of both safety and speed.
But which VPN works best for changing your Mac’s location?
You may not know which VPN is really trustworthy, and what’s more, there are dozens of similar apps and services available. You may be tempted by the sweet “free” propositions, because who wouldn’t like to save a few bucks? But the main trouble here is that most of the available free VPN services actually do more harm than good for your Internet privacy protection.
In order to stay afloat and maintain their services without users paying them, free VPNs often sell users’ personal data to third parties. It defeats the very purpose of using a VPN. Moreover, such companies may also track your online behavior by logging your activities. You may be bombarded with ads and even catch malicious code. So the word “free” is in the name only. In reality, users often pay with their compromised privacy.
Therefore, if you value staying safe digitally and need reliable performance from a VPN provider, consider using VeePN.
Why VeePN is the ideal solution
If you’re looking for a VPN for Mac to change location without hassles, VeePN stands as a sound option. Here’s why:
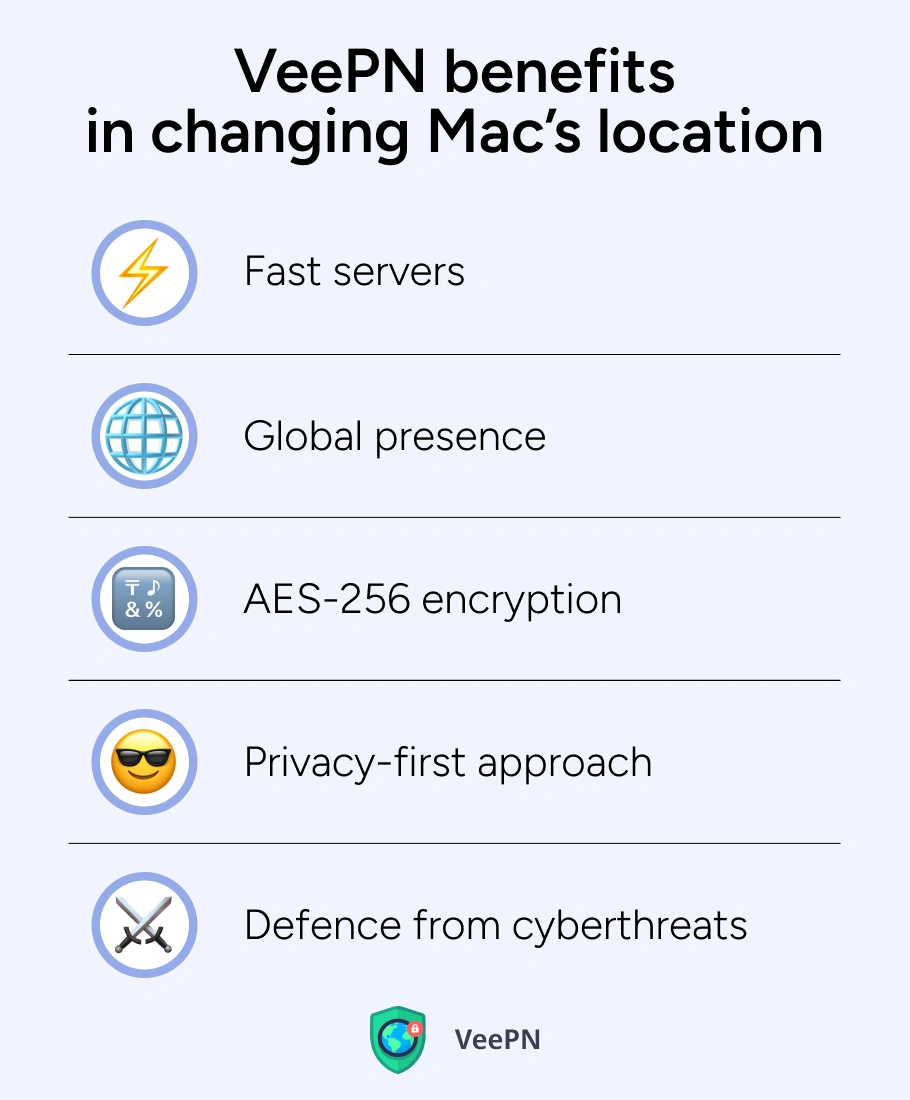
- Fast servers. You get high speeds of Internet connection and get over ISP throttling with a global server network that includes special servers for streaming content.
- Global presence. Having access to 2,500+ servers worldwide, you can switch location to MacBook in any region you prefer.
- Military-grade encryption. Whether you want to stream content, shop online, or check sensitive bank info, VeePN will secure each step with AES-256 encryption.
- Privacy-first approach. We have a strict No Logs policy. It means we don’t store your browsing data.
- Defence from cyberthreats. VeePN’s NetGuard feature removes cyberthreats even before then can harm your Mac. It instantly blocks intrusive ads, trackers, and malicious websites during your web surfing.
With that being said, let’s move on to setting up a VPN for your MacBook.
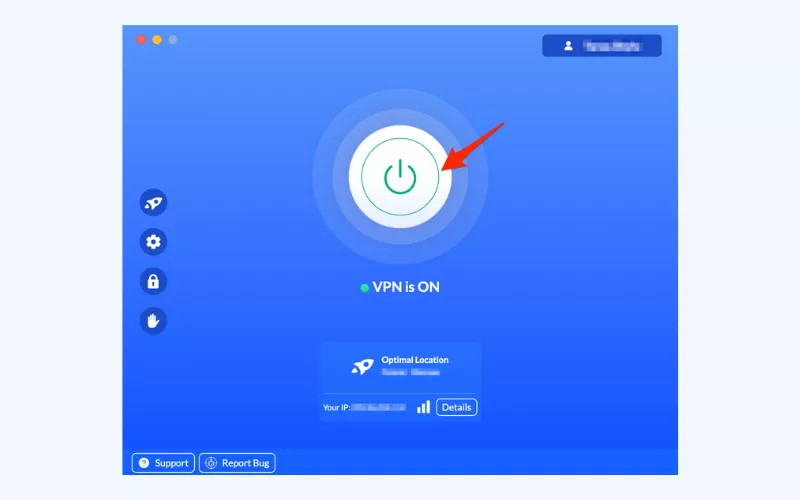
Steps to change location on a MacBook with VeePN
Here are the main steps to change your location on a MacBook with VeePN.
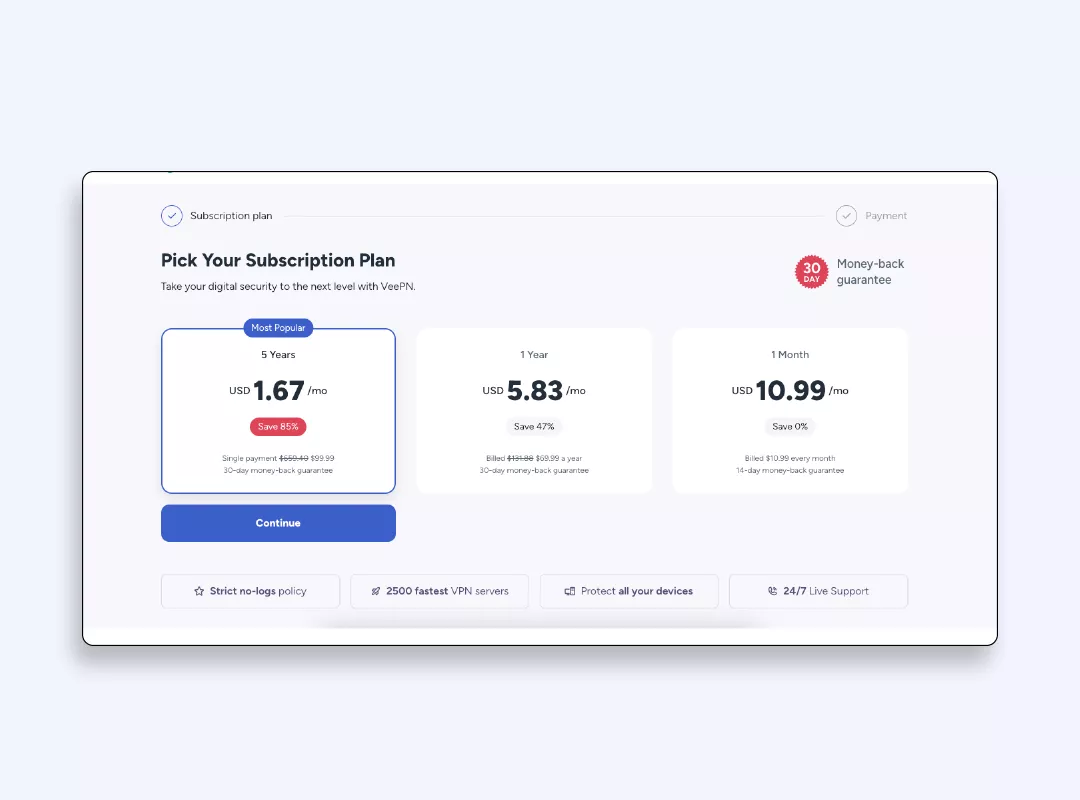
- Select your pricing plan and subscribe to VeePN.
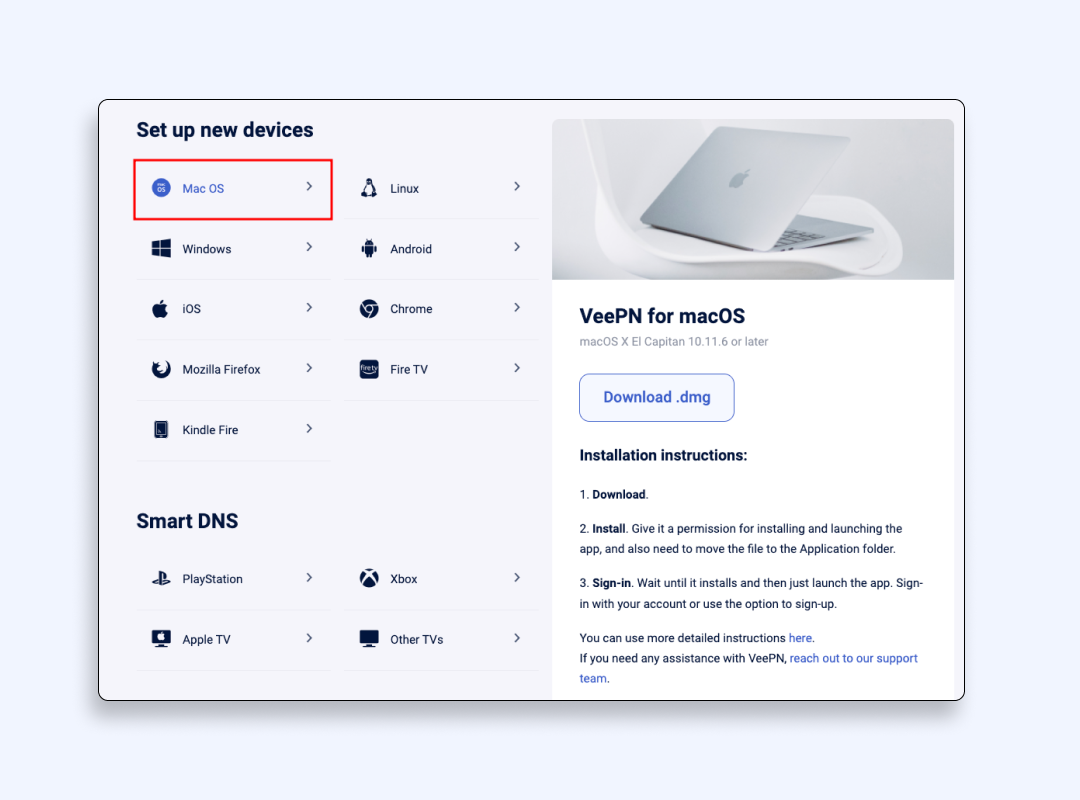
- Download and install the VeePN app on your MacBook.
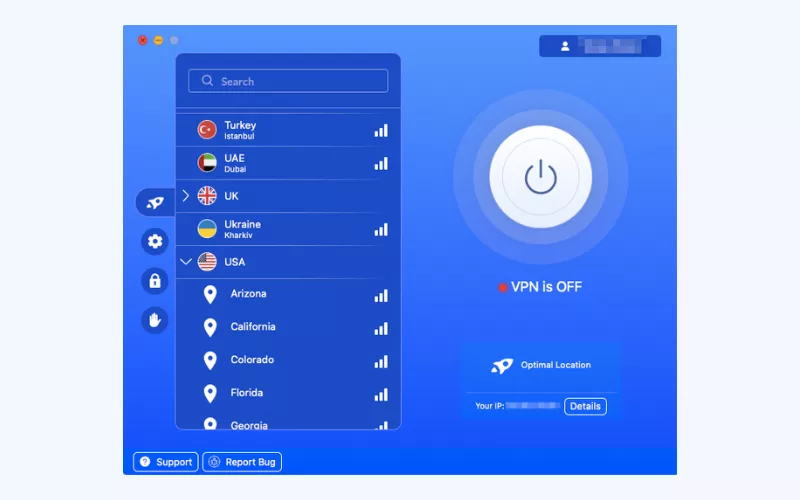
- Open the app and choose your preferred location. You can select the “Optimal Location” for the fastest connection speed.
- Set privacy and security settings. You can choose to use the most suitable VPN protocol, turn on Kill Switch, block ads, and enable more useful features.
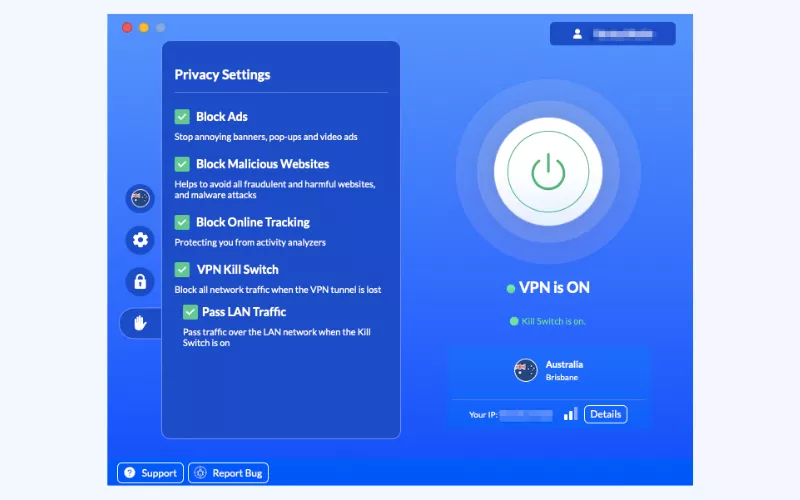
- Turn the VeePN on and you’re done! Now you have a new Mac IP address and can load up and enjoy your desired websites or apps from any region on Earth.
Try changing your MacBook location with VeePN without any risks. To each user we offer a 30-day money-back guarantee.
FAQ
- Open the Apple menu -> System Settings, then go to location services to adjust your region.
- Switch the time zone and region under Date & Time to reflect your current location.
- Check additional system services for full control over your location data.
- This keeps you connected to relevant local content wherever you work.
- In System Settings -> Network, set a new network location for different Wi-Fi networks.
- Turn on the location feature in Date & Time so your Mac updates automatically.
- Sync your Mac with your iPhone location if you prefer consistent region settings.
- For region-based sites, consider a VPN app that easily spoofs your IP address.
- Click Apple menu -> System Settings, then pick a custom region under Date & Time.
- Add or edit a location profile in the Network to suit your travel needs.
- Restart apps that rely on local settings to apply the change.

VeePN is freedom
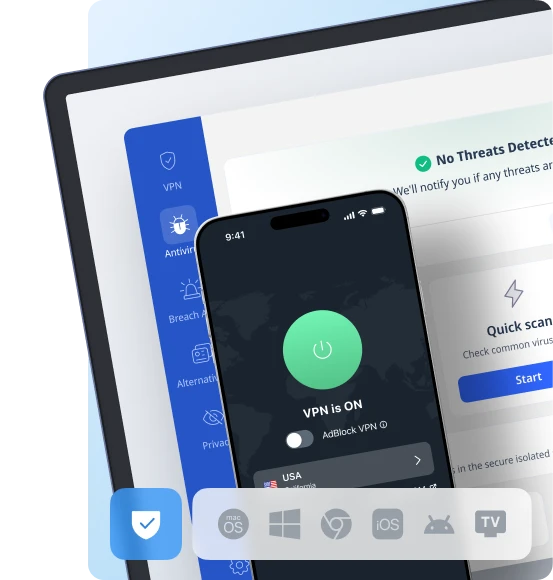
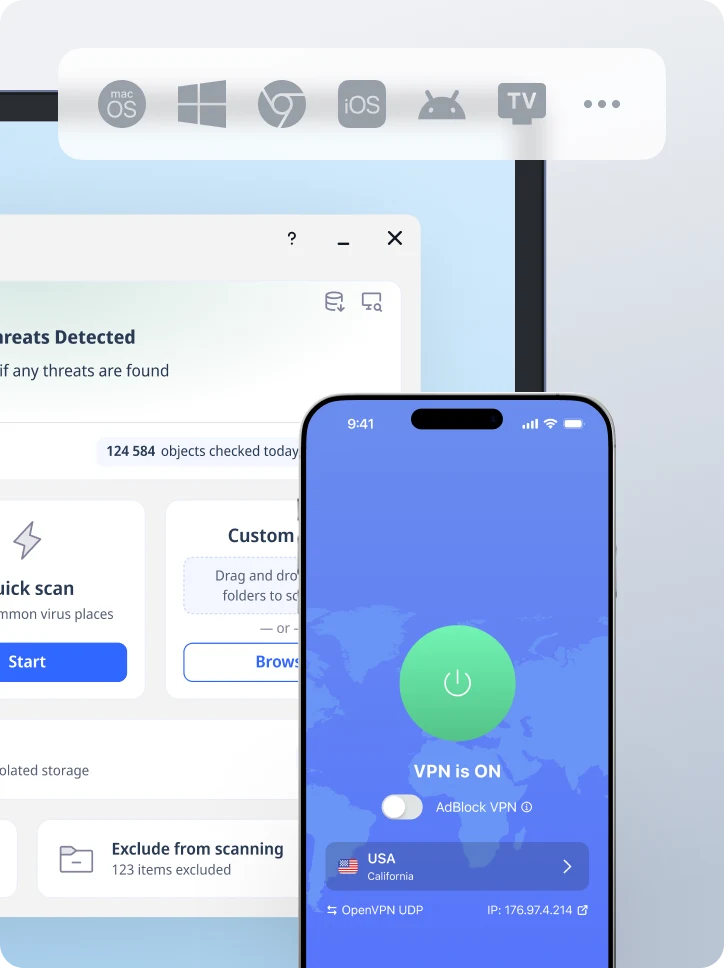
Download VeePN Client for All Platforms
Enjoy a smooth VPN experience anywhere, anytime. No matter the device you have — phone or laptop, tablet or router — VeePN’s next-gen data protection and ultra-fast speeds will cover all of them.
Download for PC Download for Mac IOS and Android App
Want secure browsing while reading this?
See the difference for yourself - Try VeePN PRO for 3-days for $1, no risk, no pressure.
Start My $1 TrialThen VeePN PRO 1-year plan