10 iPhone Privacy Settings Every User Should Enable for Uncompromised Privacy
Apple products have long been associated with advanced privacy and security. You can adjust multiple settings on your iPhone to protect your personal information, prevent potential monitoring, and mitigate the risk of being hacked. Some are pretty obvious, while others might not be familiar, even if you’ve been using the iOS operating system for years. If you care about your personal data, read along to discover the main iPhone privacy settings and find out how to use them properly.

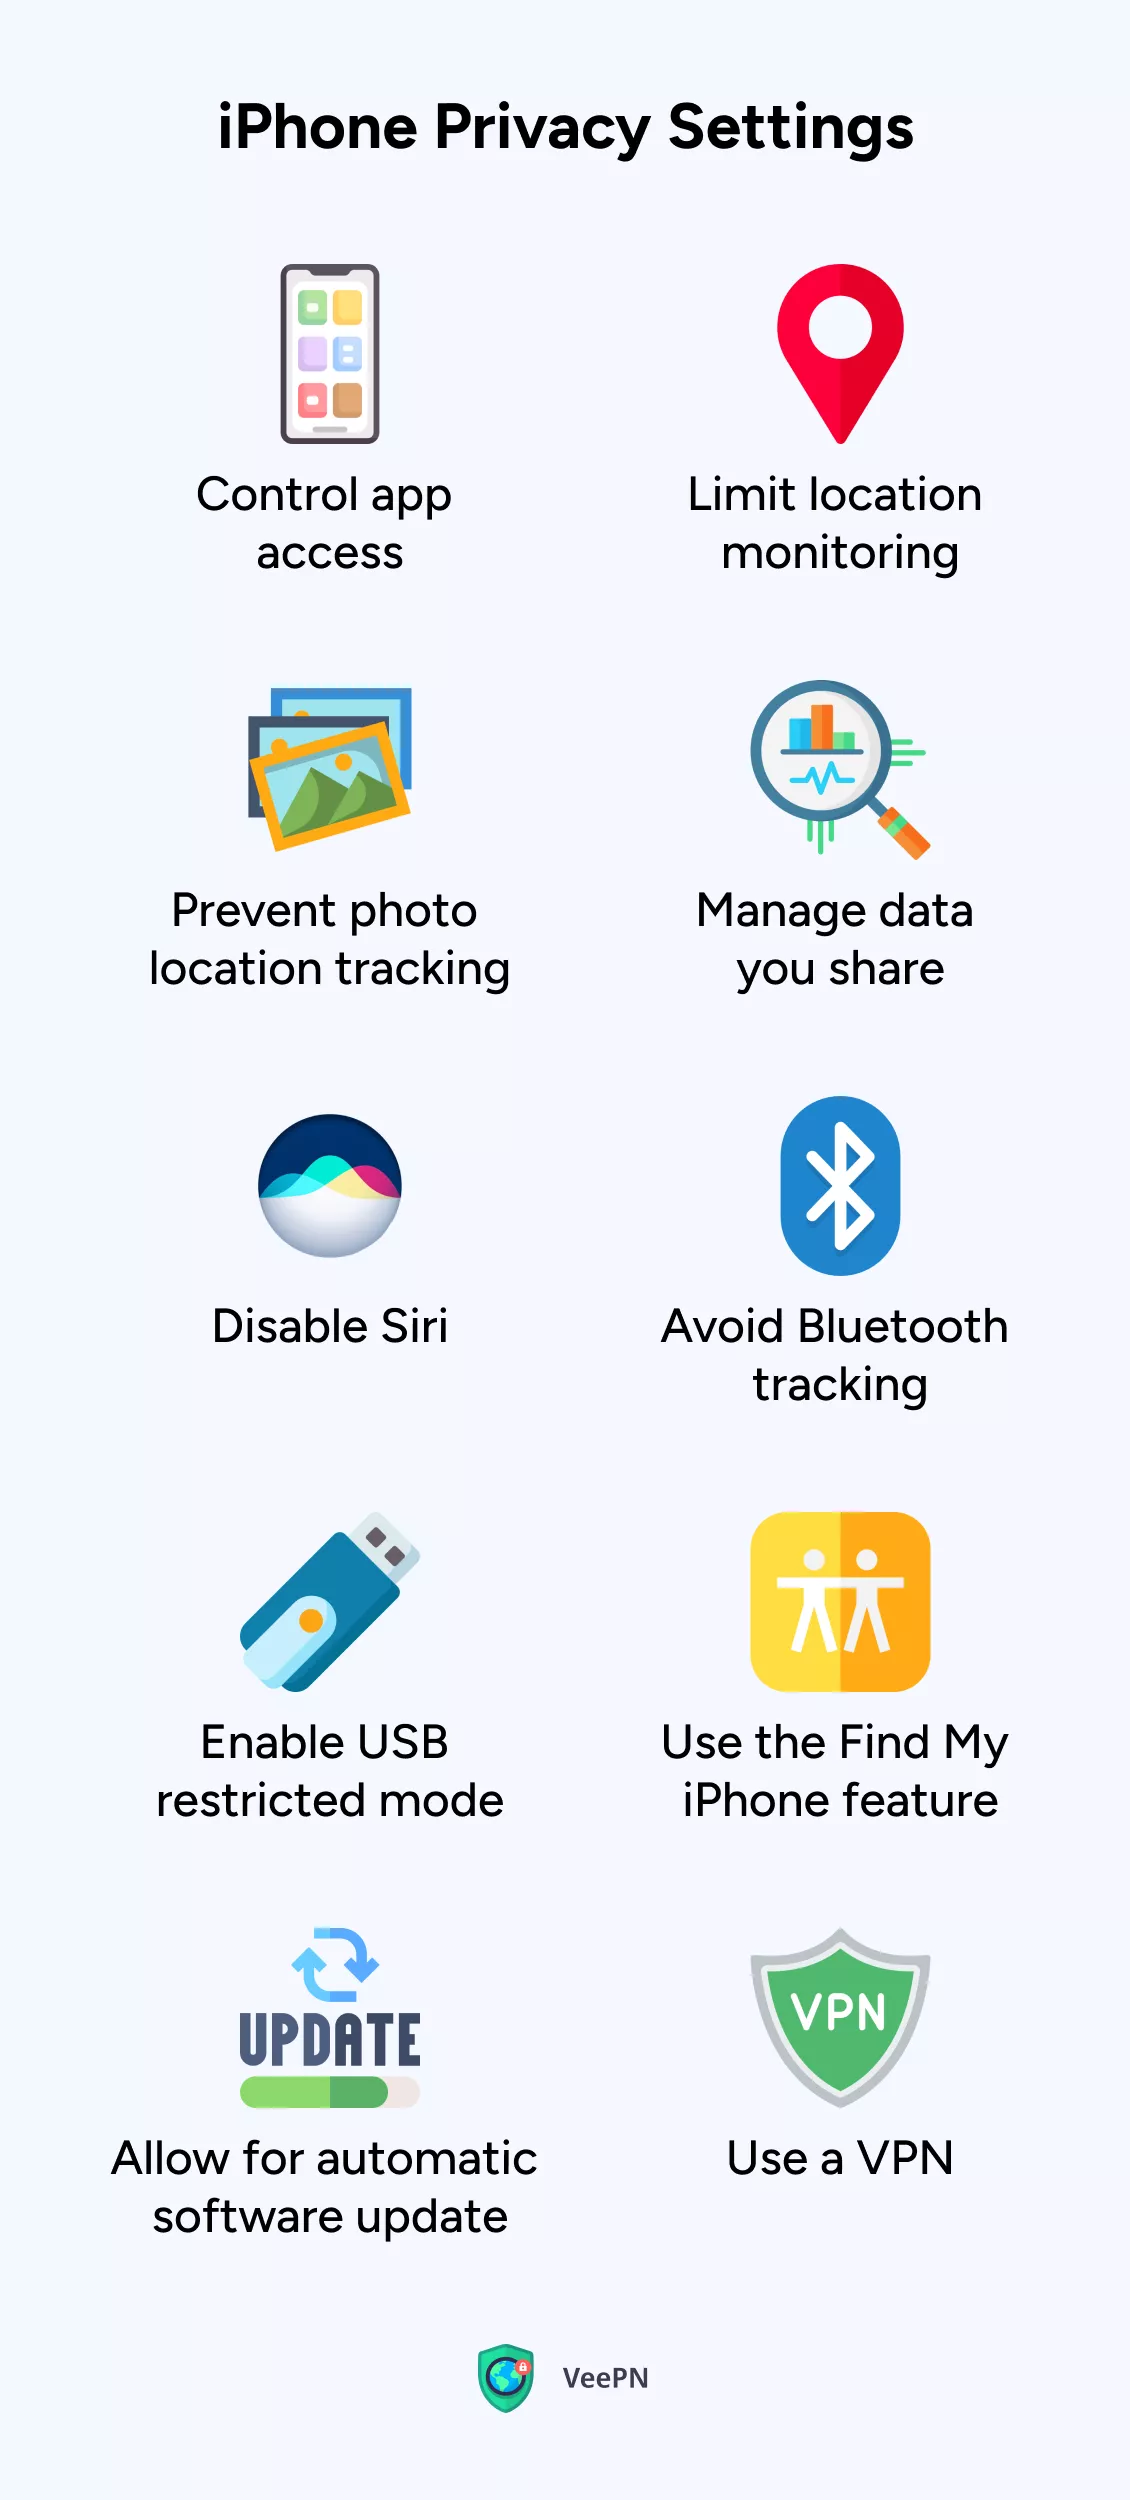
2. Control app settings
3. Limit location monitoring
4. Prevent photo location tracking
5. Manage the data you share
6. Disable Siri
7. Avoid Bluetooth tracking
8. Enable the USB Restricted mode
9. Use the Find My iPhone feature
10. Allow for automatic software updates
11. Use a VPN
12. FAQ
The overview of privacy settings on iPhone
All in all, iPhones are considered more private and secure compared to their main rival – Android (for more details, read our comparison of iOS vs. Android security). But is this an honest assessment or a misleading stereotype?
To answer this question, let’s briefly overview the main aspects regarding iPhones’ privacy.
- App sandbox.Since the release of iOS 12, Apple users have been able to manage and control the amount of sensitive data accessible to the application on their iPhones.
- Source code. iOS has a closed source code, meaning that third-party developers can’t access it. This means that nobody can modify and harm the code externally. On the other hand, it somewhat limits Apple’s ability to improve its security system and address potential vulnerabilities.
- OS and software updates. iPhones and other iOS devices get regular updates several times a year. Every update’s lifecycle is up to 5 years, ensuring consistency and stability of the operating system. It’s also important to keep your Mac computer updated and turn on automatic updates to protect against malware and vulnerabilities specific to Mac systems.
- App Store. Apple’s internal marketplace rules are pretty strict, requiring third-party developers to stick to particular security and privacy standards. It reduces the chances for malicious apps to slip inside, ending up on your iPhone.
- Smartphone security. According to some surveys, Apple iPhone 13 Pro Max and iPhone 14 are considered the safest smartphones to date, according to 32% of users. The new iPhone 15, which will be released in September 2023, has even more promising privacy and anti-spyware updates, as the latest Apple press release claims.
So you see iOS has plenty of good features and capabilities to gain more privacy and protect your data. But it’s not a silver bullet for all risks like phishing, hacker attacks and malware. So how to change privacy settings on iPhone to protect yourself from threats? Let’s look at the main tools and features you can adjust to use your phone with peace of mind.
Securing your iPhone login
The first line of defense in your iPhone is a secure log in that prevents the personal data and sensitive information in your iPhone falling into the wrong hands. The first thing you should do is to choose a good passcode, do not choose something simple such as 1234 or the year you were born. To be even more secure use longer alphanumeric passcode that you can configure in the setting app of the iPhone under Face ID & Passcode or Touch ID & Passcode.
Unlocking your device should be safe and convenient with the help of Apple biometric authentication (Face ID or Touch ID). Such security configurations make sure that no other person can access your device in case you lose it or have it stolen.
To improve the security of your Apple account and other logins, you can use a password manager that helps to create and memorize unique and complex passwords. This will ensure that no one has unauthorized access to your credentials.
Lastly, check the security of your log-ins and change your passcode or biometrics details accordingly. As long as your ID passcode, Touch ID and other security settings are up to date you will enjoy a high level of protection on your Apple device as well as all the personal information that it holds.
Enabling two-factor authentication
One of the most optimal ways of securing your sensitive data is to protect your Apple account with two-factor authentication (2FA). There is also the 2FA which allows additional verification in case your password is stolen, even then the person will not be able to log in to your account without completing a second verification method, typically a code sent to your trusted device or phone number.
To make a two-factor authentication possible, open the Settings app, tap your name on the top, and select Password & Security. There, tap Turn On Two-Factor Authentication and then enter a trusted phone number. This is an added security that is required to enhance the security of your Apple account and safeguard your device and personal data against unauthorized access.
Turning on two-factor authentication is a proactive measure to secure your privacy and guarantee that nobody could access your Apple account and the sensitive data on your iPhone with ease.
Advanced Data Protection for iCloud
If you want the ultimate privacy and security for your iCloud data then enable Advanced Data Protection. This feature brings end-to-end encryption to almost all your iCloud data—iCloud Backup, iCloud Drive, Notes and more—so that only you can access your data not even Apple.
To turn on Advanced Data Protection open the Settings app, tap your name, go to iCloud, and select Advanced Data Protection. You’ll be guided to set up a recovery contact or create a recovery key which will allow you to regain access to your data if you ever forget your Apple account password.
With Advanced Data Protection enabled your iCloud data is protected from data breaches and unauthorized access so you can have peace of mind that your privacy and security is truly uncompromised. This is a must have setting for anyone who wants to protect their iCloud data with end-to-end encryption.
Safari and Mail privacy protections
Safari and Mail are the two most common apps in Apple gadgets and they have very strong privacy features to protect your data. Prevent Cross-Site Tracking is on by default in Safari, and it prevents advertisers and sites that use trackers to keep track of where you go on the web. Privacy Preserving Ad Measurement also restricts the amount of information that can be gathered by the advertisers, to safeguard your browsing activities.
Another necessary feature is Mail Privacy Protection: once activated, it conceals your IP address to senders, which makes it significantly more difficult to track your location or keep an eye on your mailing habits. Mail privacy protection conceals your Internet activity, so that your email behaviors do not become public.
In order to check and change these privacy settings, run the Settings app and go to Safari and Mail. Seek out such features as Prevent Cross-Site Tracking and Mail Privacy Protection to ensure that they are enabled. With the help of these privacy protections, you will be able to surf and communicate without any fear of your personal details coming under the radar of cross site tracking as well as unwanted surveillance.
Hiding apps and content
Sometimes, privacy means keeping certain apps or content out of sight—especially if you share your iPhone with others or want to keep sensitive data extra secure. You can easily hide apps using the Hide Apps feature in the App Library, or restrict access to specific apps through Screen Time settings. This is a great way to ensure that only you can open certain apps, adding an extra layer of privacy protection.
For photos and videos, use the Hidden album in the Photos app. To make this even more secure, require Face ID or Touch ID to access the Hidden album. If you want to keep the Hidden album itself out of view, go to the Photos app, tap Albums, scroll to Utilities, and toggle off Hidden Album. This way, your sensitive data stays private, even if someone else is using your device.
Don’t forget to regularly review which apps have access to your location, contacts, and other sensitive data. Adjust app permissions as needed in your iPhone’s settings to maintain control over your privacy and ensure that only trusted apps are granted access to your information. With these steps, you can confidently protect your sensitive data and hide apps or content as needed.
1. Control app settings
As mentioned, you can control and manage the app’s permissions on your iPhone. This way, you will know how much personal information every application can use and limit it to enhance your privacy. In particular, you can disable the apps’ access to the following data:
- Location
- Microphone
- Camera
- Photos
- Contacts, and more.
Here’s how to adjust app permissions on an iPhone:
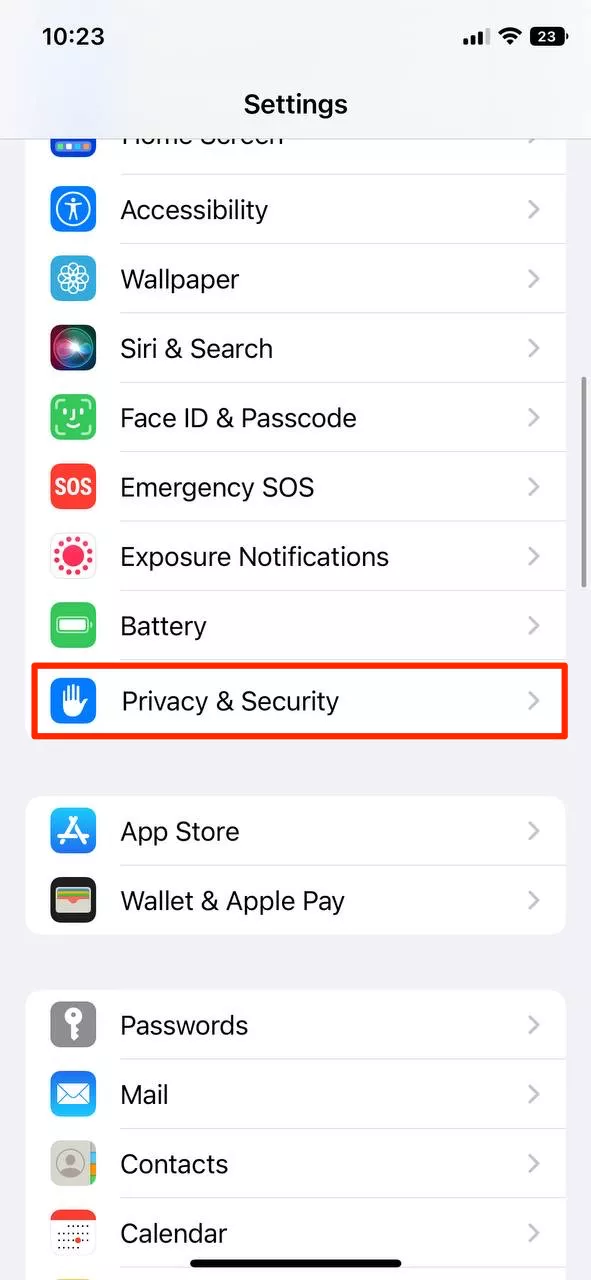
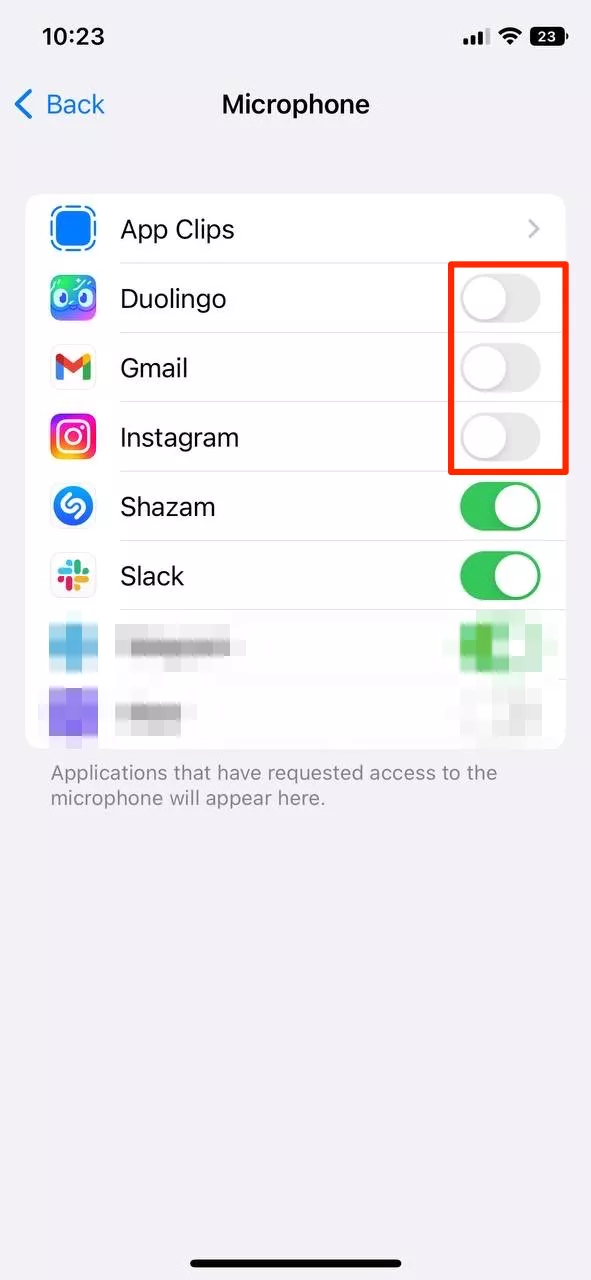
- Open Settings > Privacy & Security.
- Pick the data type your apps can access (for instance, Microphone).
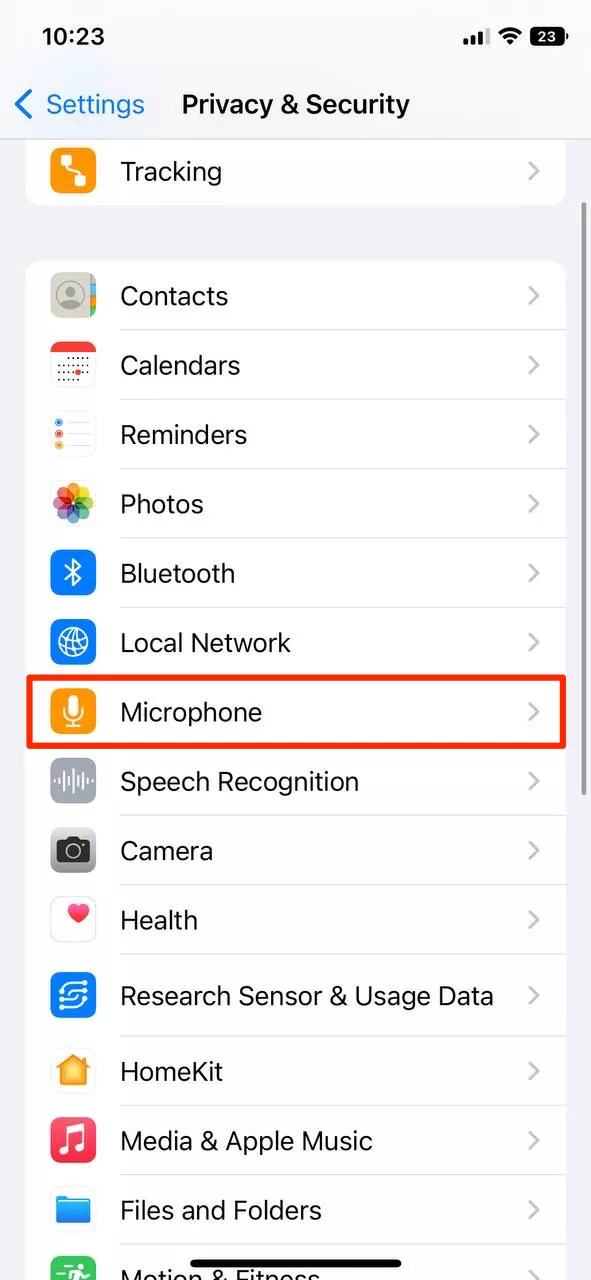
- Select apps from the list and toggle the ones you want to disable.
2. Limit location monitoring
Your location stands apart from other types of data iPhone applications can monitor. Of course, programs like Weather, Maps, and Wallet need access to your current location to function properly. However, your whereabouts might actually be tracked even by applications that don’t need this information at all.
To change your iPhone privacy settings on tracking location, take these simple steps:
- Go to your iPhone’s Settings.
- Open Privacy & Security.
- Select Location Services.

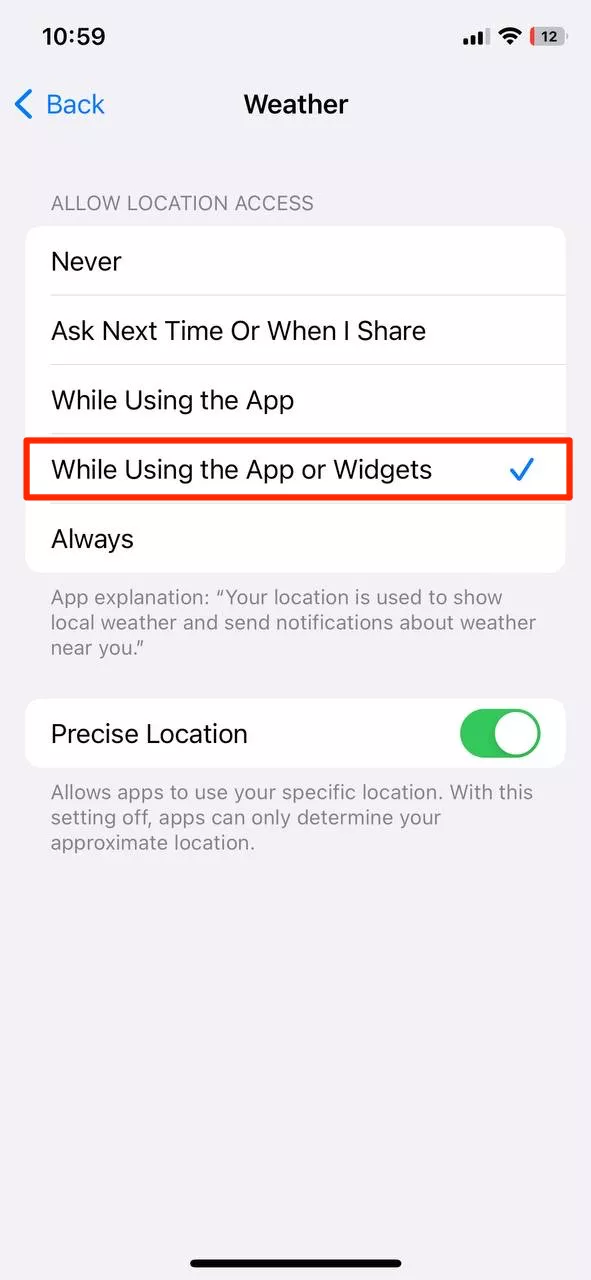
- Choose a particular app.
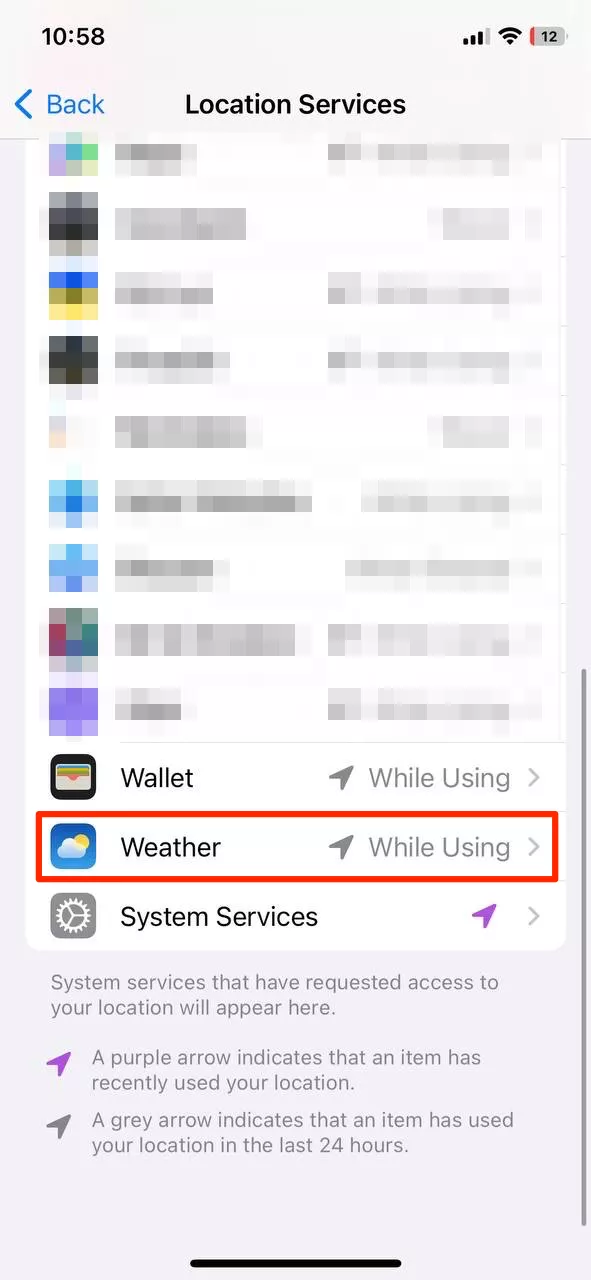
- Choose when you want this particular app to follow your place. For example, some programs, for example, weather applications, may have access to it just when you are using them, and navigation applications like Google Maps at a point use location data to guide you. You can also control whether a particular app can have access to location and turn on or off between letting an app have precise location and a more general area, which impacts on privacy and app functionality. Apps may get location data using GPS, Wi-Fi, or Bluetooth. Location information is also used for things such as Find My and device tracking. Content like addresses, which you shared, can also be automatically sent to the right app, such as Maps.
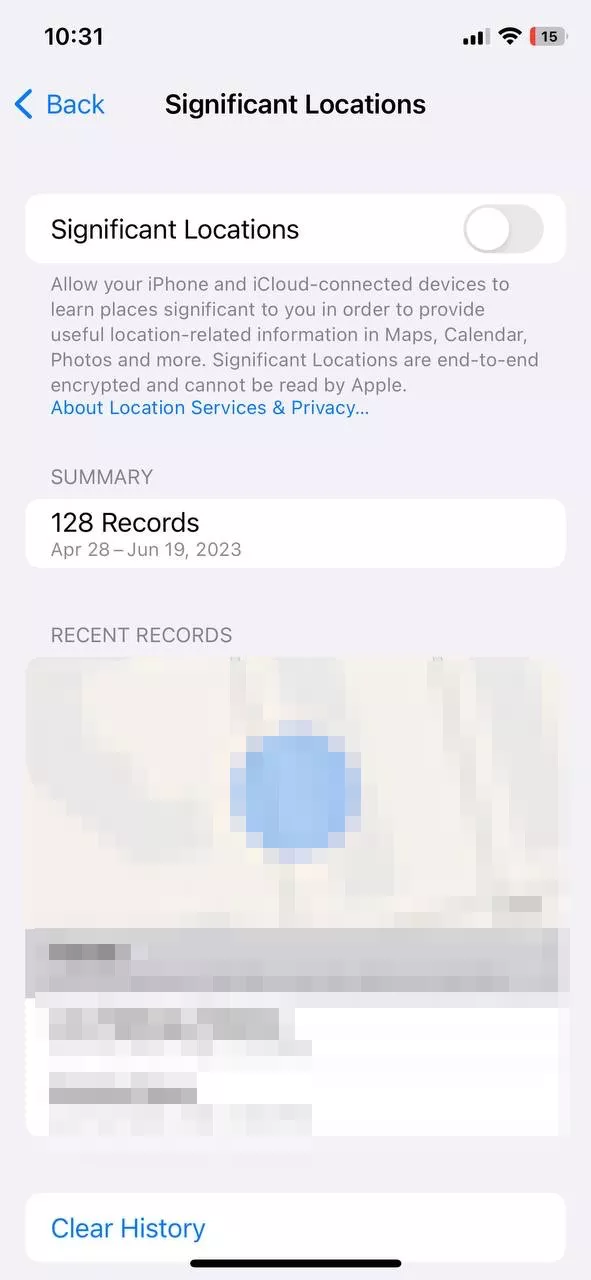
Another tricky location-tracking feature on an iPhone is Significant Locations. It saves your most common whereabouts on your phone, allowing it to provide more personalized services. Luckily, you can also manage it the following way:
- Go back to Location Services.
- Open System Services.
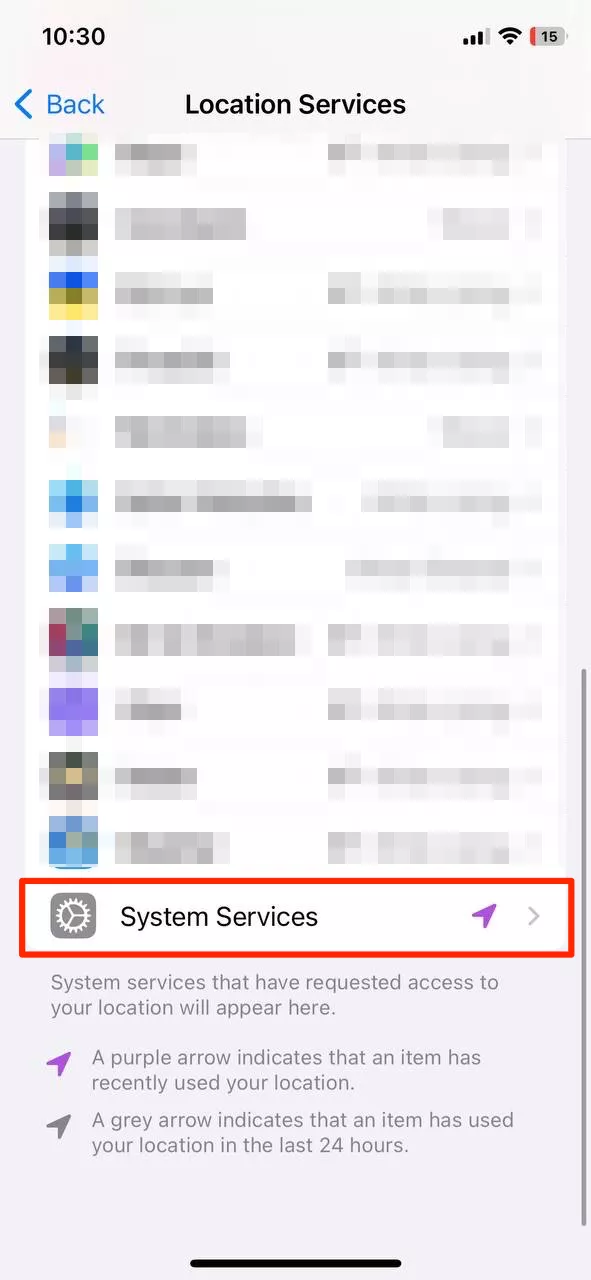
- Head to Significant Locations and disable it.
Want to change your iPhone location? Read our recent blog post to learn how!
3. Prevent photo location tracking
Every picture you take contains lots of metadata, including information about your location. And guess what? Every user you share a photo with can learn this information with ease!
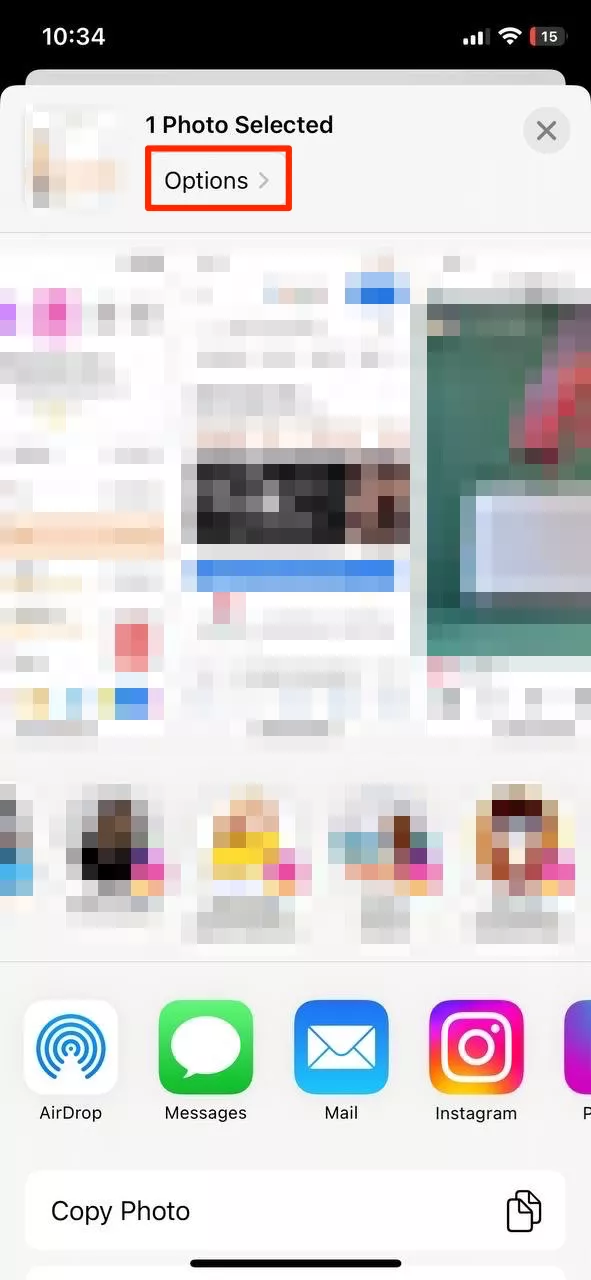
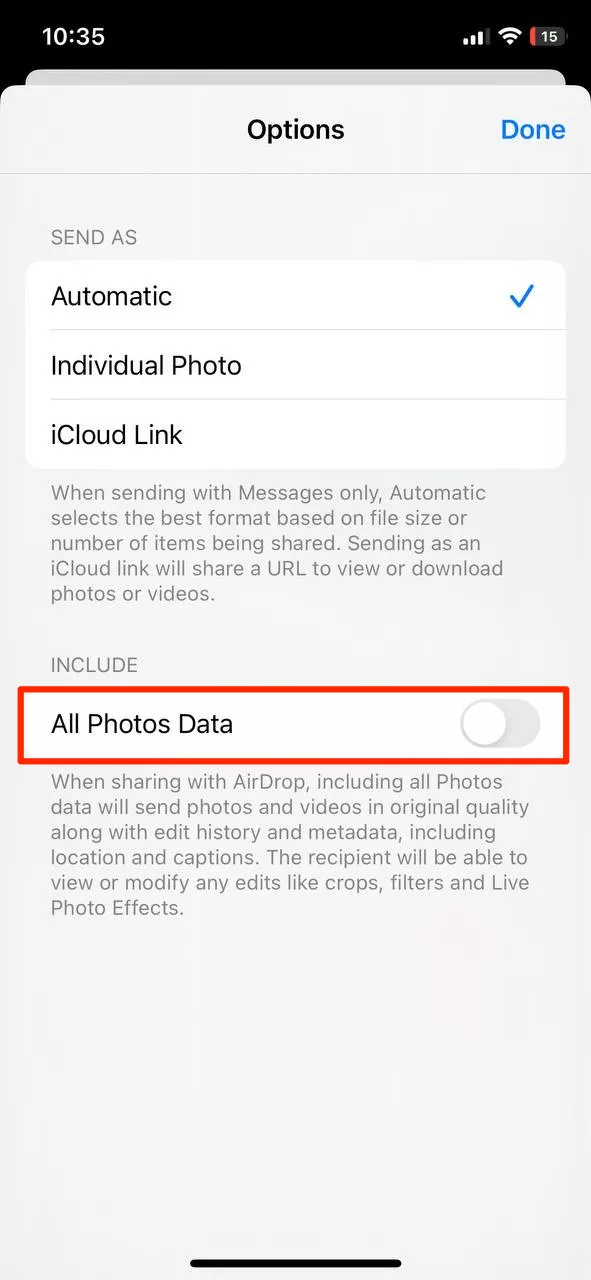
But do you really want to expose the location of your home, workplace, or restaurant where you like to hang out with your friends? If not, it’s easy to prevent anybody from accessing this info when uploading a photo on social media or a messaging app like Facebook or Snapchat – here’s how:
- After selecting a specific photo, tap Options on the top right corner of your screen.
- Under Include, toggle off All Photos Data.
Additionally, you can adjust your lock screen settings to prevent sensitive photos from being displayed or accessed when your device is locked.
- After selecting a specific photo, tap Options on the top right corner of your screen.
- Under Include, toggle off All Photos Data.
4. Manage the data you share
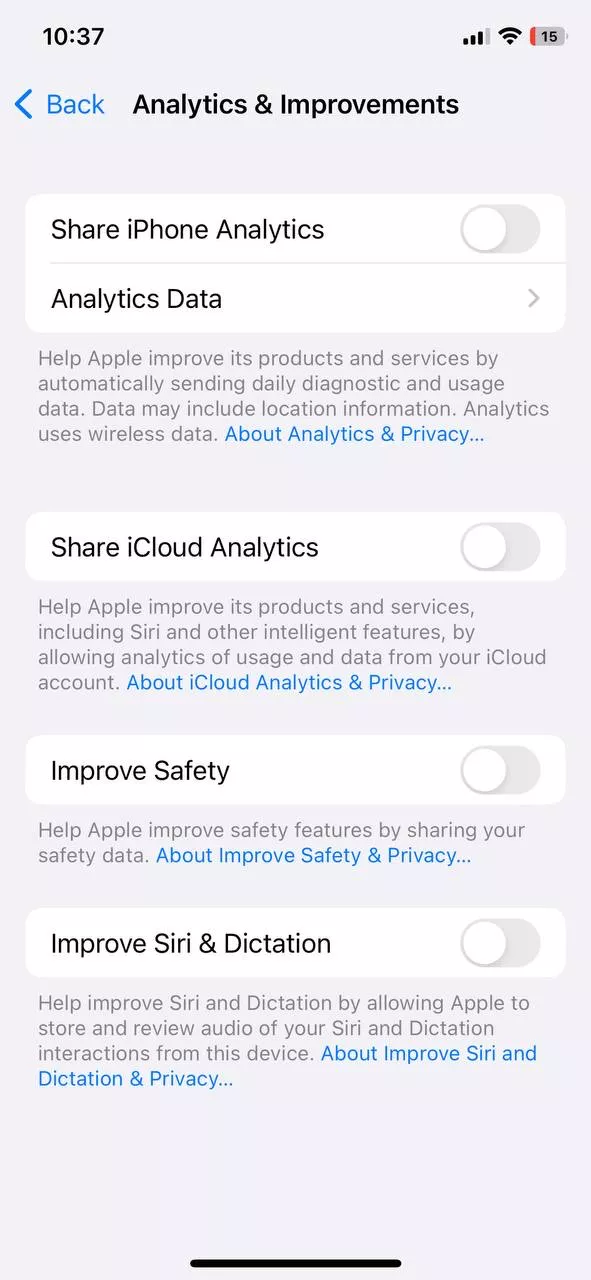
As with any other tech corporation, Apple collects specific information about its users, including usage data for analytics purposes. While this data helps developers improve their products and services by analyzing your behavior when using various apps, you can disable the collection of usage data to enhance your privacy. If you want to achieve the maximum level of your iPhone privacy, here’s how to stop sharing this information:
- Open Settings.
- Head to Privacy & Security.
- Select Analytics & Improvement.
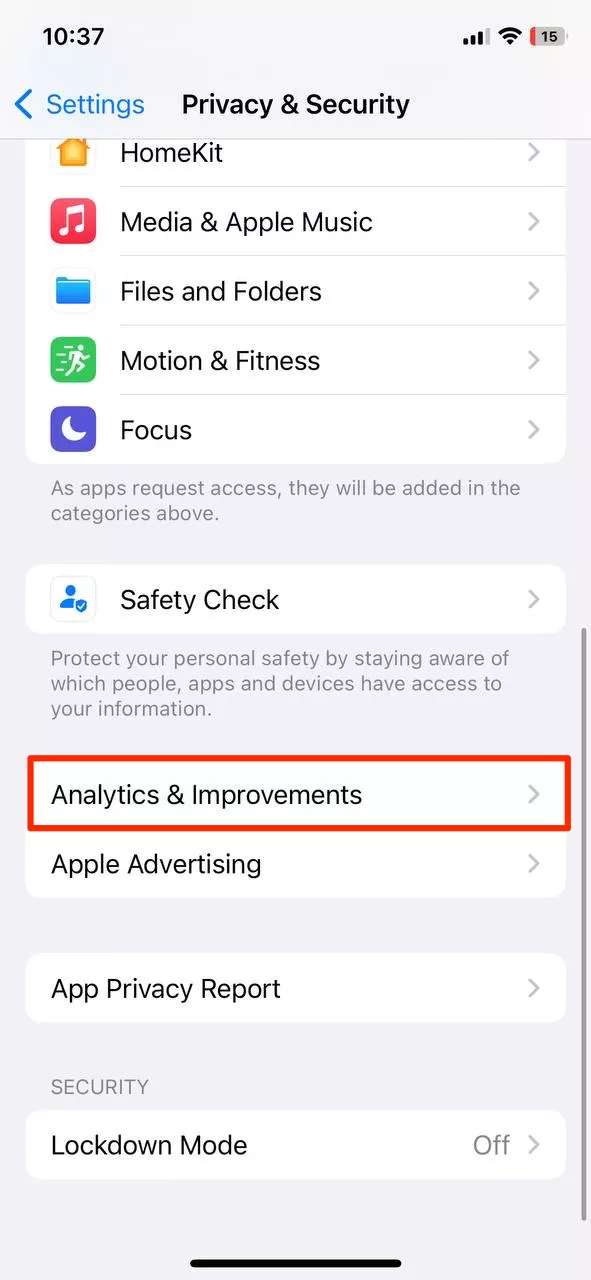
- Toggle off the unwanted monitoring (including Share iPhone Analytics, Share with App Developers, Improve Siri & Dictation, and more).
5. Disable Siri
Siri was a true breakthrough at the time Apple first introduced this feature back in October 2011. It was the very first smartphone virtual assistant, followed by similar solutions developed by Google (Google Assistant) and Amazon (Alexa). However, it has also become one of the main privacy concerns for smartphone users.
The problem is that such programs recognize specific hot words to trigger particular actions, which makes many believe that a phone can actually listen to our conversations. In particular, Apple was criticized for a real incident in 2019 – the company’s employees snooped on some users with the help of Siri.
Wondering whether your phone is listening to you? Read our recent blog post on this topic to find out!
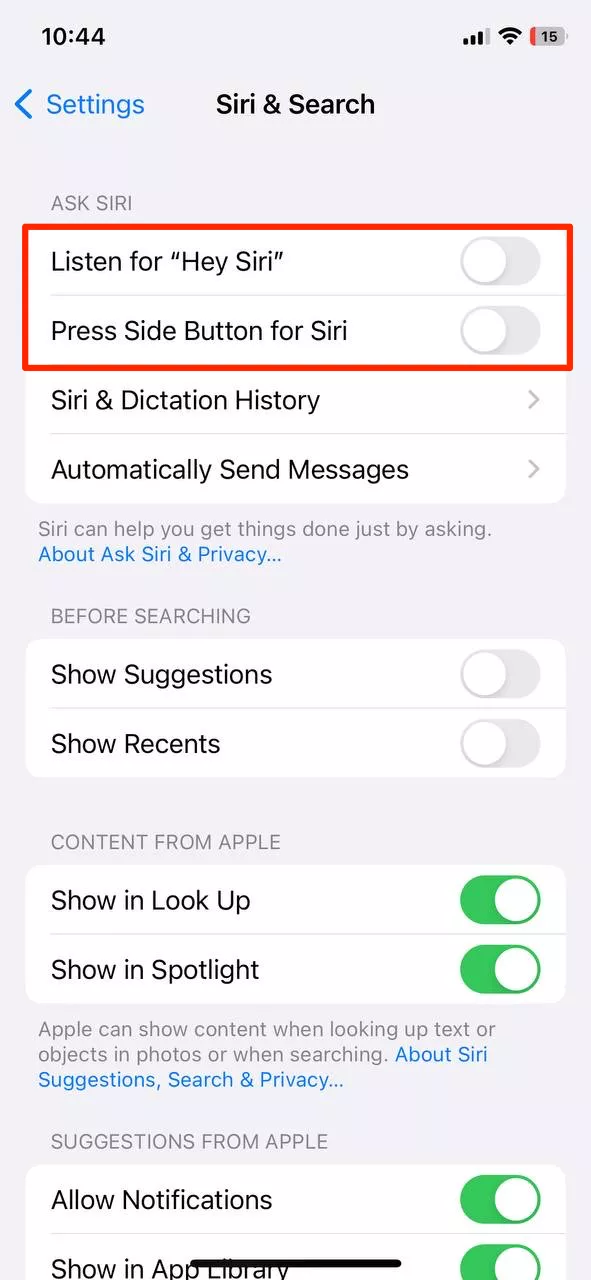
But whether you believe it or not, it’s always better to take some extra security precautions. Luckily, there’s a way to make sure nobody can use your private conversations to bombard you with tons of personalized ads later on. Here’s how to disable Siri on your iPhone:
- Go to your phone’s Settings.
- Open Siri & Search.
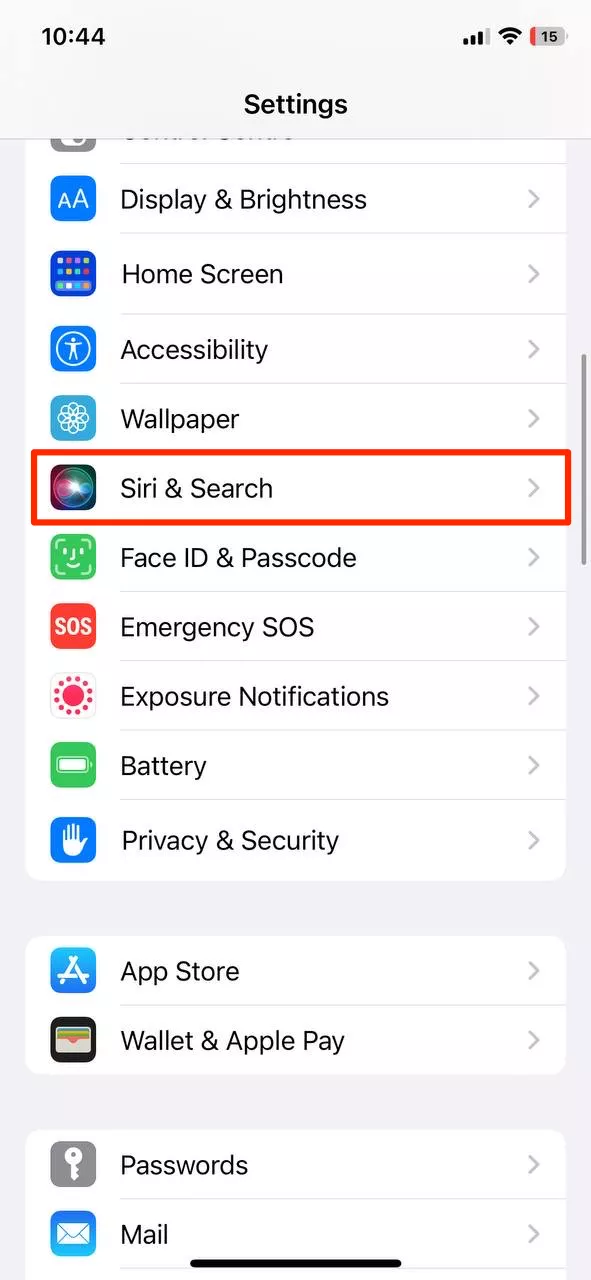
- Turn off Listen for “Hey Siri” and Press Side Button for Siri.
6. Avoid Bluetooth tracking
Bluetooth data monitoring is no less tricky as it also allows third-party applications to interfere with your privacy. Besides, keeping your Bluetooth on when you’re not using it drains your iPhone’s battery.
Here’s how to disable Bluetooth tracking on an iPhone
- Open your phone’s Settings.
- Head to Privacy & Security.
- Select Bluetooth.
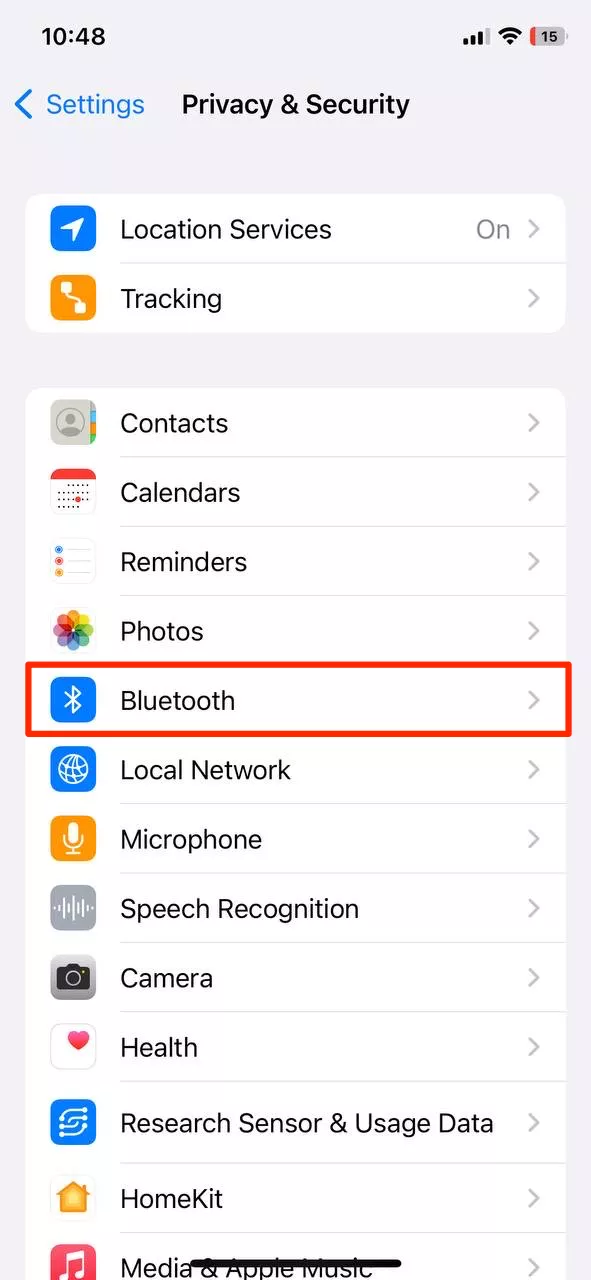
- Disable it for unwanted applications.
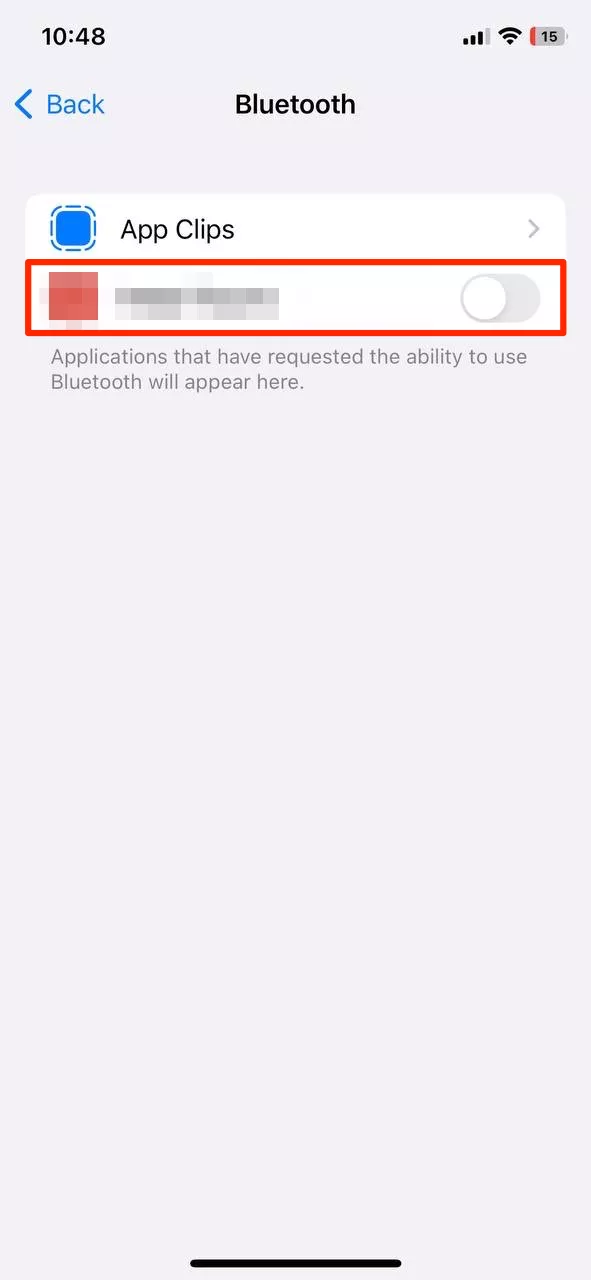
Consider which applications can access your Bluetooth data. A good reason for that is the need to connect to your AirPods or other accessories. Also, video apps like YouTube may need permission to connect to dongles, such as Chromecast. But when it comes to applications like Facebook, it may ask for Bluetooth access just to track your location.
7. Enable the USB Restricted mode
Connecting your iPhone to an unverified device via a USB cord may result in sensitive data loss. This security challenge is known as a juice-jacking attack. Cybercriminals turn to this malicious technique to compromise users’ devices, affecting them with malware or stealing confidential information, from account passwords to credit card details. It’s particularly dangerous if you travel a lot and tend to charge your phone using third-party charging ports.
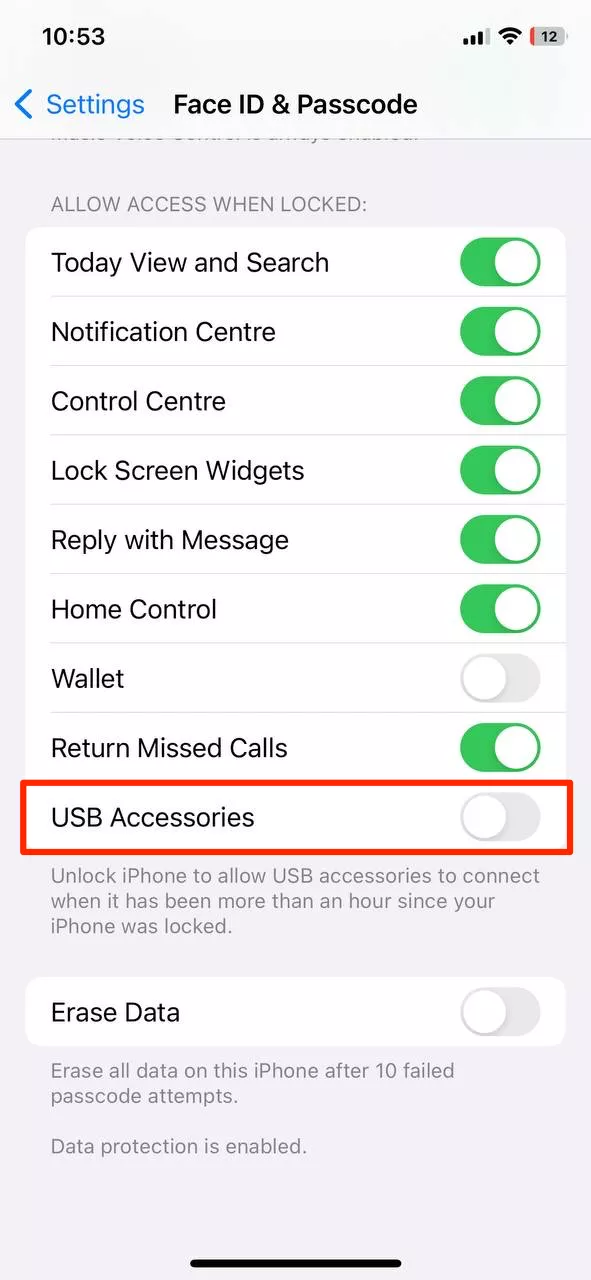
The good news is that you can protect your iPhone by enabling the USB Restricted mode. This feature prevents users from exposing data through malicious USB connections. Here’s how to enable it:
- Open Settings.
- Tap Face ID & Passcode or Touch ID & Passcode.
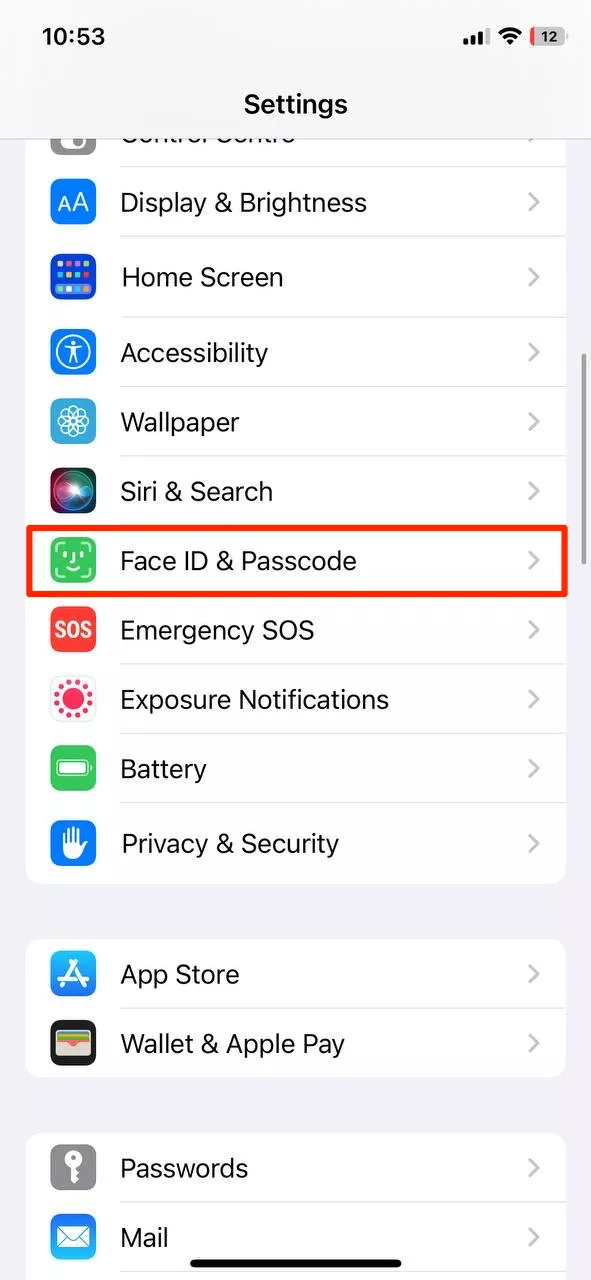
- Enter your passcode, find USB Accessories, and toggle it off.
8. Use the Find My iPhone feature
This essential feature is your lifeline if you lose your iPhone or someone has stolen it. Find My iPhone allows you to spot your phone’s location from another device or web browser, as well as remove all your data so that it doesn’t end up in the wrong hands. Therefore, make sure you turned on Find My iPhone, especially while away from home.
Here is how to enable this feature:
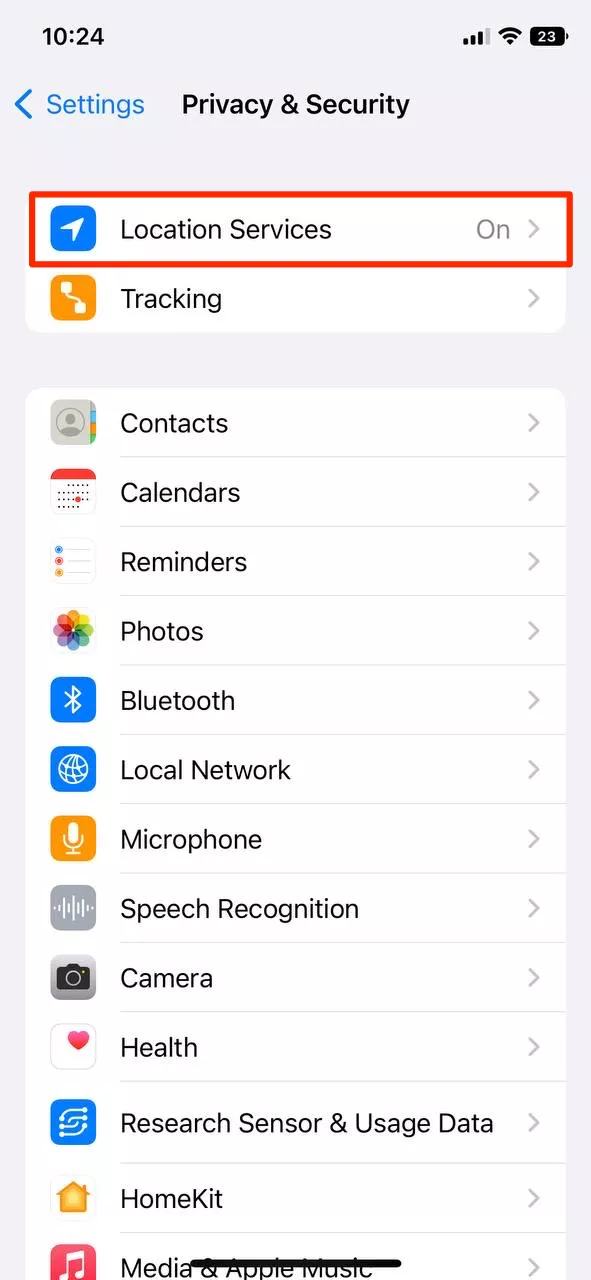
- Head to Settings > Privacy & Security.
- Tap Location Services.
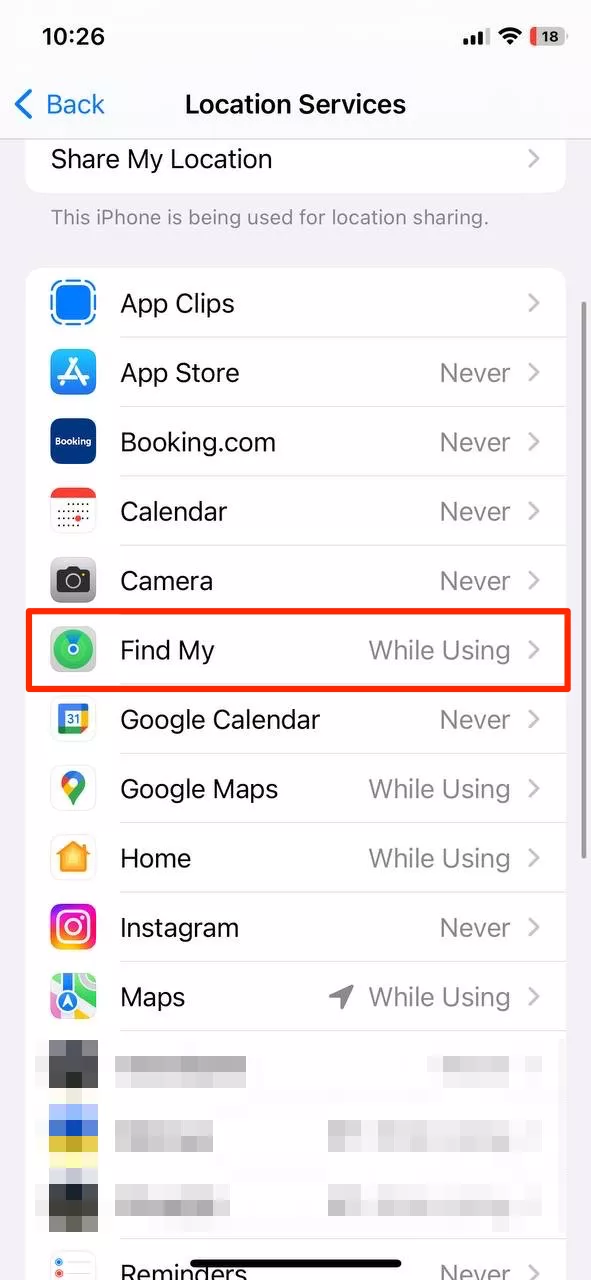
- Open Find My.
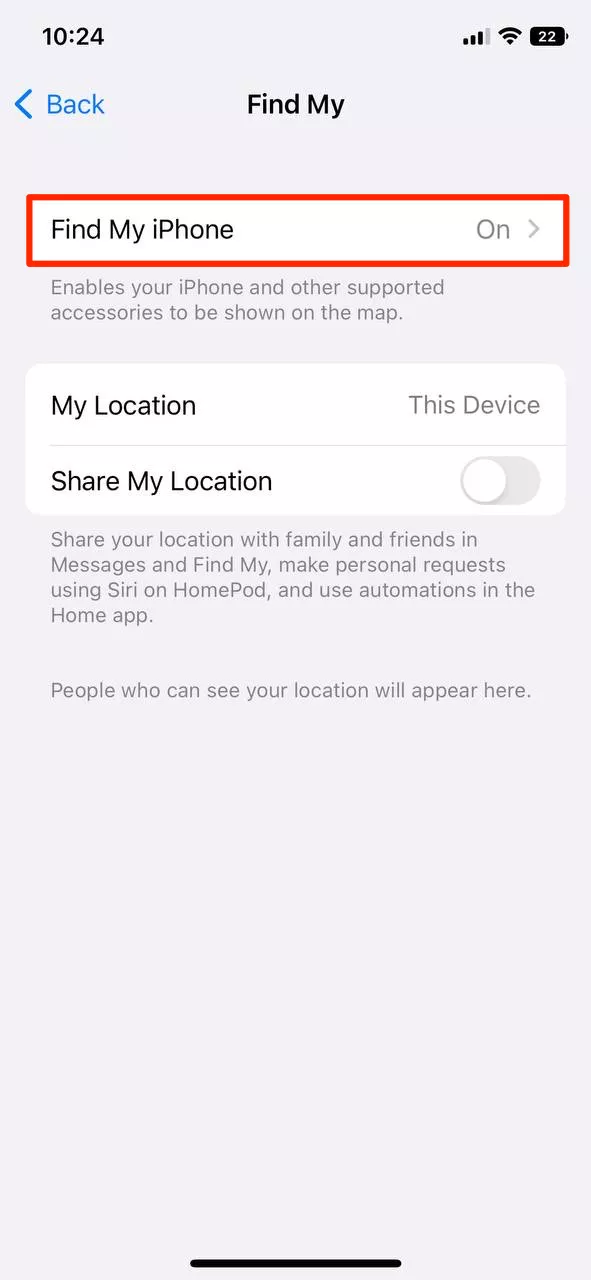
- Tap Find My iPhone.
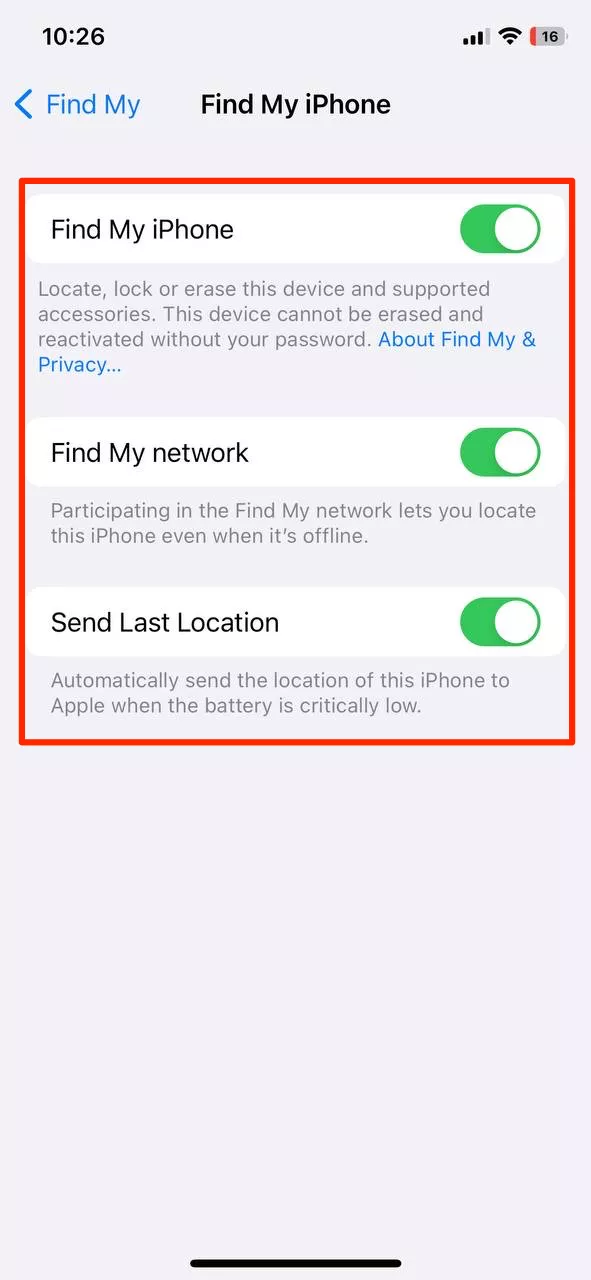
- Toggle on Find My iPhone, Find My Network, and Send Last Location.
You may also need to improve your privacy screen iPhone settings. In particular, come up with a strong and unique passcode and make sure your phone locks in 15 seconds. These simple measures can save the day if somebody steals your device.
9. Allow for automatic software updates
We already mentioned that Apple regularly introduces software updates and patches to address security flaws and vulnerabilities. But these improvements won’t save the day if you forget to update your phone as soon as possible. Otherwise, hackers may exploit the existing weaknesses and infect your device with dangerous malware or virus.
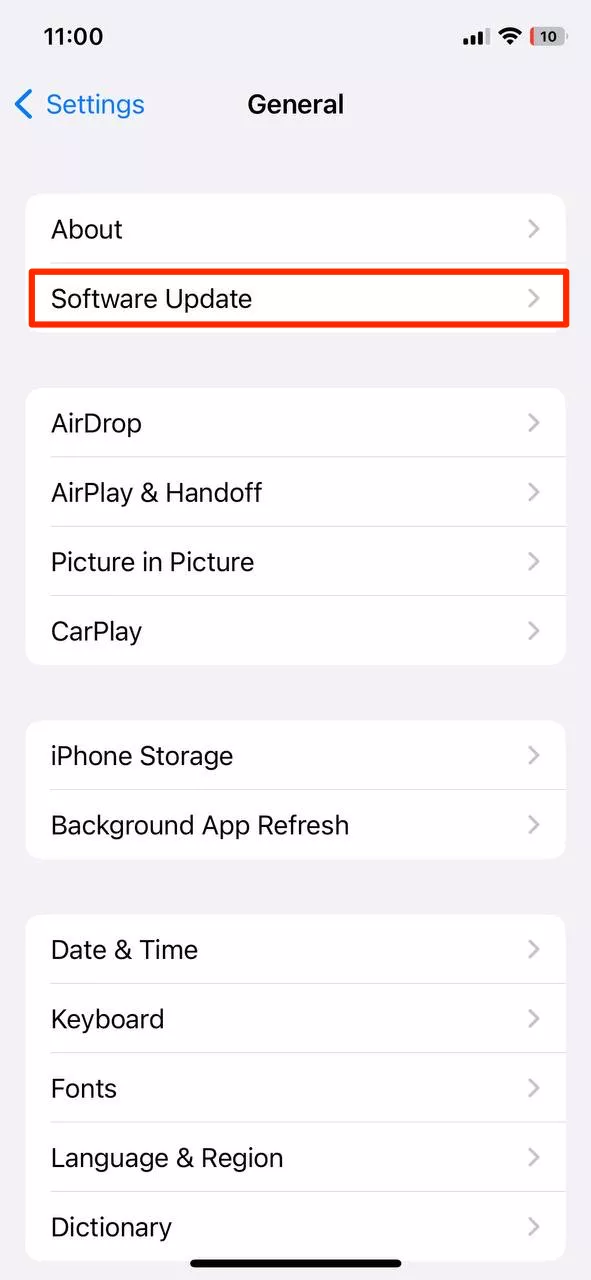
To be sure that your phone is running the latest versions of OS and software, follow these steps:
- Head to Settings > General.
- Select Software Update and check for the latest updates.
If there’s an update available, you will see a corresponding notification.
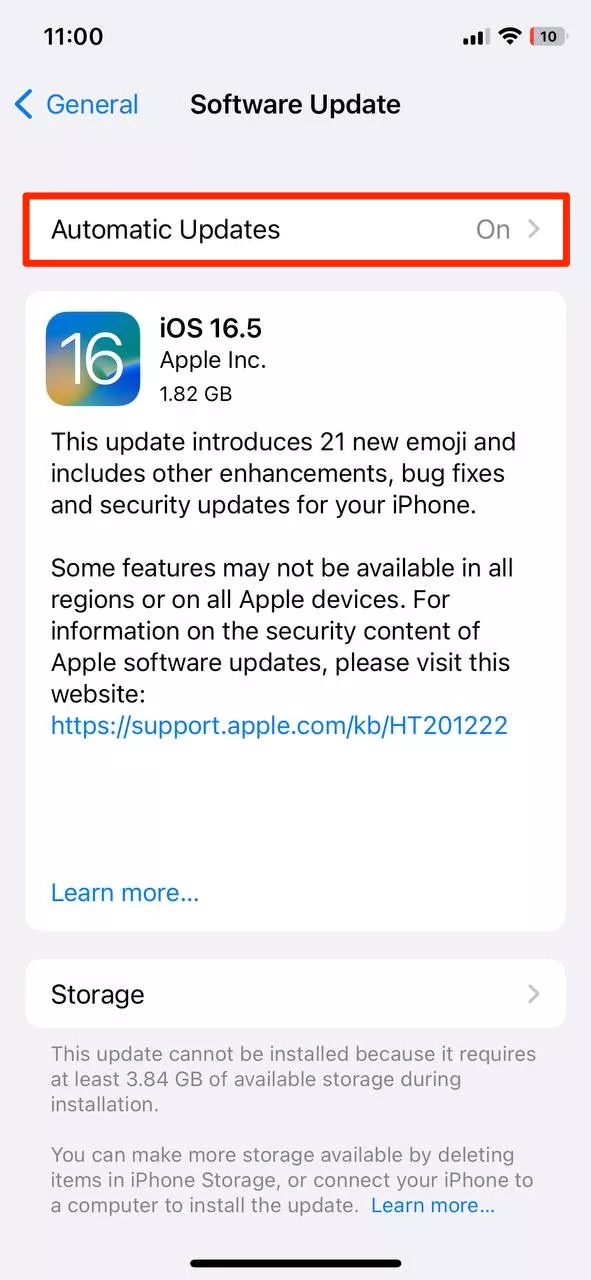
Besides, if you don’t want to miss out on anything important, you can allow for automatic updates. Here’s how:
- Go back to Settings > General > Software Update.
- Toggle on the Automatic Updates function.
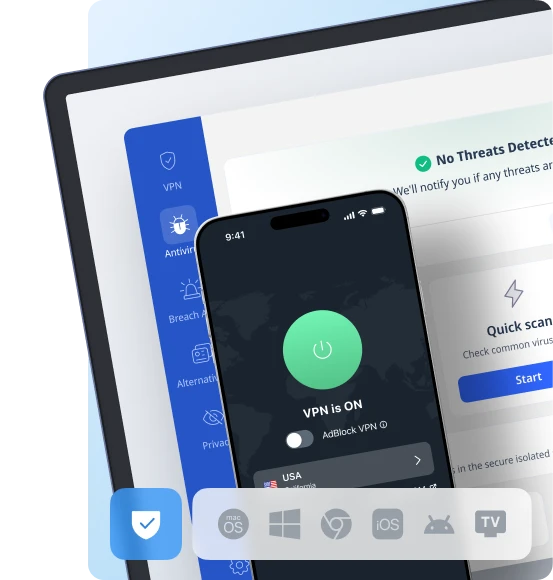
10. Use a VPN
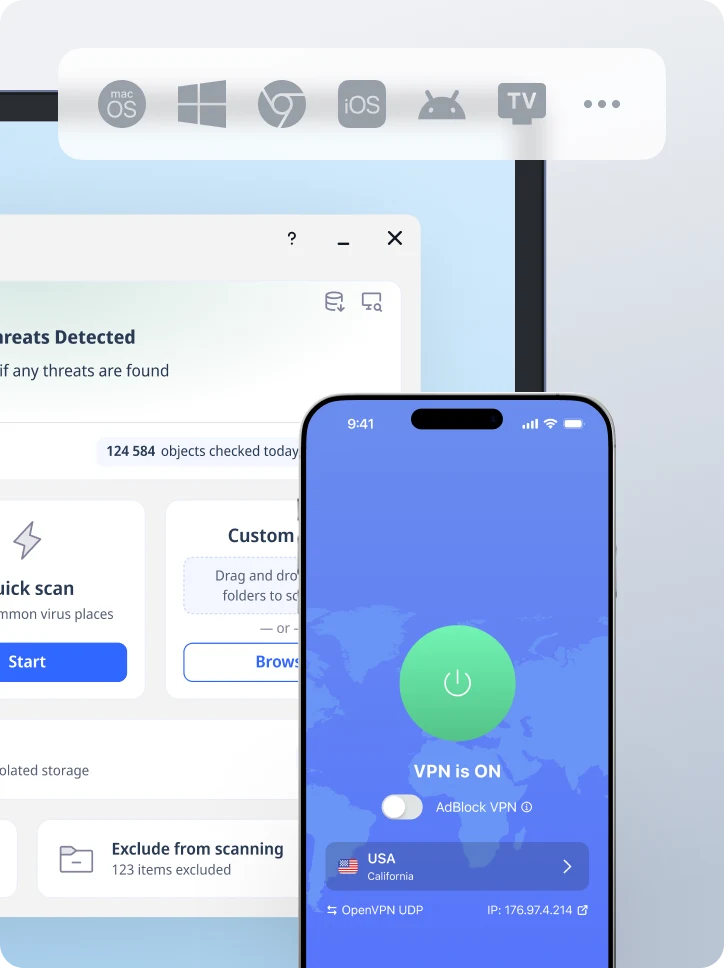
Although iPhones don’t have a built-in VPN (virtual private network) feature, you can get a third-party VPN service to protect your privacy. Why do you need one? Well, the thing is that there are much more risks of being monitored or hacked online than some basic browser privacy settings on an iPhone can prevent. And that’s where a VPN comes into play.
A VPN is a powerful solution that hides your IP address and reroutes your Internet traffic through a remote server. It creates a secure encrypted tunnel and sends all your data through it, so it’s nearly impossible for a snooper to compromise your online activities. What’s more, a VPN is a decent cybersecurity tool that helps avoid various risks, from phishing and malware to malicious ads and pop-ups (for instance, iPhone Calendar virus).
Note, though, that not all VPNs are worth your trust. Pick a service that adheres to a strict No Logs policy (doesn’t record and store your sensitive information) and a good number of privacy and security features, including Kill Switch and AES-256 encryption. That said, we recommend VeePN – a reputable VPN service with all the mentioned functions and many more in place.
Now, let’s find out how to get started with a VPN on an iPhone.
How to set up a VPN on iPhone
Here’s how to set up VeePN on your iPhone in a few simple steps:
- Choose the optimal pricing plan and sign up for VeePN.
- Download and install VeePN for iOS from App Store.
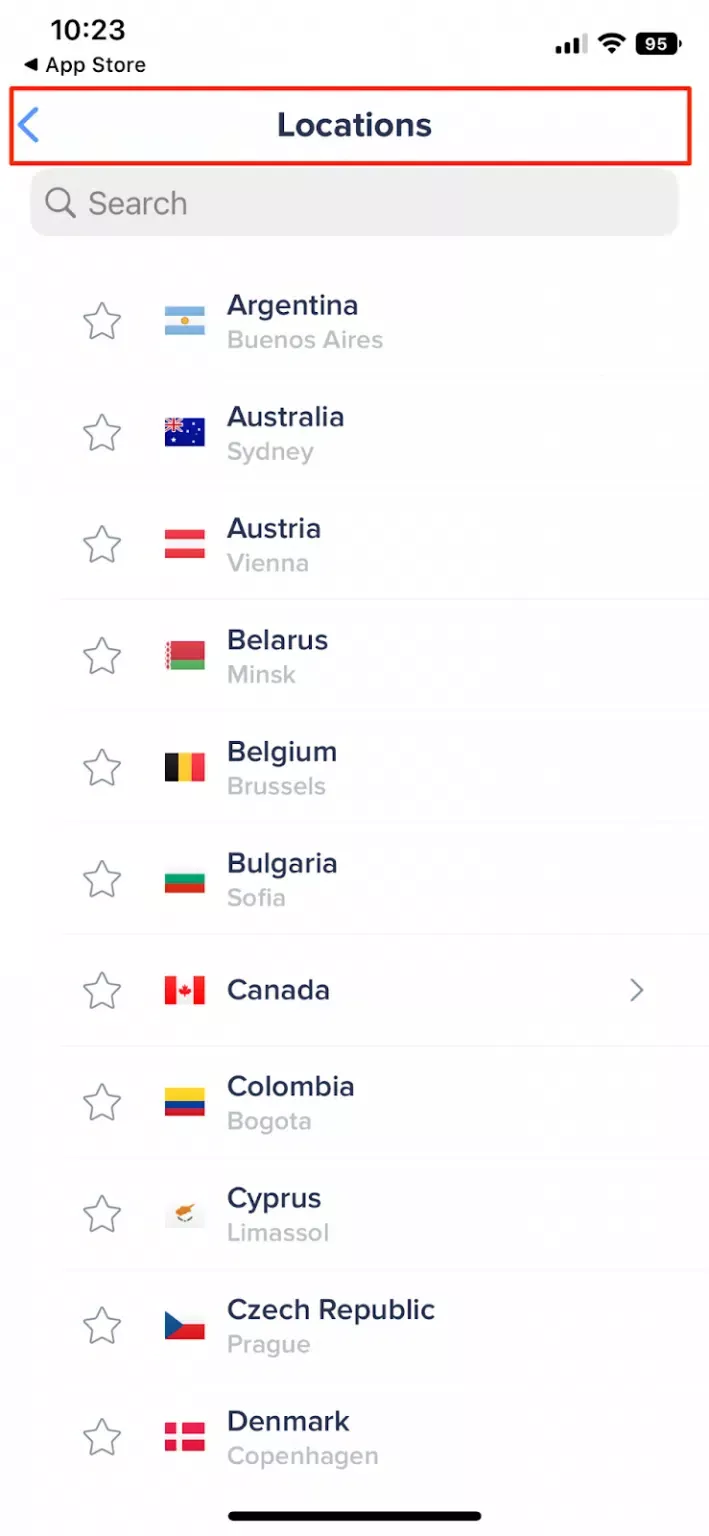
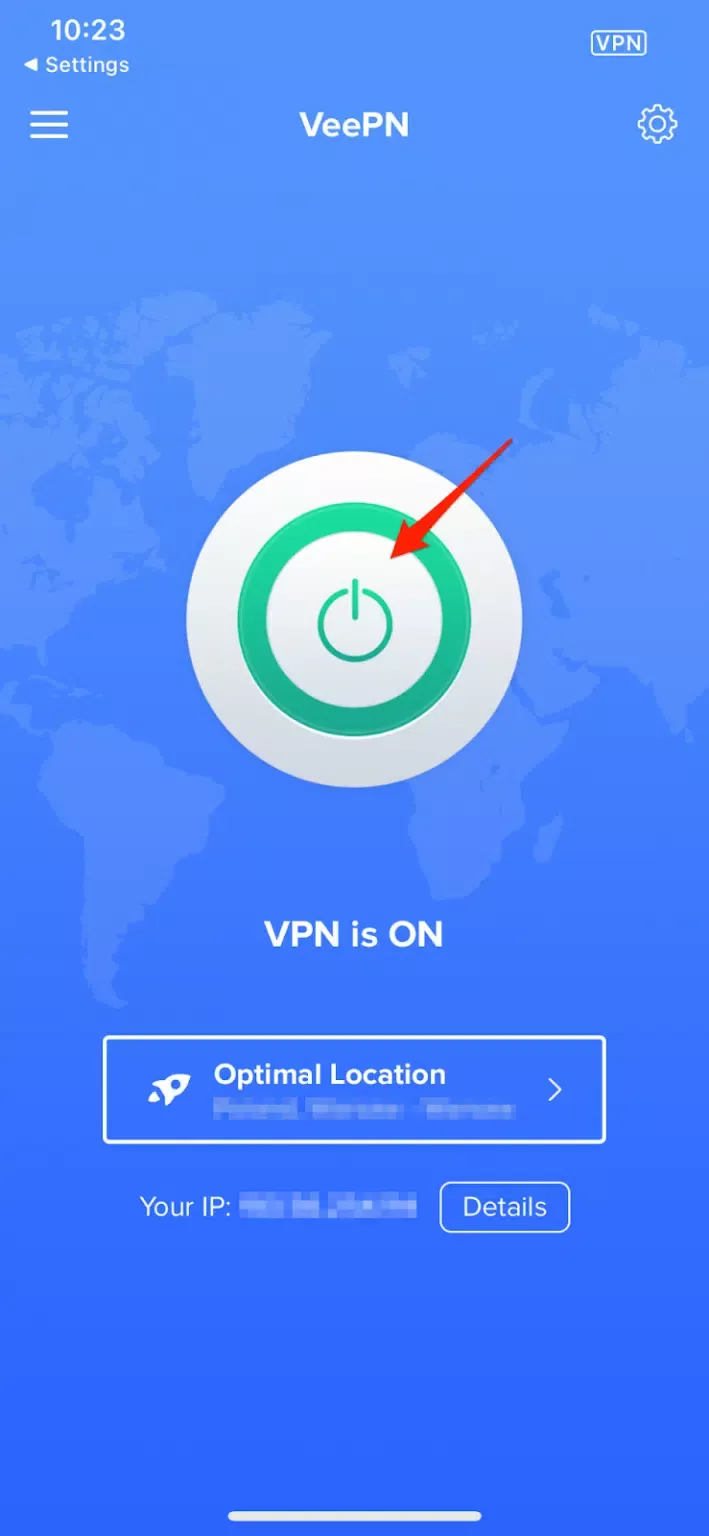
- Open the VeePN app on your iPhone.
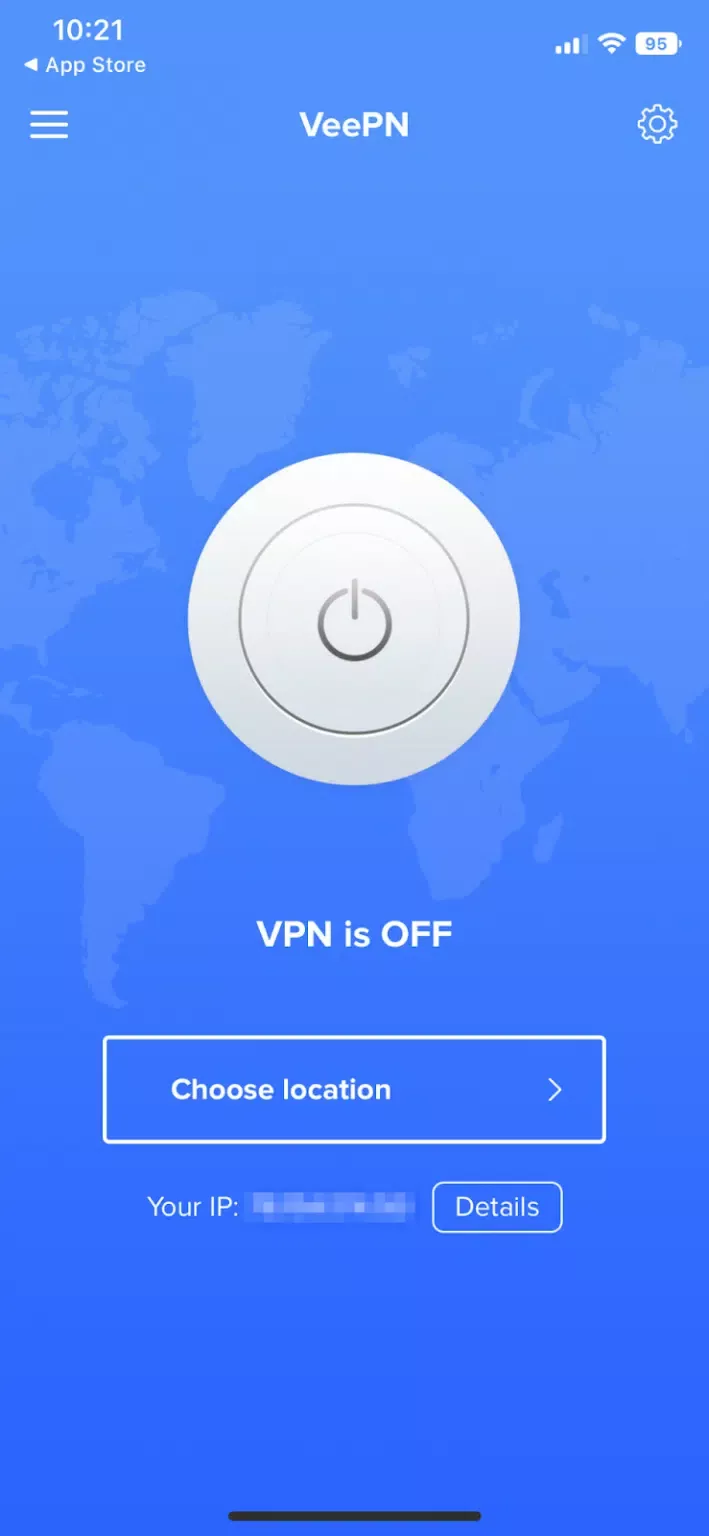
- Select the preferred server location. For instance, if you want to get an Italian IP address, select Italy from the list – and you’re all set. Alternatively, you can use the Optimal Location feature to connect to the closest server for the fastest connection possible.
- Turn your VPN on and enjoy private browsing on your iPhone.
Note that you can use VeePN on iOS 10 or later. For more information, read our comprehensive guide on how to use a VPN on iPhone.
Want to test out VeePN? Pick the most suitable plan and try VeePN for iPhone with a 30-day money-back guarantee!
FAQ: iPhone Privacy Settings
There are many ways to take your iPhone’s privacy and security to the next level. The following methods are the most effective:
- Enable the Find My iPhone feature.
- Come up with a secure passcode and make your phone lock in 15 seconds.
- Control apps’ permissions on your iPhone.
- Regularly update your phone’s OS and software.
- Limit location and other data monitoring.
- Set up a reliable VPN like VeePN on your iPhone.
For more information, check out this article.
You can set different privacy and security settings on your iPhone. Here are the most common ways to protect your personal data on an iOS device:
- Manage apps’ permissions in Settings > Privacy & Security.
- Limit location tracking.
- Disable Siri.
- Use the Find My iPhone feature.
- Allow for automatic updates.
- Install a VPN on your iPhone.
Read this article to learn how to adjust these and other Apple iPhone privacy settings.
It’s highly recommended to turn off the access of your apps to your sensitive data (including your microphone, camera, contacts, and more) if it’s not affecting those apps’ functionality. Also, you may want to prevent Bluetooth tracking, turn off location monitoring for the applications you’re not using, and disable Siri. Read this article to learn more.
iOS is generally considered a private and secure operating system. iPhones have many decent privacy-focused features, from app sandbox to multiple settings users can adjust to protect their personal information from prying eyes. Still, an iPhone doesn‘t provide ultimate privacy. In particular, it won‘t protect you from various online threats, from phishing to malware and hacks. That’s why it‘s worth installing a reliable VPN like VeePN on an iPhone. Check out this article for more details.
Some of the latest privacy features on iPhone are Hide My Email and App Tracking Transparency. Besides, the latest version of iOS encrypts all messages, including the ones sent via iMessage and FaceTime. It means that no third party, including Apple, can access the texts you send and receive on your smartphone.
To handle some basic iPhone privacy settings (location tracking, app permissions, and so on), you just need to enter the Settings app and tap Privacy & Security. However, there are some additional features you may find on your iPhone. Read this article to learn how.
VeePN is freedom
Download VeePN Client for All Platforms
Enjoy a smooth VPN experience anywhere, anytime. No matter the device you have — phone or laptop, tablet or router — VeePN’s next-gen data protection and ultra-fast speeds will cover all of them.
Download for PC Download for Mac IOS and Android App
Want secure browsing while reading this?
See the difference for yourself - Try VeePN PRO for 3-days for $1, no risk, no pressure.
Start My $1 TrialThen VeePN PRO 1-year plan