How to set up VPN on iPhone: A Quick Guide and Easy Guide
Thinking about getting a VPN for your iOS? We get it — security of your devices is a top priority. And a VPN is the perfect tool for guarding your online presence and bypassing geo-blocks. In this article, we’ll cover what else VPN has to offer you and, more importantly, how to set up and run a VPN for iPhone in no time.

Why you need a VPN on your iPhone
A VPN is a versatile product. And you might want to use it in the following cases:
- Bypass geo-restrictions — access content globally by connecting to servers in other regions. With a VPN on, you can avoid restrictions and get access to your favorite services even when away from home.
- To encrypt internet connection and hide your online persona. Imagine the internet realm as this really dark alley swarming with hackers, snoopers, and trackers eager to strike you. And to minimize your exposure to them, VPN’s encryption is a way to go.
- To protect your data on public Wi-Fi networks. On public networks, you lay your data out in the open, making it easy for third parties to get hold of it. You don’t want that to happen, do you?
You get the point — a VPN will do you good. So, how to use VPN on iPhone, and more crucially, which service provider to pick?
VeePN — top-notch VPN for iPhone
“Out of all VPNs, why should I install exactly VeePN?”, you may ask? What does it bring to the table? Let’s find out.
Among the goodies VeePN for iOS provides are:
- Double VPN. With this feature on, the created encrypted tunnel goes through several servers in different countries at once, giving you stronger protection online.
- NetGuard. You can turn it on in the settings to block ads, trackers, and malicious websites. They’ll no longer be a pain in your neck.
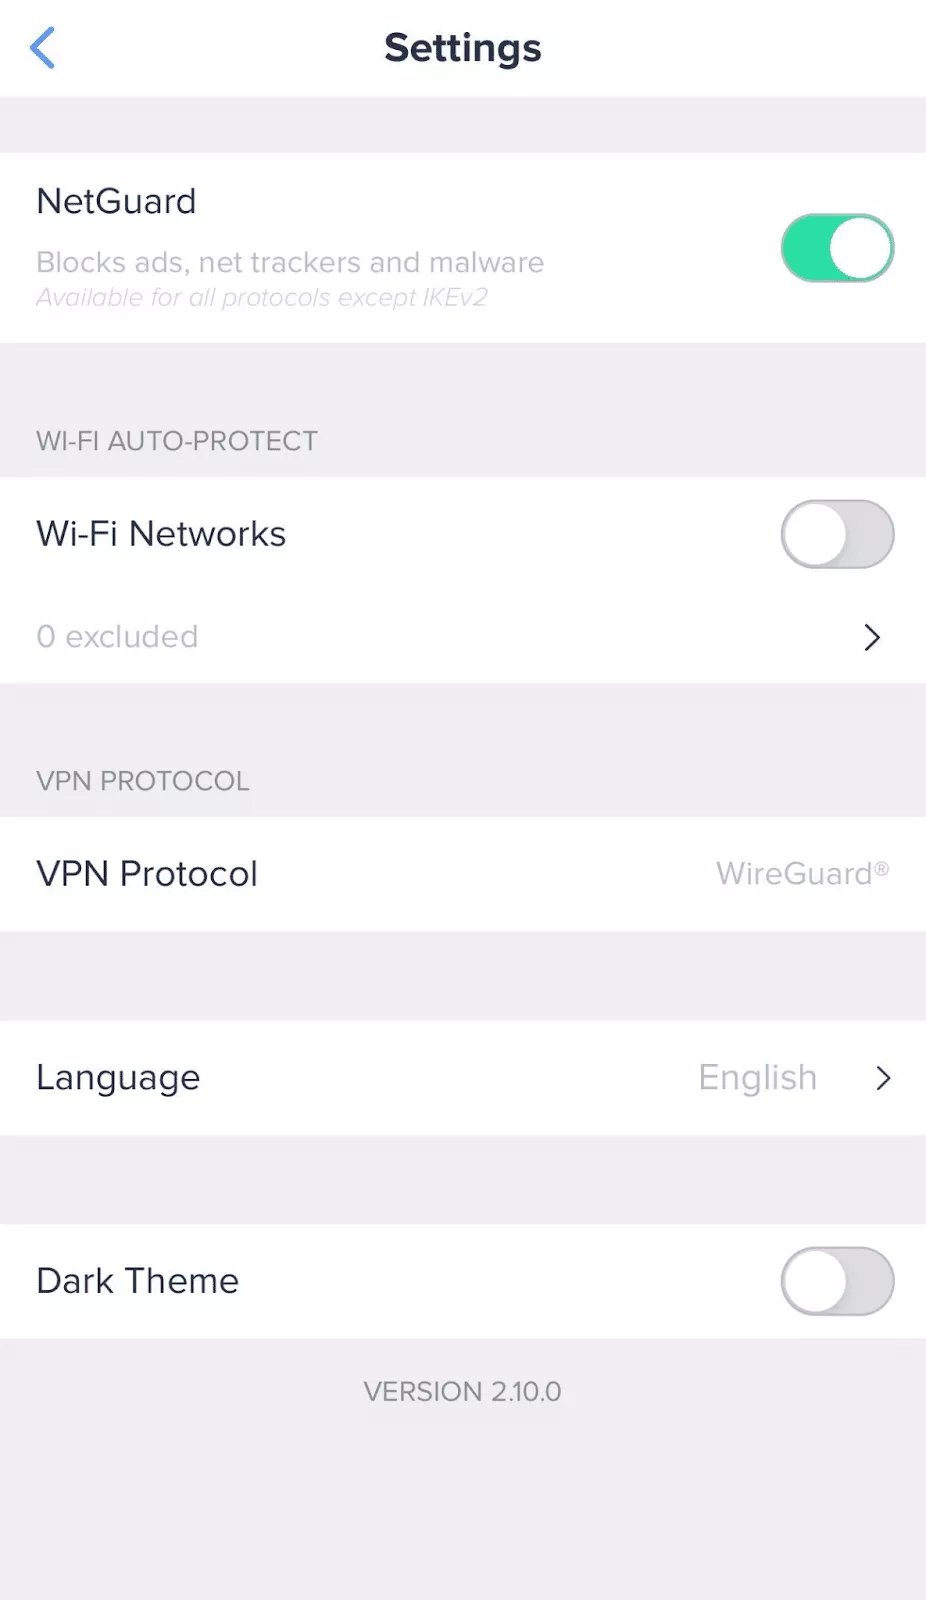
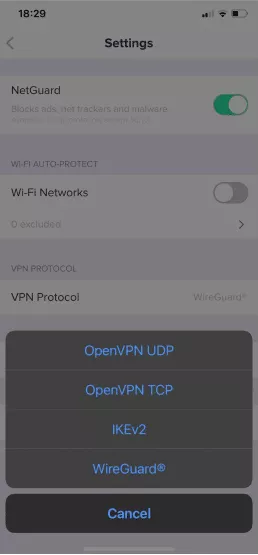
- Multiple VPN protocols. The latest protocols are at your fingertips — OpenVPN TCP, OpenVPN UDP, IKEv2, and WireGuard®. Learn more about them here.
- Optimal location. If this setting is on, you’ll be connected to the server you get the fastest response from.
- Favorite location. You can mark each location as a favorite and add it to a separate list to have an easier time finding them.
By and large, VeePN will guide you through an online realm, which is jam-packed with threats. How? It provides AES-256 encryption, impenetrable for brute force attacks, and an extensive network of 2,500+ servers across 60 countries, shielding all your data automatically even when you are using a public hotspot. You can also have 10 simultaneous connections under one VeePN subscription and use VeePN on your phone, computer, tablet, TV, browser, or even a router.
How to set up a VPN on my iPhone?
Back to our main topic. You can install a VPN on your iPhone in two main ways —- automatically and manually. Let’s see what they’re about.
Automatic VPN configuration for iPhone
You can go about using a VPN on your iOS the easy way — by configuring a VPN automatically, which requires just installing a VPN app. Once you’ve downloaded an app, setup takes just a few clicks.
In this guide, we’ll describe how to set up VeePN step-by-step. However, the iPhone VPN setup steps are similar for whichever app you choose.
How to install VeePN on iOS
Note: VeePN runs on iOS 10 and higher. Click here to know how to check which iOS version you’re using.
Follow these steps to set up VeePN on your iPhone in no time:
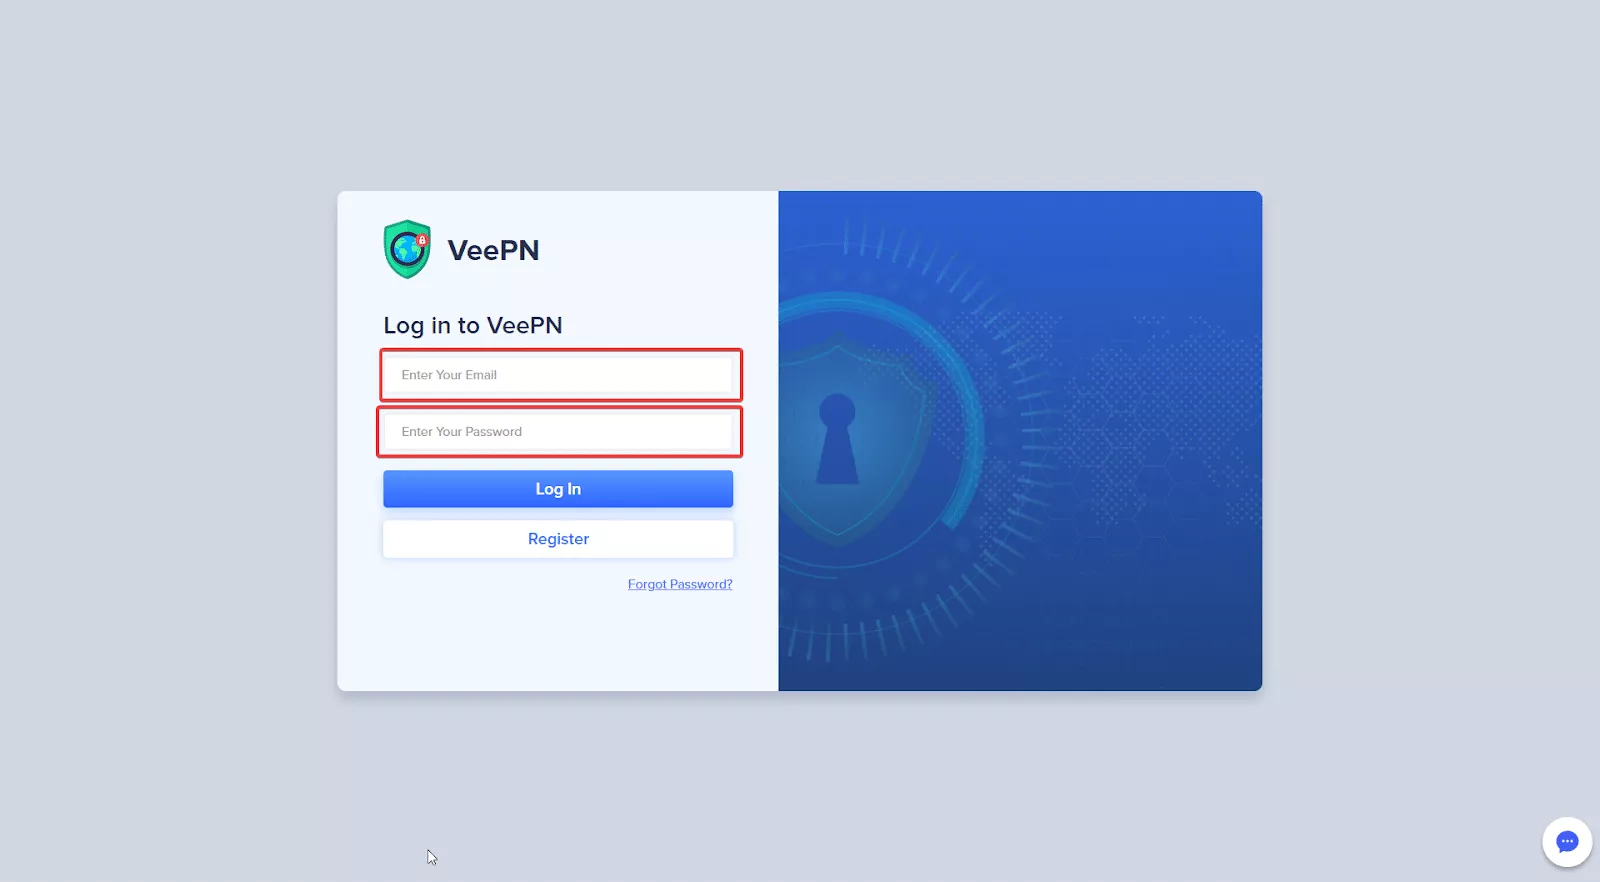
- Open Safari or any other browser you prefer and go to veepn.com/login.
- Click on Downloads and choose iOS.
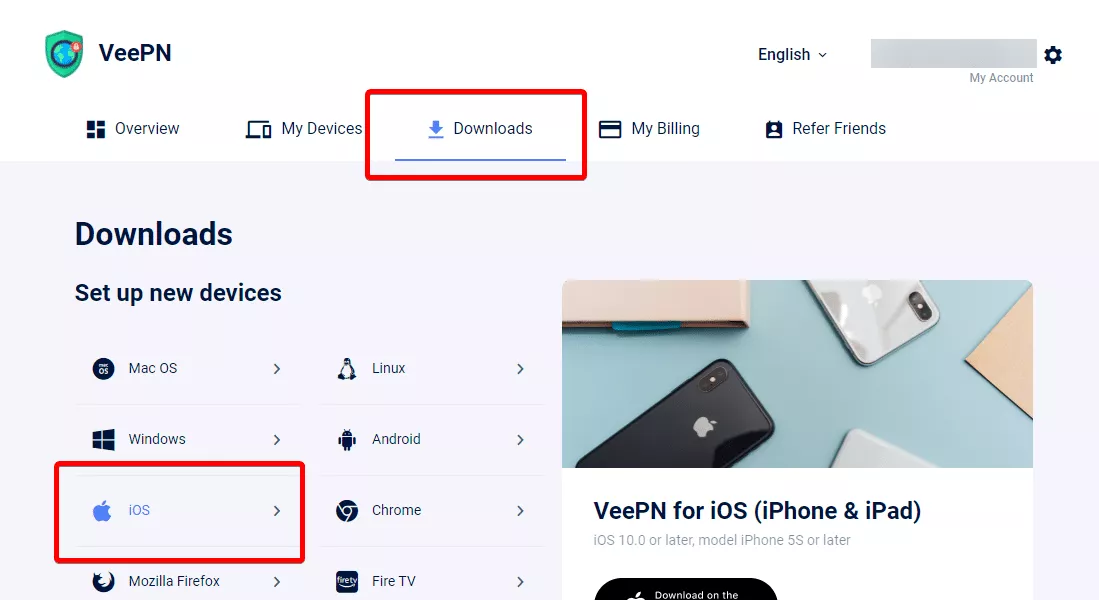
- You will be redirected to the App Store, so download the app from there.
- Open the app, enter your email, password, and log into the account. Or hit ‘Sign up’ below if you don’t have an account yet.
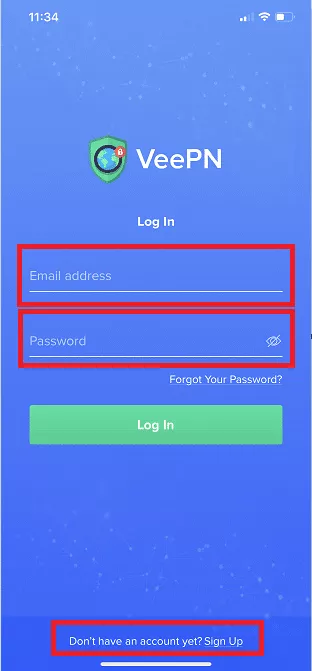
Note: If you’ve already got your subscription, just hit Restore Purchase down below the screen. You can also do that inside the Menu when logged in. Once logged in, you’re going to see Restore Purchases in the Menu.
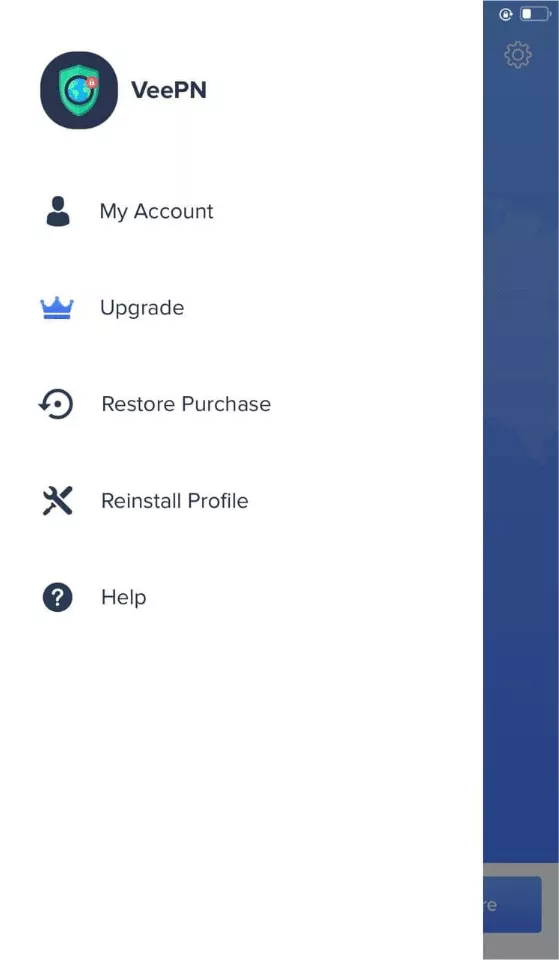
Almost there — you are just a few steps away from a complete Internet protection.
- When you signed up or logged in, tap Allow when the VeePN app asks for permission to add VPN configurations.
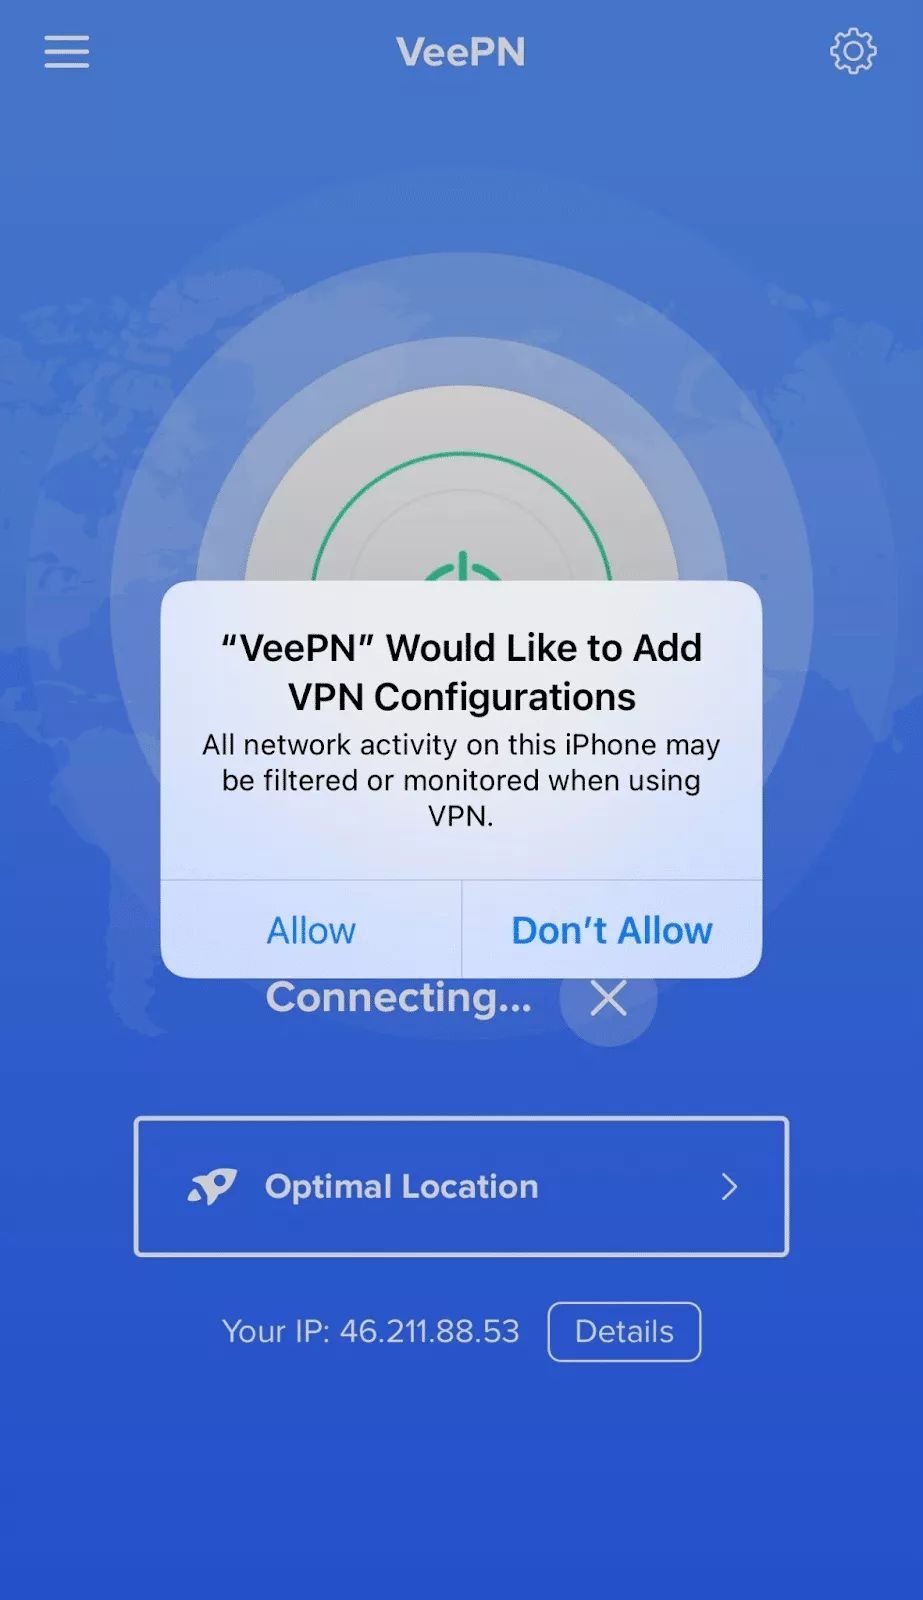
- Enter your passcode or Touch ID.
- Watch a short tutorial on how to use our service.
- And rejoice — you’re on the main screen now!
Connecting is easy
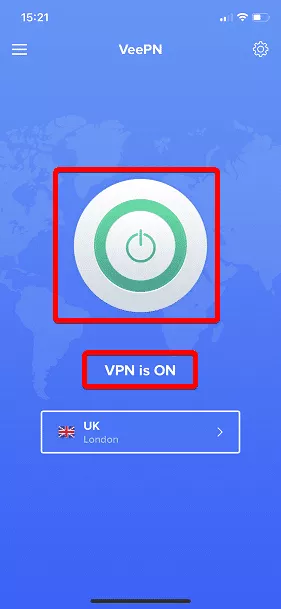
- Tap the big ON button in the middle of the screen. It can take a few moments based on the location and load on the server. To disconnect, tap the button once again.
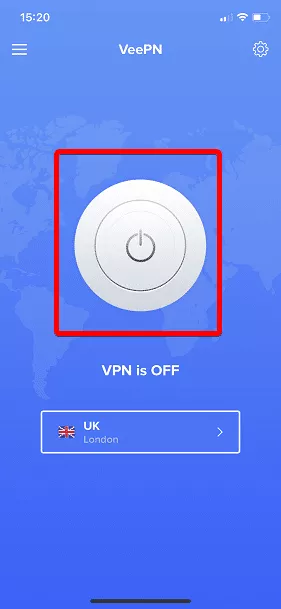
Note: When connecting for the first time, you’ll get the best available server. Otherwise, you’ll be automatically redirected to the last one you used.
- Once the button has changed to white and green, and you see the “VPN is ON” message, you can browse the web safely and freely.
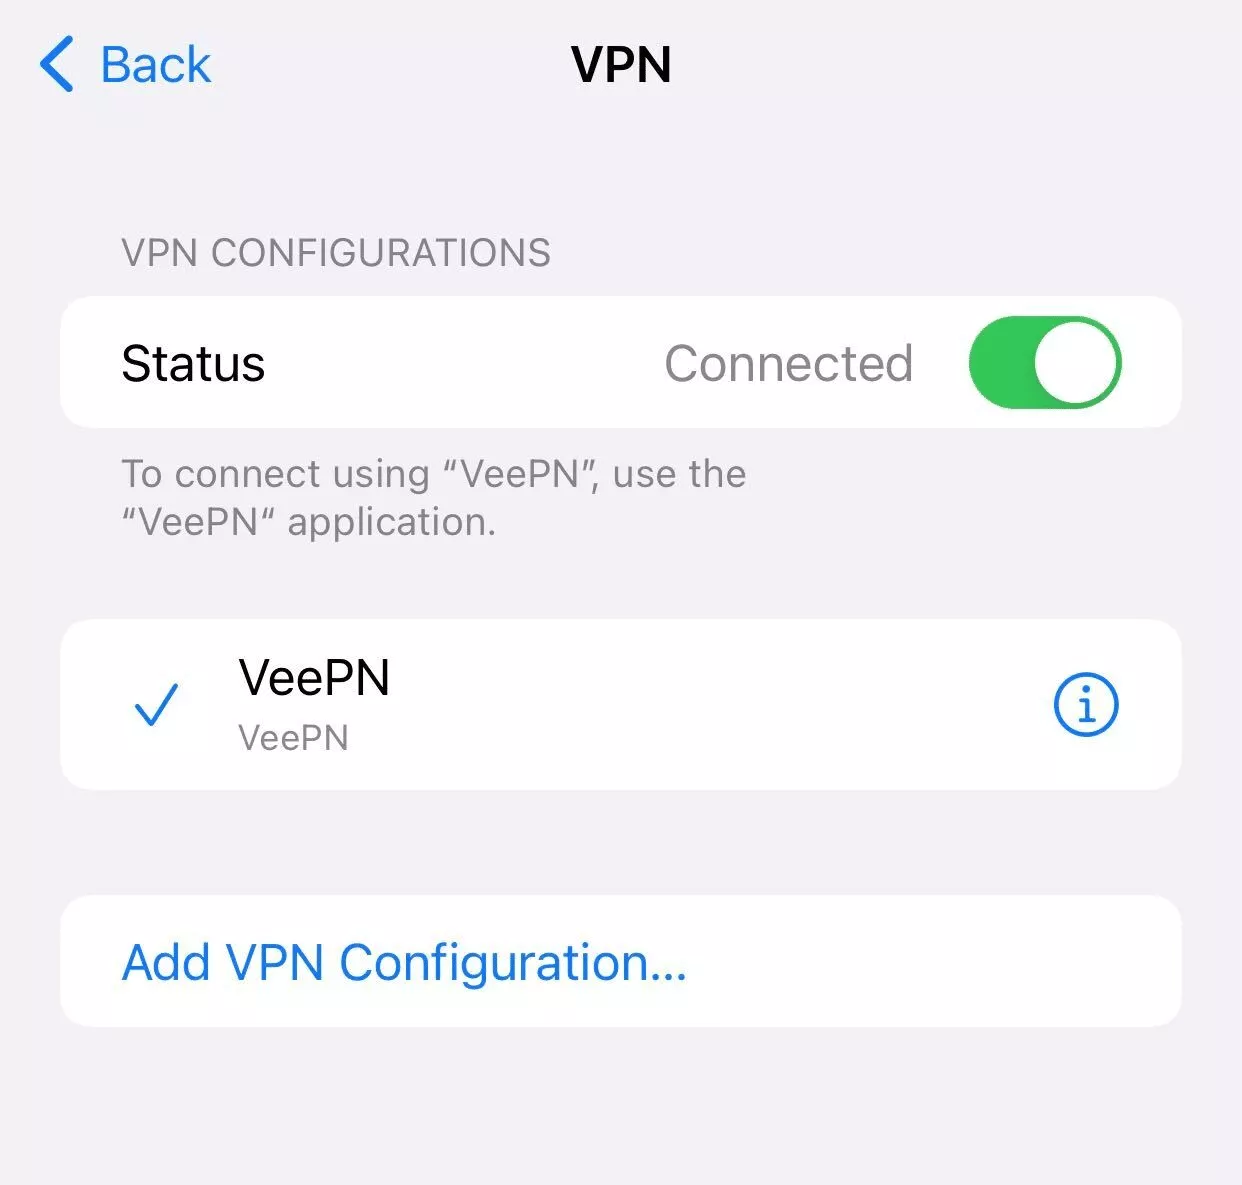
Another way to quickly connect to a VPN is through your iPhone settings. This way, you don’t have to open the VeePN app.
Here’s how to turn on a VeePN via your iPhone settings:
- Open your iPhone’s Settings.
- Click on General.
- Select VPN & Device Management.
- Tap VPN.
- Click the button beside Status. Make sure it’s green. Switch it back off once you’re done using the VPN.
How to choose different server location
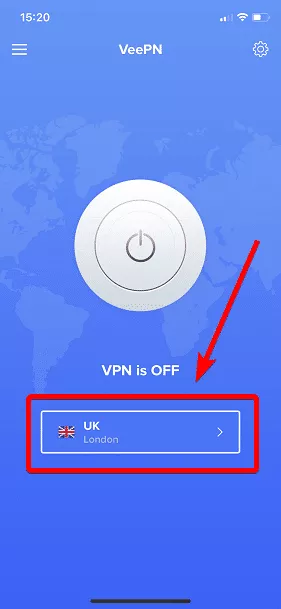
- To connect to a different server, tap on the bar with a country name below the connect button.
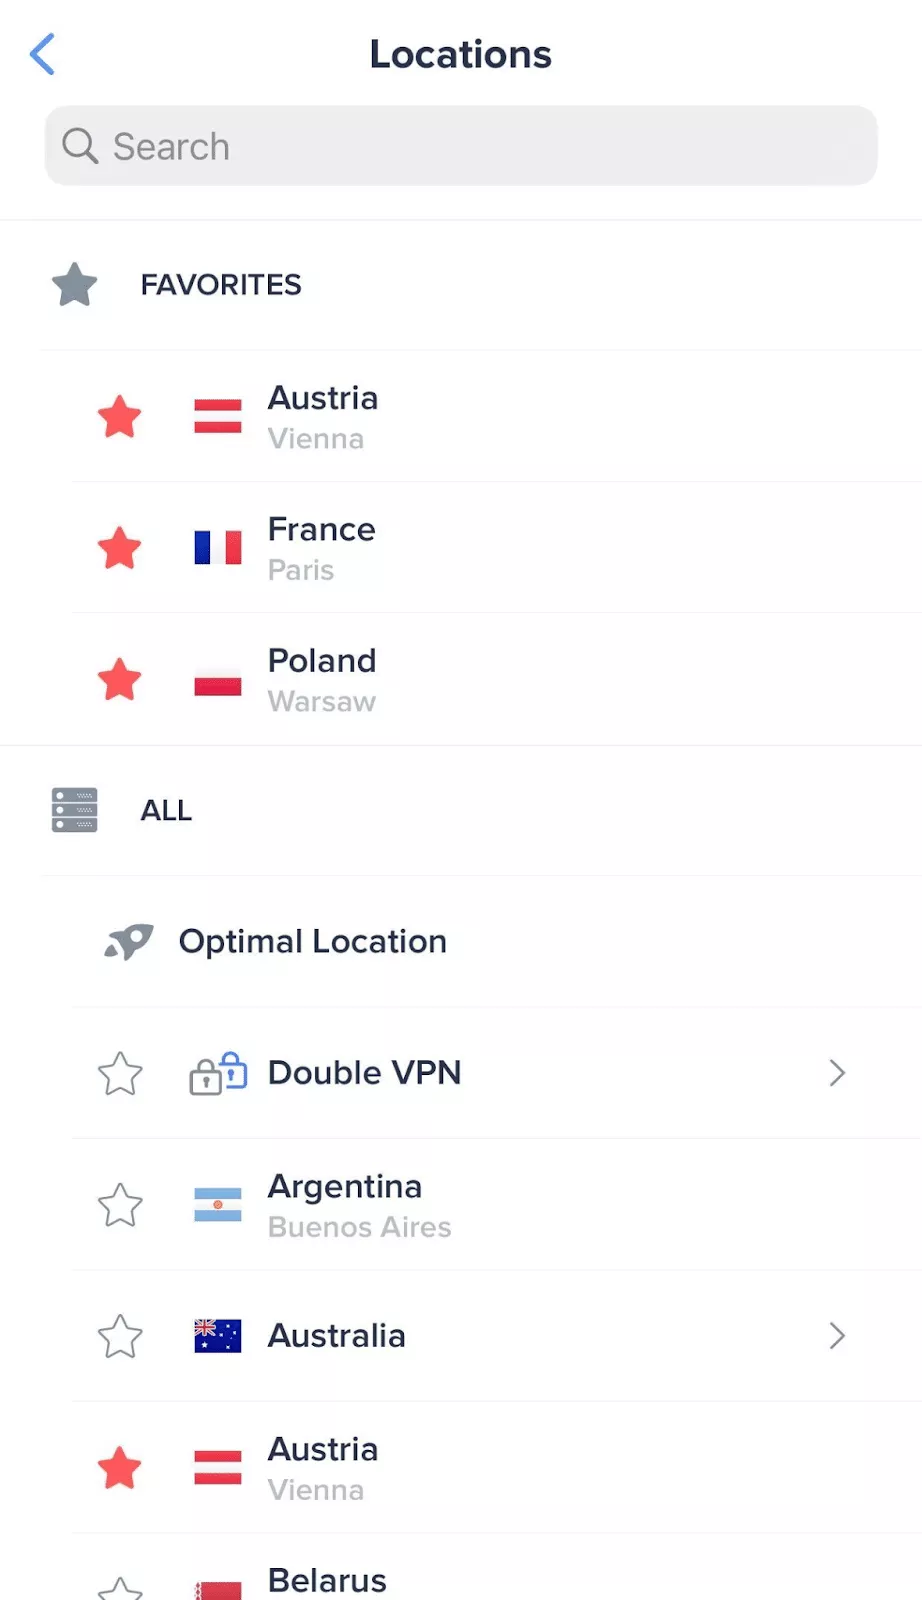
- In Locations, choose a preferred one (Choose Optimal Location if you want VeePN to connect you to the fastest server).
- You can also add preferred servers and countries to favorites as well as connect to a Double VPN for double security.
All clear now!
Manual VPN configuration for iPhone
You can also go the other way, but it’ll require a bit of a technical know-how and take a little longer. To conduct a manual VPN configuration for iPhone, you’ll still need a VPN provider since your iPhone doesn’t have a built-in VPN.
Once you’ve chosen a VPN service, look up the following:
- Type
- Description
- Server
- Remote ID
- User authentication
- Username
- Password
With this information, you can then proceed to set up VPN configuration on iPhone:
- Launch your iPhone’s Settings and select General.
- Tap VPN & Device Management.
- Tap Add VPN Configuration.
- Select the type of your network by tapping Type.
- Choose the network type — IKEv2, IPSec, or L2TP.
- Fill in Description, Server, and Remote ID.
- In the Authentication section, enter a Username and Password.
- Tap Done.
Now, with your network configured, you can turn your VPN on and off as described above and surf the web without the need to look over your shoulder.
Wrap-up
That’s it — we’ve covered how to set up VPN on iPhone in several ways. A piece of cake, right? And you don’t need to go far to find a reliable VPN service — test-drive VeePN with its large 2,500-server network, solid security, and many perks. Secure your presence online and stream all the content you want. No extra configuration needed — just set up VeePN on your iPhone with our easy step-by-step tutorial and connect to one of the servers. Enjoy the Internet with no limits and speed caps.
FAQ: How to set up VPN on iPhone
No. Although an iPhone does come with a VPN feature (Settings — General — VPN & Device Management) for you to configure a VPN connection, you’ll still need a VPN app. Good news is that today you can find a number of user-friendly VPNs that are highly reliable and optimized for iPhones.
You can come across many free VPNs on the market and download them from the App Store. But, however tempting those are, we don’t recommend using free VPNs, since they’ll still come at a cost to you. You may not pay in money, but in limited protection and a risk of your data being exposed.
You can indeed find a number of free VPN providers for your iPhone, but beware of their poorer performance, limited protection, and increased exposure of your data. So, it’d be better to look for paid options. To make sure that a specific VPN service is the one, test-drive it on a free trial.
You’ll need to configure a VPN manually in your iPhone’s settings. However, you still have to choose a specific VPN provider and dig up some information about it to proceed with configuration. Look through this article to know what steps are needed.
A VPN might slightly slow down your Internet speed on iPhone due to intensive data encryption. But with a premium VPN for iPhone like VeePN, that’s won’t be a problem. VeePN uses advanced tunneling protocols like WireGuard that strikes a perfect balance between connection security, stability, and speed.
Here are some common issues associated with VPN connection and ways to troubleshoot them:
- Connection drops: Switch your VPN server or check your Internet connection.
- Slow speeds: Try using a different protocol (like WireGuard or IKEv2) or change your VPN server.
- VPN not working: Ensure your VPN is up to date and restart the app.
VeePN is freedom

