Remote Desktop Over VPN: Connect to Your PC From Anywhere Without Risks
Picture this: you finish dinner, open your laptop, and with two clicks you’re steering your office workstation as if you were still at your desk. That’s the promise of a remote desktop over VPN. By wrapping the remote desktop protocol (RDP) in a hardened VPN connection, you dodge port‑scanning bots and coffee‑shop snoops while keeping the experience smooth enough for real work.
In the article, we reveal how it works, and give some tips to secure your Internet usage.


Remote desktop connection: flip the switch and drive your office PC
Getting the steering wheel ready comes first. A clean remote desktop connection means fewer hiccups later:
1. Enable the host
On Windows Pro, open System > Remote Desktop and flip the switch for incoming connections. Mac users can install Microsoft Remote Desktop Host from the App Store.
2. Lock down login credentials
Create a dedicated account with a long pass‑phrase or, better yet, add two‑factor prompts to block password‑spray bots.
3. Choose a secure protocol
Stick with the latest RDP build on Windows 11 or tunnel RDP through an OpenVPN server for legacy machines. OpenVPN rides on port 1194 and supports TLS, making it harder to spoof than a manual PPTP VPN connection.
Your steering is in place. Now it’s time to set up a secure connection that keeps others from tracking your activity.
Remote access without stress: build your private lane
A virtual private network turns the noisy public Internet into a calm, private road back to devices on your local network. Here’s a walk‑through, from flipping the first switch on your router to watching your office desktop appear on‑screen.
Turn your router into a VPN server
- Find the VPN menu.
- Log in to your router admin panel (usually something like “192.168.0.1”)
- Look for a tab called “VPN,” OpenVPN,” or “Server.” If it offers only PPTP or L2TP, stop and install third‑party firmware or buy a router that supports OpenVPN server mode, as old protocols leak like a sieve.
Now, you need to generate keys and a profile
- Click “Enable VPN server”
- Choose “OpenVPN protocol”
- let the router create an .ovpn profile. This tiny file contains the server’s public key, your internal IP address pool, and its public IP address (or dynamic‑DNS name).
- Save that profile somewhere safe. You’ll feed it to every device later. Think of it as the master key to your new private lane.
2. install and configure your VeePN (VPN) client
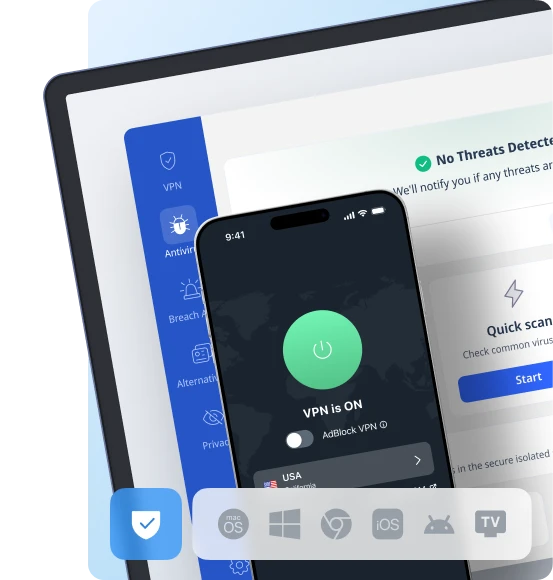
- Grab the VeePN app, not a random VPN tool. Head to VeePN’s download page and install the desktop client for Windows or MacOS. Mobile users can fetch the iOS or Android app from the stores.
- Sign in and pick a nearby server. Log in with your credentials and choose a location in (or close to) the same country as your home PC. Shorter hops keep remote desktop connection lag low.
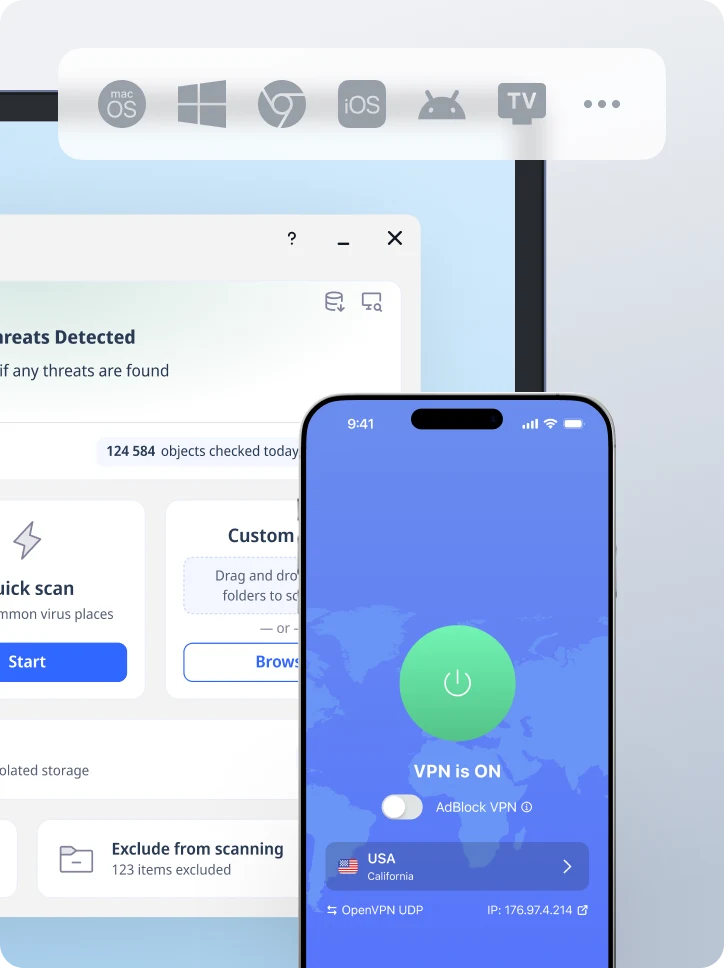
- Tap ”Connect and verify.” Once the switch flips to “Connected,” the VeePN dashboard shows the new internal IP address it has assigned (10.x.x.x or 172.16.x.x). That means all traffic, including RDP, now rides inside VeePN’s encrypted tunnel.
- Enable LAN access on the host side. Run VeePN on your office or home PC as well (or install it on a compatible router). With both ends linked to the same VeePN server, they behave as if they share one secure local network..
- Double‑check the shield icon. A green shield confirms the tunnel is active.
3. Aim remote desktop at the correct IP address
- Find the host PC’s LAN address. On the computer you plan to control, open Command Prompt and type “ipconfig”. Note the IPv4 Address (for example, 192.168.1.155). This is the target inside the tunnel.
- Launch remote desktop. In Windows, search “Remote Desktop Connection.”On MacOS, use Microsoft Remote Desktop from the App Store.
- Enter the address and port. Type the 192.168.x.x number you just wrote down. Leave the port number at 3389 unless you changed it.
- Supply login credentials. Enter the username and password for that PC. If Network Level Authentication is on (recommended), you’ll see a certificate prompt — click “Yes.”
- See your desktop appear. After a brief handshake, your office screen pops up. You’re now in a fully encrypted remote session that no coffee‑shop snooper can read.
Secure access checklist: seal every crack before hackers knock
Your remote desktop over VPN setup is only as strong as its weakest hinge. Run through these guardrails every time you open that tunnel.
Hide RDP behind VeePN at all times
Never forward port 3389 on your router. Instead, install VeePN on both the host PC (or a VPN‑capable router) and the laptop you travel with, then connect them to the same VeePN location. That keeps RDP visible only on VeePN’s internal network, so port‑scanning bots hit a dead end. Halcyon’s May 2025 threat review ranks exposed RDP ports and misconfigured VPNs as the two most common ransomware doorways, which is a solid proof that a private lane matters.
Patch the VPN gateway before the OS
Attackers often breach the VPN appliance first, then pivot to Remote Desktop. When Ivanti Connect Secure users lagged on updates (CVE‑2025‑0282), intruders ran remote code on the gateway and jumped straight into internal RDP hosts, dropping the BUSHFIRE backdoor in the process. Apply vendor firmware the moment it appears, then tackle Windows updates.
Lock credentials behind MFA
A stolen password ruins even perfect network design. After hackers grabbed AnyDesk’s production signing keys in 2024, the company forced a global password reset to stop fraudulent logins. Add two‑factor prompts (code, hardware key, or push) to both your VeePN account and the Windows user you’re remoting into. This one swipe foils credential‑stuffing bots.
Set connection lockouts and watch the logs
Configure Windows to block an IP after five failed log‑ons. VeePN’s Threat Blocker filters known brute‑force command‑and‑control domains, while its Kill Switch cuts all traffic if the tunnel hiccups—so no stray packet ever escapes unencrypted.
Audit the setup quarterly
Apply an external port‑scanning service. You should see zero hits on 3389 or 22. Switch VeePN server locations every now and then: new IPs disrupt long-running recon scripts, and audit who still requires RDP access. Disable an account that has not been logged in months before somebody else does it.
You can’t change how attackers operate, but you can slam every easy door shut. Here’s how VeePN helps.
How VeePN shields every remote desktop move
These are the benefits that VeePN brings to the table:
- End‑to‑end encryption for sensitive data. VeePN’s AES‑256 ciphers enclose RDP packets, so sensitive information like payroll files stays unreadable in transit.
- IP masking and dynamic endpoints. VeePN provides you with a new IP address at each session, and the threat actors cannot profile your working patterns or initiate targeted sprays.
- Smart split tunneling. Route only the traffic on your remote device down the tunnel, leaving the video traffic outside in order to save bandwidth.
- Threat blocker & DNS shielding. The NetGuard feature does not allow loading malicious domains that imitate Windows servers to update the OS and minimize drive-by malware, which targets to hijack RDP.
- Cross‑platform reach. One app secures Windows, macOS, iOS, Android, Linux, and browser extensions. Overall, VeePN covers up to ten gadgets per subscription.
Try using VeePN, as it backs every plan with a 30‑day money‑back guarantee.
FAQ
Yes. A VPN ensures RDP traffic travels inside an encrypted tunnel, hiding the port and your IP address from scanners. Discover more details in this article.
Absolutely. Install VeePN, connect to your VPN server, and you can securely reach printers, NAS boxes, and PCs on your local network. Discover more details in this article.
You bet. A reliable VPN provider like VeePN keeps file transfers private and fends off throttling so video calls and RDP feel native. Discover more details in this article.
- Connect to your VPN.
- Open Remote Desktop.
- Type your machine’s internal IP or server name.
- Sign in and start the RDP session.

VeePN is freedom
Download VeePN Client for All Platforms
Enjoy a smooth VPN experience anywhere, anytime. No matter the device you have — phone or laptop, tablet or router — VeePN’s next-gen data protection and ultra-fast speeds will cover all of them.
Download for PC Download for Mac IOS and Android App
Want secure browsing while reading this?
See the difference for yourself - Try VeePN PRO for 3-days for $1, no risk, no pressure.
Start My $1 TrialThen VeePN PRO 1-year plan