How to Grant Permission for Website to Use Camera (And Stay Secure Doing It)
Websites frequently request access to your webcam for dozens of justified reasons. Be it when you want to join a Google Meet interview, have to verify your identity for online banking, or even change your appearance when playing a quick AR-powered game. But every pop-up that wants camera access also opens a tiny privacy door.
After reading this article, you’ll learn how to grant permission for websites to use your camera safely in every major browser, spot the red flags, and add an extra shield with VeePN.


2. Step-by-step guide on how to grant permission for website to use camera
Chrome browser
Mozilla Firefox
Safari
Edge browser
3. How scammers may exploit your camera access
4. Best practices before you allow camera access in your browser
5. VeePN – your extra layer of protection
FAQ
Why legit websites may ask for camera and mic access
Before we go straight to the steps, let’s see the reasons why normal and trustworthy sites ask for your camera and microphone access:
For video calls and ID checks
Sites like Zoom or Google Meet obviously need camera or microphone permissions for you to communicate with your colleagues during meetings. Same with banking or document apps that want a live photo for identity verification. These are normal requests, but only if you trust the site you’re on.
For customer support or AR features
Some support pages ask for microphone access so you can talk to an agent, or use your cam to scan a QR code or document. Shopping tools may use AR filters or virtual try-on options that trigger your webcam. These can be useful, but not every site is transparent about why it’s requesting access.
That out of the way, let’s move to steps on how you can grant permission for websites to use your webcam or mic.
Step-by-step guide on how to grant permission for website to use camera
Just follow the steps that match the browsers and devices you use down below:
Chrome browser
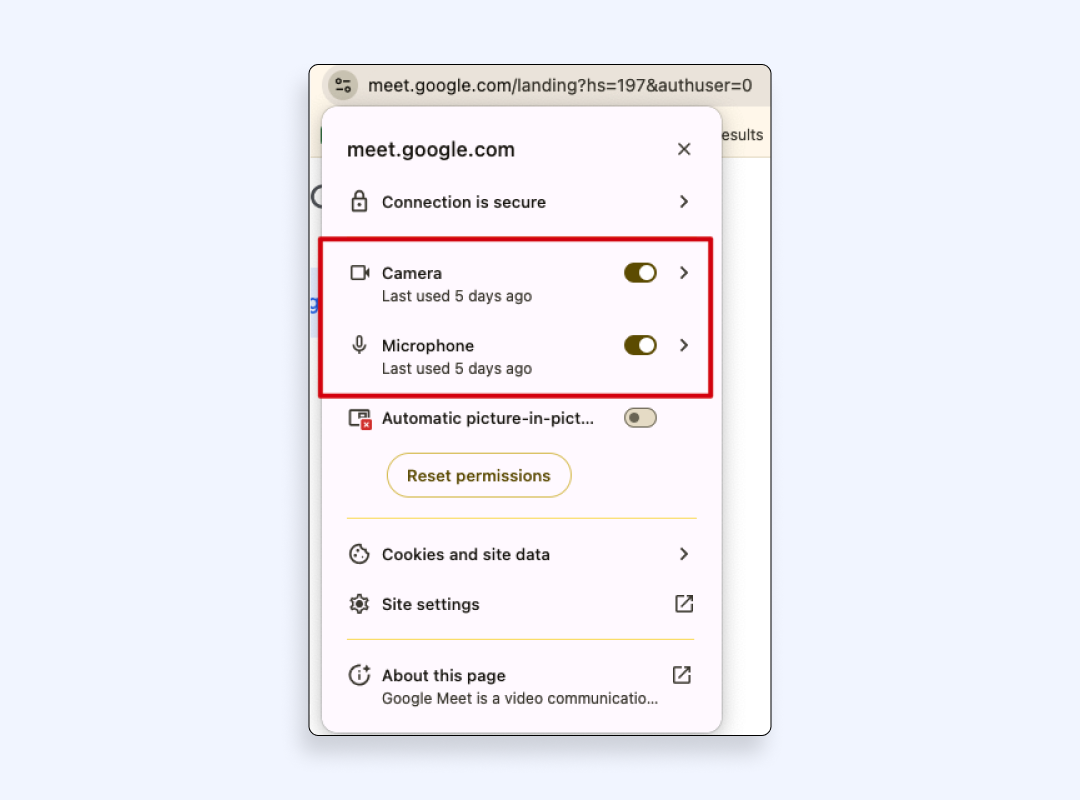
1. Open the site, click the padlock in the address bar.
2. Choose the camera and switch to “Allow.”
3. If you need audio too, flip the microphone permission to “Allow.”
If you want to tweak it later, do the following:
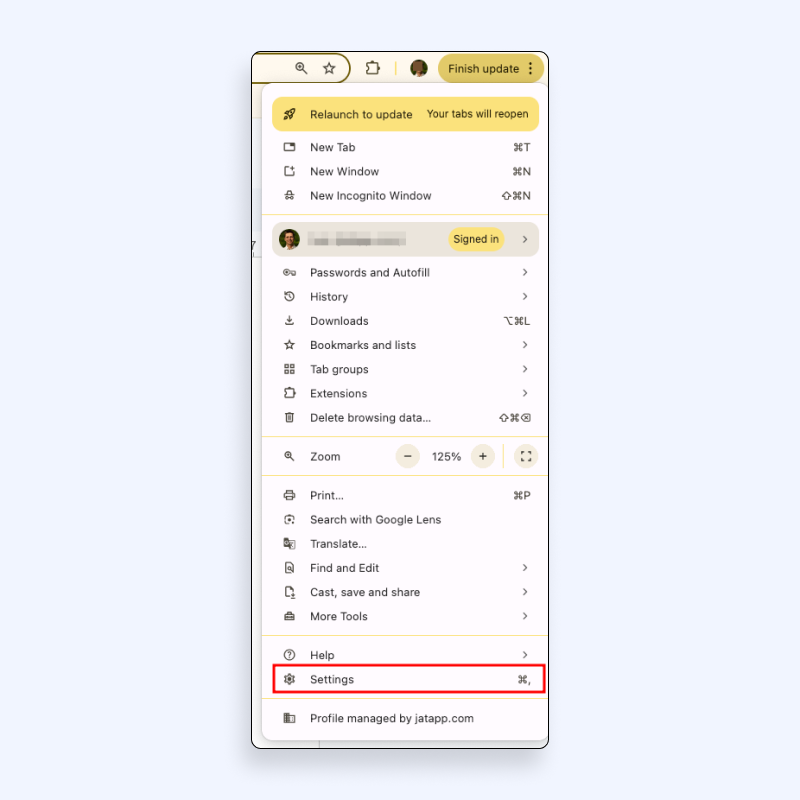
1. Click the three dots (⋮) in the top-right corner of the screen.
This opens the main menu where all your browser settings live.
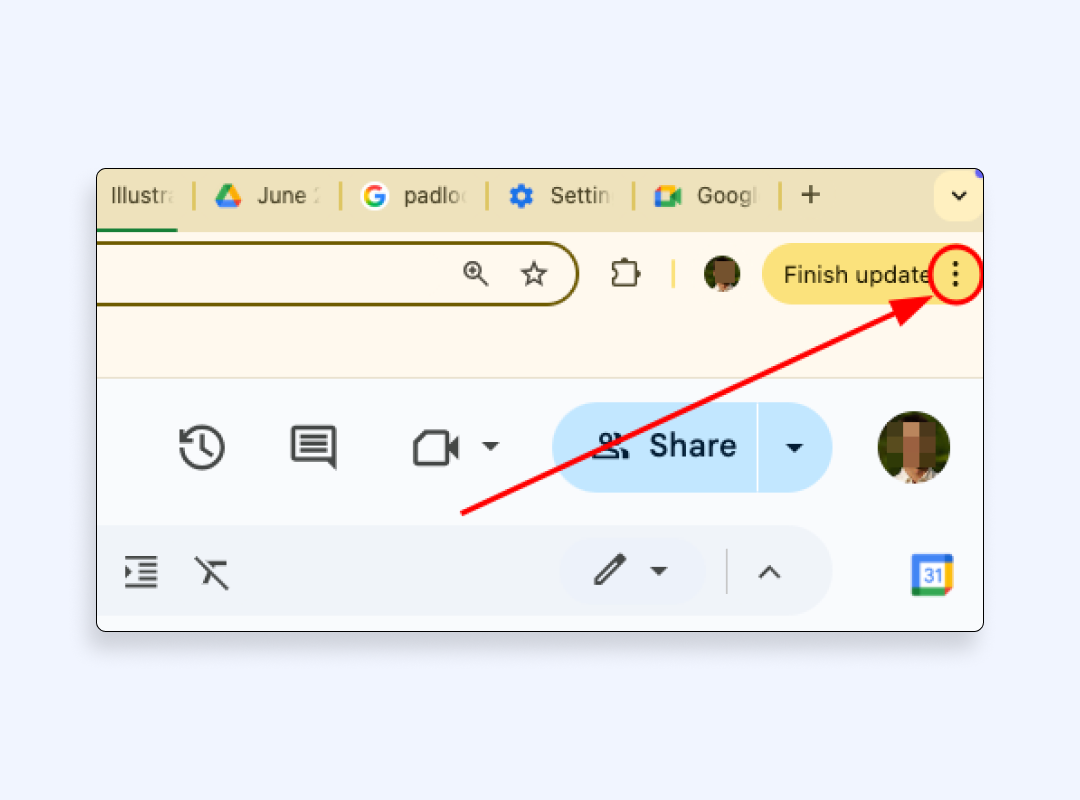
2. Click on “Settings.” You’ll be taken to a new tab with Chrome’s settings dashboard.
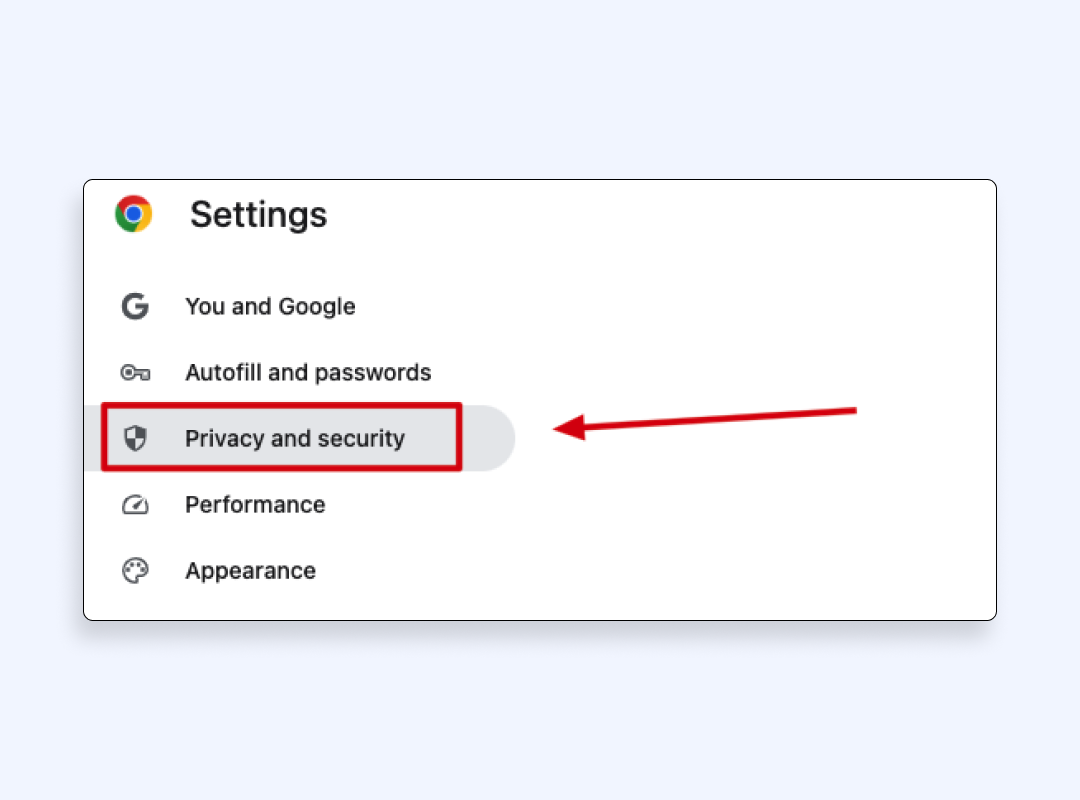
3. In the left sidebar, choose “Privacy and security.” That’s where Chrome keeps things like site permissions, security settings, and more.
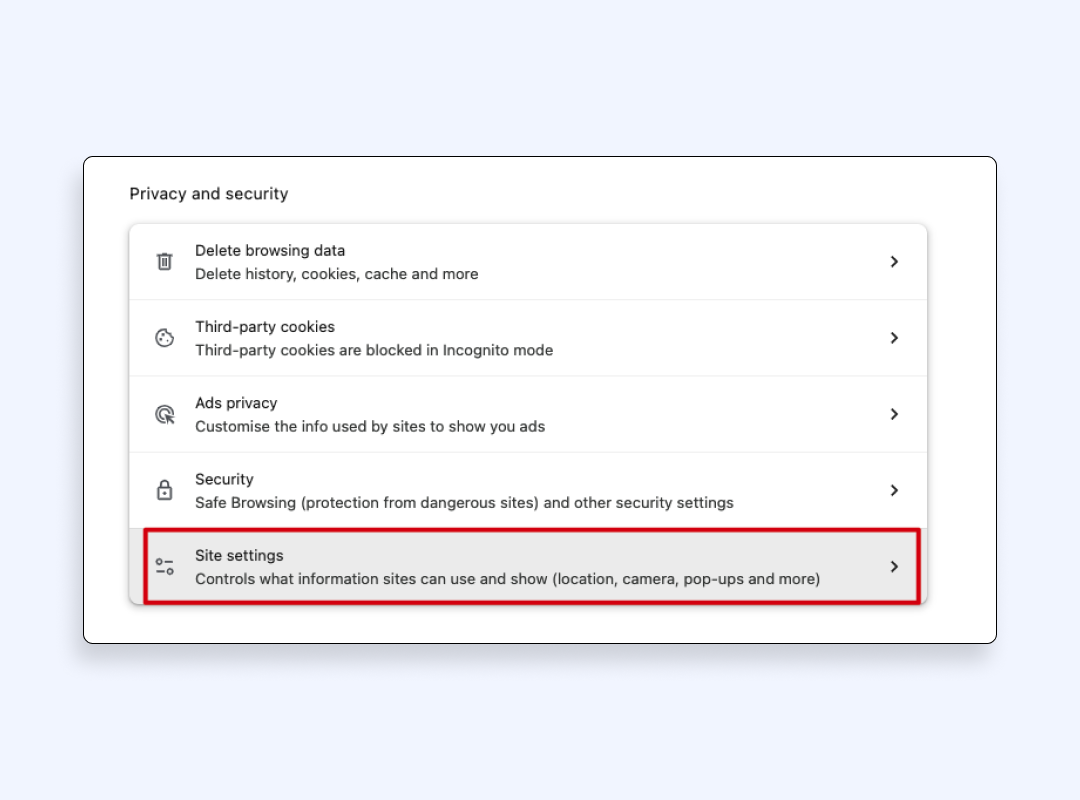
4. Click on “Site settings.” This is where you control what websites can do, like access your camera, microphone, or send notifications.
5. Scroll down and click “Camera.” You’ll see a list of all the sites that have asked for camera access.
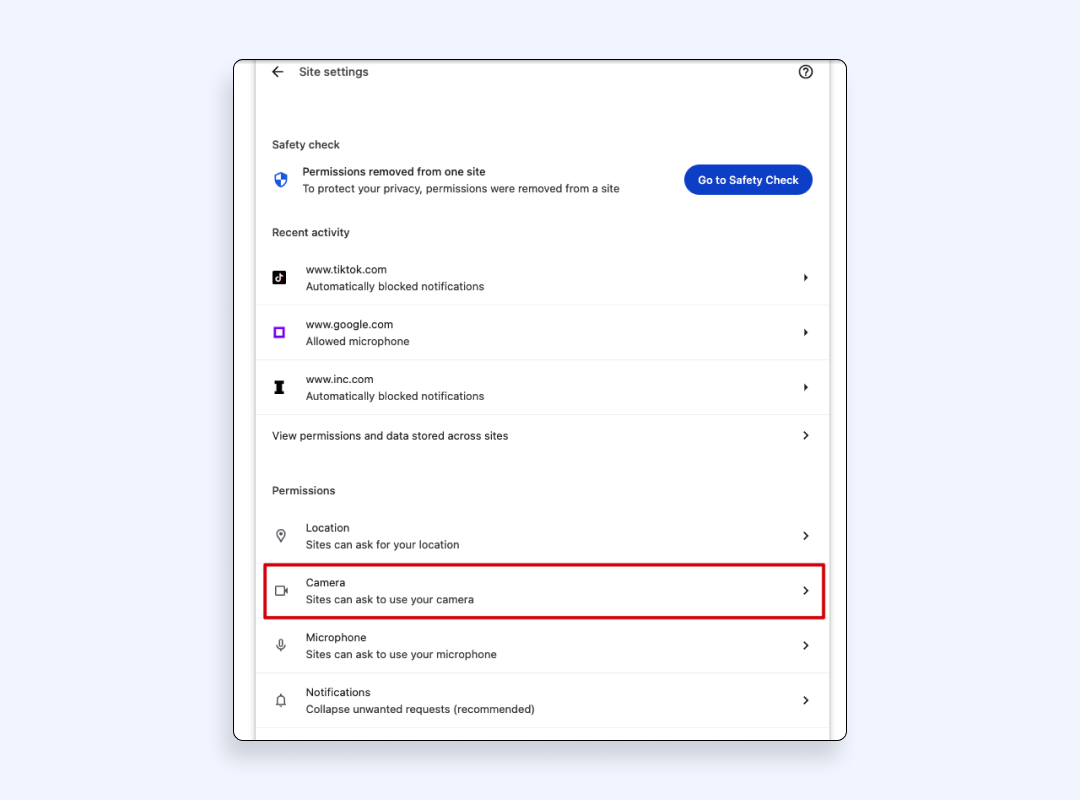
6. Click the dropdown next to each site to “Allow” or “Block access.”
To unblock Chrome camera permissions, just switch the setting back to “Allow” for that site.
If you want to remove all permissions, then toggle the setting at the top to block all by default. When needed, do the same for “Microphone” right below the Camera section. Make sure both camera and microphone access are only given to websites you fully trust.
Mozilla Firefox
Firefox makes it pretty easy to manage camera and microphone access as well:
1. Go to the site that’s asking for camera access.
2. After a small box will show up at the top-left, click “Allow” if you trust it, or “Allow for this session” if you just need it once. If something feels strange, hit “Block.”
3. If you missed the pop-up, then look for the camera icon next to the site’s address. Click it to quickly change what the page is allowed to use.
To see all your permissions in one place:
1. Open Mozilla Firefox Settings
2. Scroll to “Privacy & Security”
3. Find “Permissions” and click “Camera.” You’ll see a list of sites with access.
4. Remove anything that looks suspicious or just clear out the old ones.
Safari
Safari often asks for camera access the very moment a site needs it. Therefore, you’ll usually see a pop-up right away.
Hit “Allow” if you trust the site, “Deny” if you don’t, or “Allow once” if you just need quick access without keeping it on.
If you want to change camera access later on a Mac:
1. Open Safari
2. Go to “Settings”
3. Choose “Websites”
4. Click on “Camera.”
You’ll get a list of sites that have asked for access. From there, decide what sites can keep it and who should be cut off.
If you are using an iPhone or an iPad
1. Go to your main “Settings” app
2. Scroll to “Safari”
3. Tap “Camera”
You can toggle permissions for each site just like on desktop.
Edge browser
Here’s how to enable or manage camera access in Microsoft Edge:
1. Visit the site that’s asking for camera access
2. Click the padlock next to the URL. You’ll see the site’s settings
3. Find “Camera” and switch it to “Allow” if you trust it.
To manage all sites in one place
1. Go to “Settings”
2. Find “Cookies and site permissions”
3. Tap “Camera.” You’ll see a list of sites that have asked to use your camera.
4. Block or allow websites as needed.
If you don’t want to keep camera access on, choose temporary permission. It resets when you close the tab, and nothing will stay saved.
Now, before you go manage access in the browser of your choice, let us tell you how con artists make use of such granting permissions and ways you can protect yourself from those dangers.
How scammers may exploit your camera access
Even legit platforms have had serious security problems regarding protecting your camera access, and shady sites know how to take advantage of tech mistakes and human flaws. Here is what you risk when clicking the “Allow” button and even without doing it:
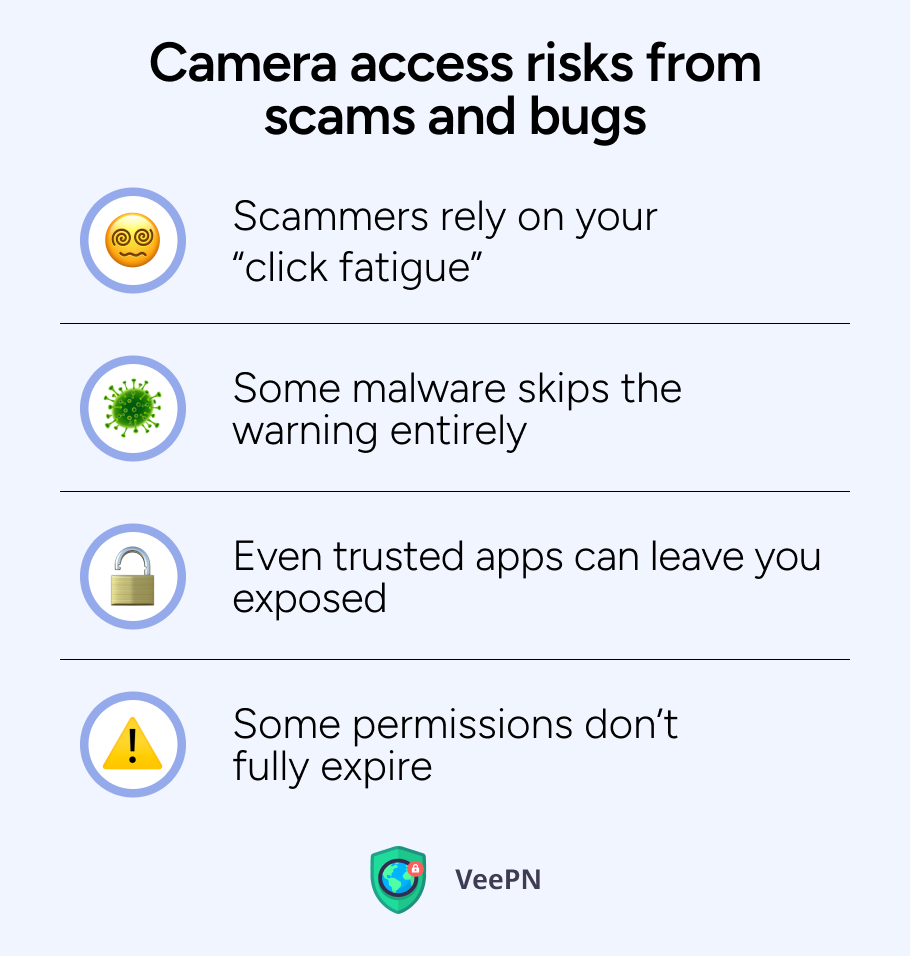
Scammers rely on your “click fatigue”
Hackers count on people blindly clicking through permission pop-ups. It’s called permission fatigue, and it’s common. You stop reading, hit “Allow”, and your camera or mic might be used by scammers without you realizing it.
Some platforms with spoofed interfaces from fake Zoom or Google Meet pages are also common. They look familiar but are built to steal logins or start hidden recordings.
Some malware skips the warning entirely
A Safari bug discovered in 2024, nicknamed HM Surf, let adware quietly switch on users’ cameras and mics without showing any pop-up. Apple pushed a fix after reports of silent recordings started surfacing.
Some users only realized they’d been compromised after finding strange video files on their machines, which were recorded silently in the background. A hidden webcam stream is one of the most invasive ways someone can spy on you.
Even trusted apps can leave you exposed
Zoom had to patch four serious flaws that opened users to hijacked calls and crashing vulnerabilities in 2025. So if you didn’t update in time, your calls could’ve been wide open to attackers.
Some permissions don’t fully expire
Chrome browser now revokes camera access automatically after you leave a page, but only if you didn’t click “Always allow.” If you did, the site can keep using your camera until you remove it yourself. It’s a helpful feature, but not foolproof.
Let’s see how you can protect yourself from experiencing unpleasant outcomes of granting access to your camera.
Best practices before you allow camera access in your browser
First up, clicking “Allow” shouldn’t be a reflex. Before you give a site permission to use your camera, take a moment to protect yourself. These habits can save you from major privacy headaches:
Stick to HTTPS sites you know
If a site isn’t encrypted (you don’t see a padlock in the address bar), don’t use it. Only grant camera or microphone access on secure pages from brands you recognize.
Check your camera permissions regularly
Make it a habit. Every month or so, go through your browser camera settings. Remove the sites you no longer visit or don’t remember approving.
Keep your system and browser updated
Don’t ignore update prompts. Browsers like Edge and Safari, and both iOS and Android, push security fixes often. Many of them patch camera and mic vulnerabilities. Such updates can close the door before anyone tries to sneak in.
Use hardware and software indicators
If your device has a camera light, pay attention to it. That green or red LED is your warning system. Some browsers and devices also give you on-screen alerts when the camera or mic is in use, so pay attention to them.
Use a trusted VPN that blocks malicious websites
A reliable VPN provider like VeePN helps you avoid threats before they even load. With a built-in NetGuard blocker in place, it stops dangerous sites in their tracks before you allow the site to use your camera.
Let’s see how else VeePN can protect your online privacy.
VeePN – your extra layer of protection
While your browser manages basic permissions, VeePN adds a deeper level of security:
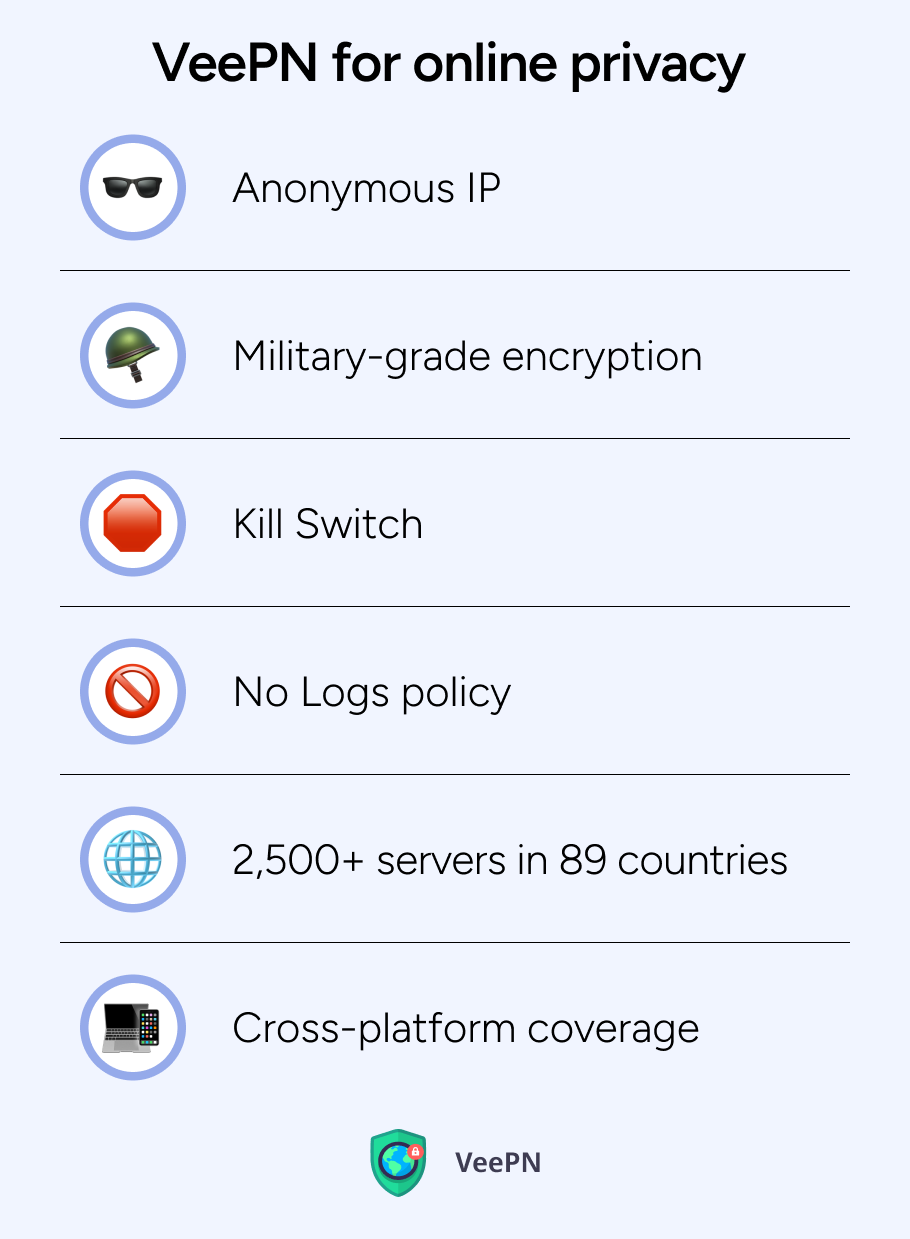
Anonymous IP
Trackers and sites usually match your IP with camera data to create a digital fingerprint. VeePN redirects your traffic through private servers, and websites don’t see your real IP. Instead, they get a random location that cannot be traced down to you.
Military-grade encryption
All your web traffic, including video calls, is locked by the strongest to date AES-256 encryption protocol. That keeps snoops and hackers out, especially on public Wi-Fi.
Kill Switch
If your VPN connection ever drops or glitches, VeePN’s Kill Switch instantly blocks all traffic. That way, your data and real IP address never leak.
No Logs policy
VeePN doesn’t keep records of the sites you visit, the apps you use, or anything else you do online. Nothing gets saved, and nothing can be shared even if requested.
2,500+ servers in 89 countries
Whether you’re on a video call or just browsing, your connection stays smooth, fast, and unrestricted.
Cross-platform coverage
Use VeePN on Windows, macOS, Android, or iOS. That way, your whole network is protected without juggling multiple apps.
Try all of VeePN’s features with zero risk, as we offer a 30-day money-back guarantee.
FAQ
- Open your browser’s site-permissions panel
- Pick the website
- Switch the webcam toggle to Allow.
Refresh the page so the change takes effect immediately.
Find out more ways in this article.
- Click the padlock icon next to the URL
- Choose “Site settings”
- Set “Camera” to “Allow”
Chrome activates it without digging through menus.
Read this article to discover more ways to do that.
To allow camera access on Android:
- Long-press the browser icon
- Press the “App info” (ⓘ symbol)
- Go to “Permissions”
- Then “Camera
- Choose “Allow”
To allow camera access on iPhone:
- Go to Settings
- Select “Privacy & Security”
- Choose “Camera”
- Toggle your browser on
Discover more details in this article.

VeePN is freedom
Download VeePN Client for All Platforms
Enjoy a smooth VPN experience anywhere, anytime. No matter the device you have — phone or laptop, tablet or router — VeePN’s next-gen data protection and ultra-fast speeds will cover all of them.
Download for PC Download for Mac IOS and Android App
Want secure browsing while reading this?
See the difference for yourself - Try VeePN PRO for 3-days for $1, no risk, no pressure.
Start My $1 TrialThen VeePN PRO 1-year plan