What Is DNS: Everything You Need to Know About It
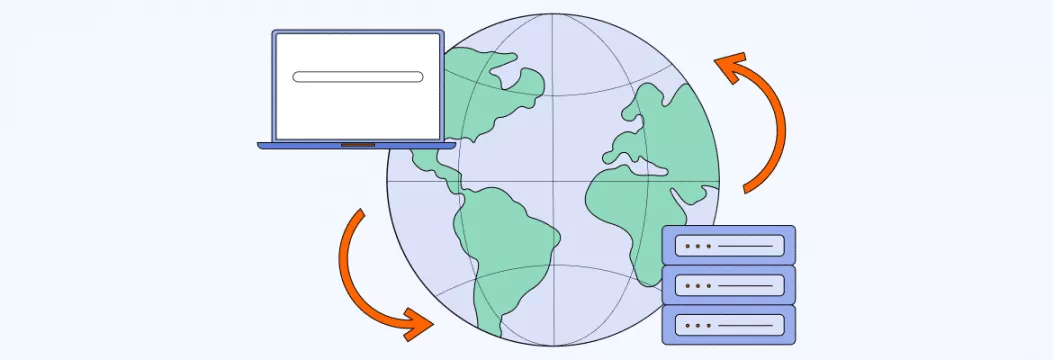
Accessing web pages looks easy — we just punch in addresses like youtube.com or amazon.com into a search engine and wait for the page to load. But there’s a lot going on underneath. The thing is that machines don’t understand site names like we do. Here’s where Domain Name System (DNS) — the phone book of the Internet — comes in. Read along to find out how DNS works its magic.
DNS definition
DNS is the system that translates website names (google.com) into IP addresses (given to each device on the Internet) so that your device could understand the query. DNS works in the background, and it’s not something the average Internet user needs to care about much. However, without it, your browser wouldn’t know how to complete your web page request.
In the networking world, computers don’t go by names like humans do — they go by numbers. To communicate and identify each other over the network, they use numbers called IP addresses. Meanwhile, humans are used to using names instead of numbers. So, to bridge the communication gap between humans and the networking world, DNS was developed. It turns names into numbers, specifically – domain names (website names) into IP addresses. This process is called DNS lookup or DNS resolution. Let’s see how that works.
How does DNS work?
Say you open your web browser and type in the domain name of the website you want to go to — for example, google.com. Technically, to be sent to this website, you don’t have to type in google.com but its IP address instead (if you know it). But since we aren’t used to memorizing and dealing with numbers — especially when there are millions of websites on the Internet — we can just type in a domain name instead and let DNS convert it to an IP address for us. Back to our example, when you punch in google.com in a web browser, the DNS server will look through its database to find a matching IP address. When it locates one, it will resolve the domain name you’ve typed in to the IP address of the Google website. Once done, your computer can communicate with a Google web server and retrieve the web page.
That’s why DNS is called the Internet’s phonebook — when you want to find a number, you don’t look up the number but the name first.
To break all this down into further detail, let’s go through the steps DNS lookup takes.
What is a DNS lookup?
A DNS lookup is the process of translating domain names into IP addresses from the correct DNS servers. Cloudflare compares this process to a librarian finding a book upon request and narrowing their search. When a server receives a DNS query from a browser — that is, when you type in the domain name like google.com, — this is how it usually goes down:
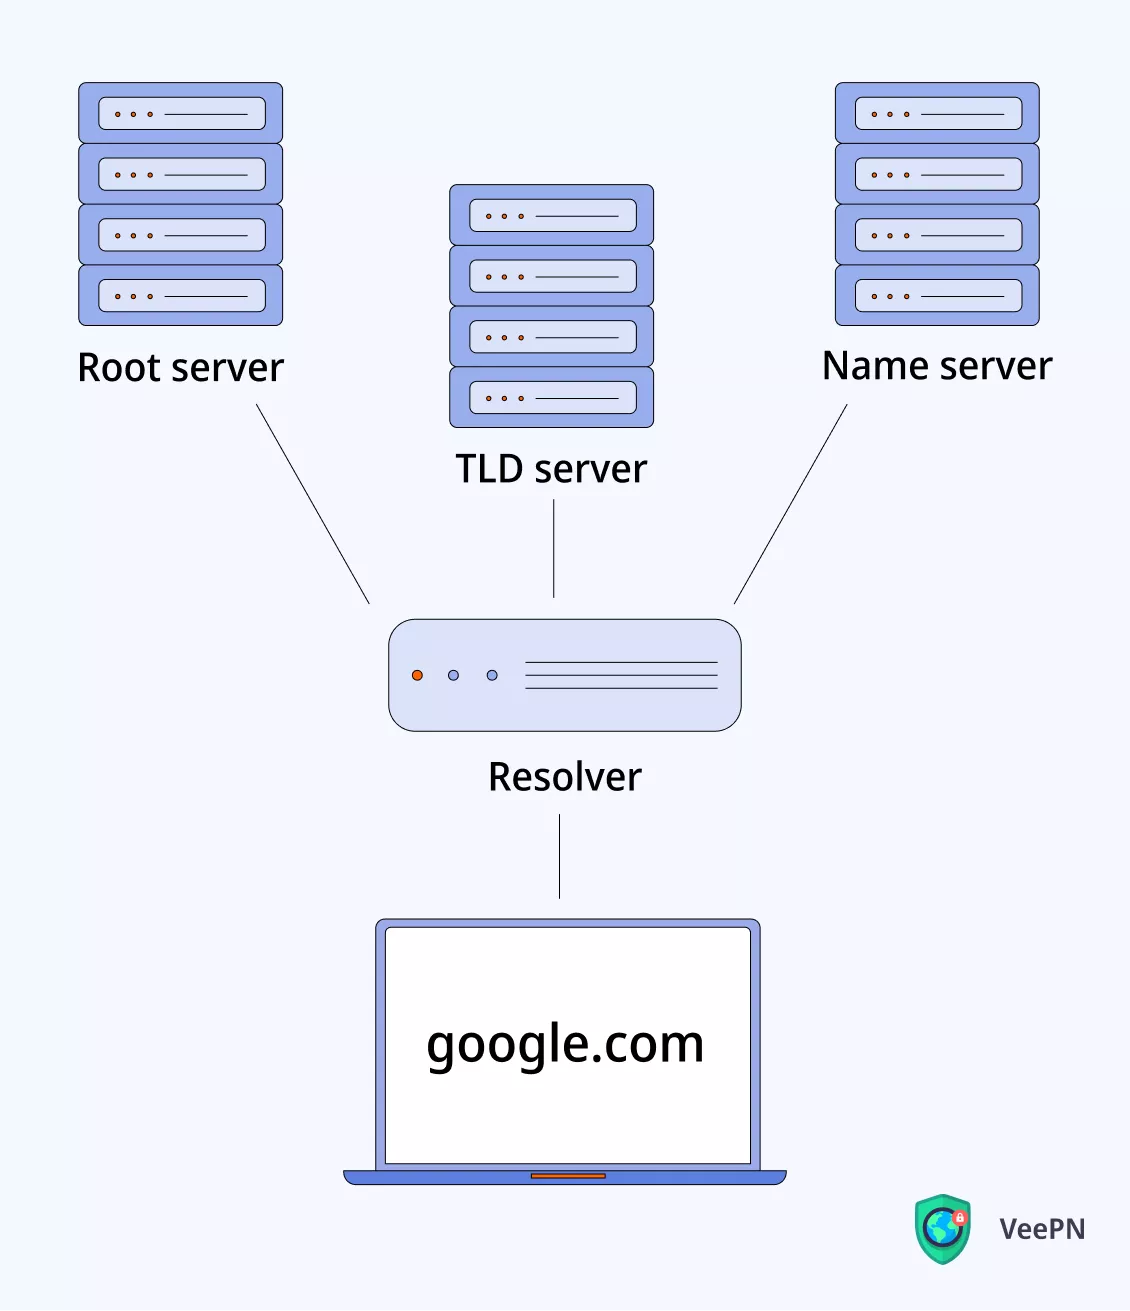
- If your browser or operating system can’t find the matching IP address in its own cache memory, it will send the query to the next level — the resolver server. It’s basically your Internet Service Provider (ISP) — someone like a librarian who is asked to find a particular book. When the resolver gets the query, it will check its cache memory to find an IP address for google.com.
- If the resolver can’t locate the IP address, it will send the query to the next level — the root server, the top of the DNS hierarchy. The root server usually leads the resolver to more specific locations, so we can think of it as an index in a library that points to different racks of books.
- When the root server receives the query for the IP address of google.com, it isn’t going to know what the address is but will know where to send the resolver to help it find the IP. So, the root server will direct the resolver to the Top Level Domain (TLD) for the .com domain.
- The TLD server hosts the last portion of a hostname (for example, “com” or “org”). We can think of it as a specific rack of books in a library. When the TLD server gets the query for an IP address, it will narrow down the search once again and direct the resolver to the next and final level – Authoritative Name server.
- The resolver will now ask the Authoritative Name server for the IP address — kind of like a dictionary among books, where you can look up a definition of a specific name. The Authoritative Name servers are the final authority — they’re responsible for knowing everything about the domain, which includes the IP address. So, when it receives the query, it will respond with the IP address to the resolver.
- Finally, the resolver will tell your computer the IP address for it to retrieve the Google’s web page.
Once this process is complete, your browser gets the needed IP address and loads the web page. If a query gets all the way to the Authoritative Name server level, but the IP address isn’t found for some reason, your browser will show you an error message. This might seem like a long process to us, humans, but computers make it happen in a few milliseconds usually.
DNS Caching
When the resolver gets the needed IP address, it will store that address in its cache memory. This way, the resolver doesn’t have to go through all those steps again in case it receives another query for that domain. As a result, loading speeds are as short as possible thanks to retrieving the necessary data from local cache.
So, in a way, DNS records are really like an online address book. You already have the name (read, domain name) of the person (read, website) you want to “talk to” – now you just need the phone number (IP address) to start communication.
The entire process is also known as the forward DNS lookup. But there’s also a reverse one. Let’s see what that means, exactly.
What is a reverse DNS lookup?
As we can guess from the name, a reverse DNS lookup does just the opposite of what the forward DNS lookup does — it finds out the domain name associated with an IP address. Email servers commonly use this solution to check and see if an email message came from a valid server before bringing it onto their network.
What is DNS leak?
DNS has made human-machine communication a lot easier. We’ve got that covered. But it also comes with risks, one of which is DNS leaks. They happen when your DNS queries, browsing history and even your device IP address are exposed to third parties. The thing is that DNS requests aren’t encrypted — this means your ISP, Wi-Fi hotspot owners, network administrators, and others can snoop on your browsing history. The good news is that you can protect your traffic with a trusted Virtual Private Network (VPN).
How to protect your browsing with a VPN?
A VPN changes your virtual location and routes your device’s DNS requests (and all other traffic) through a secure virtual tunnel. This way, it reduces the chance that third parties can snoop on what you’re doing online. However, not all providers keep you DNS-leak-free. That’s why it’s crucial to go for a reliable VPN service with DNS leak protection.
VeePN is one such service. Its top-level AES-256 encryption hides your web activities from your ISP, network operators and others, as well as shields you from pesky hotspot hackers. You can also step your online security game even more by turning on DNS leak protection as well as ad, tracker, and malware blocker. Here’s a quick VeePN 101:
- Sign up for VeePN.
- Download the app for your device.
- Install and open the app.
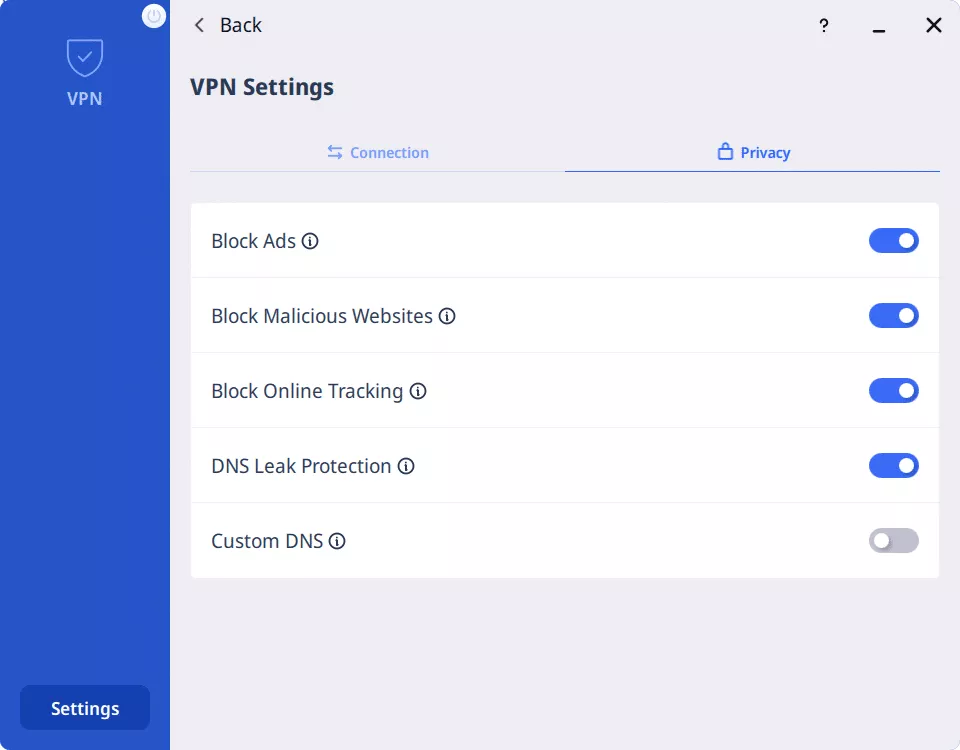
- Go to Settings > VPN > Privacy.
- Enable DNS Leak Protection and toggle “blocker” switches on. Here’s how it looks in the VPN PC app:
- Go to the main screen and click Connect.
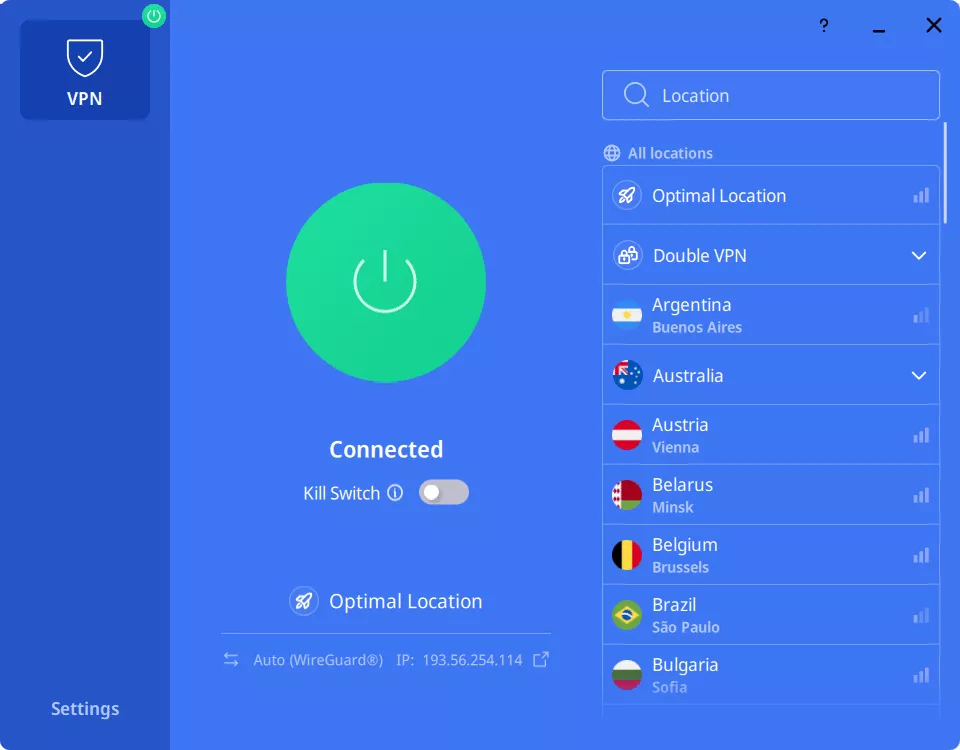
Note: Upon your first connection, VeePN will choose the most optimal VPN server for you to connect to. But you can switch it trouble-free by choosing a specific server location on the list.
And there’s that — your browsing is under wraps!
FAQ
What is DNS used for?
Domain Name System (DNS) translates domain names into IP addresses. It’s needed because computers speak only in numbers — unlike humans that type in website names when accessing web pages. So, when you type google.com into your search engine, your device needs the website’s IP address to load the page. Learn more in this article.
What is DNS and do I need it?
The DNS is a database that stores domain names and their matching IP addresses. It was developed to bridge the communication gap between humans that speak in names (domain names) and computers that speak only in numbers (IP addresses). Find out more in our article.
How do I check my DNS?
On Windows, stick to the following steps:
- Open the Command Prompt by clicking Start Menu.
- Type cmd and press Enter.
- Type nslookup google.com and press Enter.
- You’ll see results that look something like these:
Server: dns.google
Address: 8.8.8.8 Non-authoritative answer:
Name: google.com
Addresses: 2a00:1450:4009:815::200e
142.250.178.14
- The “Addresses” line will show your DNS server address.
The process is very similar on macOS devices:
- Open the Terminal by pressing Command Key + Space Bar.
- Type terminal and press Enter.
- Type nslookup google.com and press Enter.
- You’ll see results that look something like these:
Server: dns.google
Address: 8.8.8.8 Non-authoritative answer:
Name: google.com
Addresses: 2a00:1450:4009:815::200e
142.250.178.14
- The “Addresses” line will display your DNS server address(es).
VeePN is freedom
Download VeePN Client for All Platforms
Enjoy a smooth VPN experience anywhere, anytime. No matter the device you have — phone or laptop, tablet or router — VeePN’s next-gen data protection and ultra-fast speeds will cover all of them.
Download for PC Download for Mac IOS and Android App
Want secure browsing while reading this?
See the difference for yourself - Try VeePN PRO for 3-days for $1, no risk, no pressure.
Start My $1 TrialThen VeePN PRO 1-year plan
